Amprobe BDM40-UA Bench-Digital-Multimeter User Manual
Page 22
21
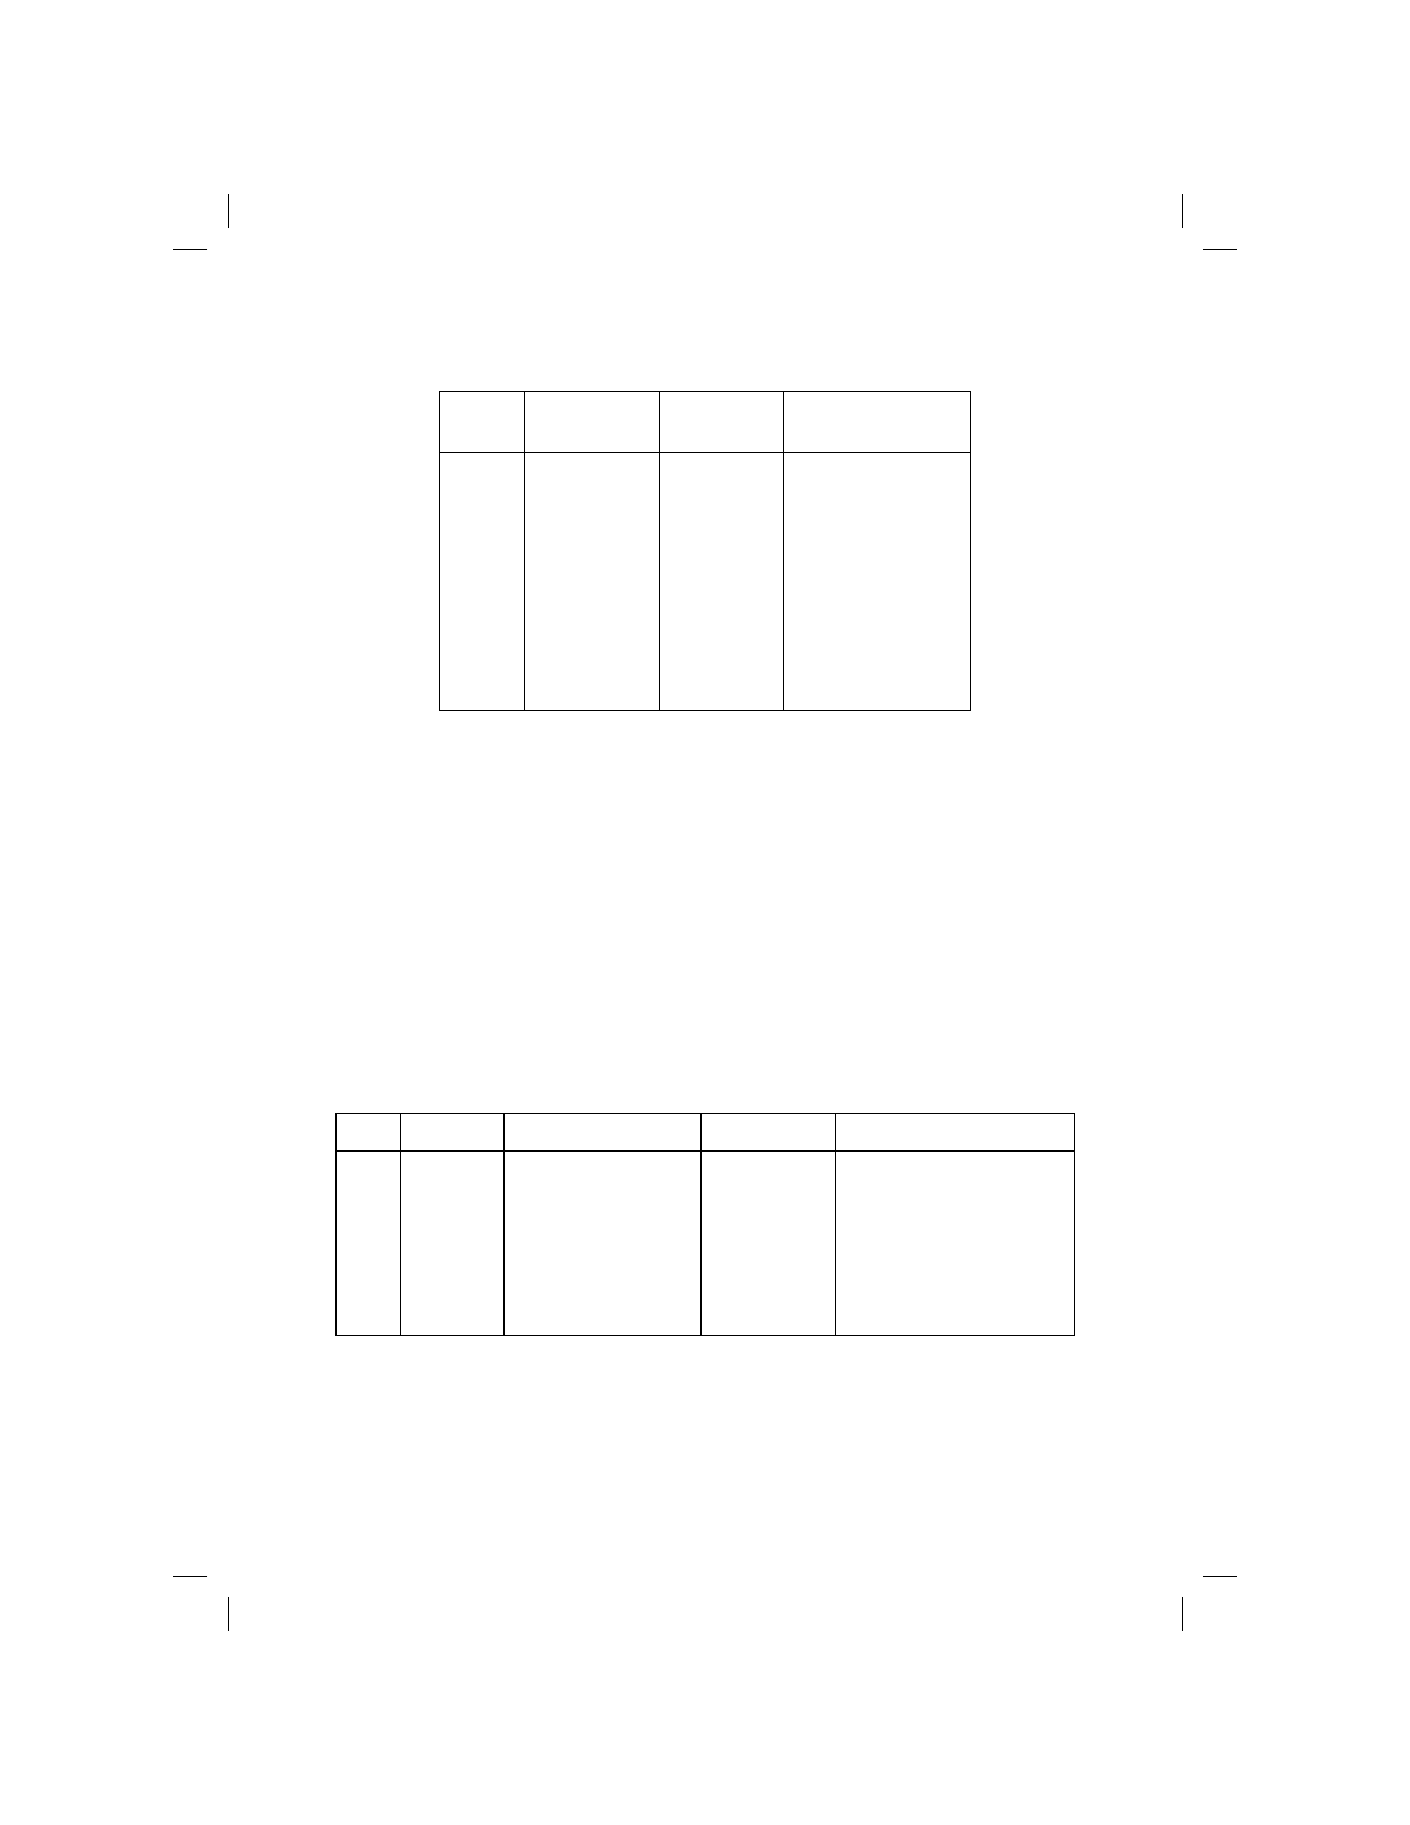
3.
For each step in Table 7, select the listed range, program the calibrator for the corresponding input to
the UUT and verify that the UUT display is within the indicated limits.
Table 7. Resistance Test
STEP
SELECT
RANGE
INPUT DISPLAY
READING
1
2
3
4
5
6
7
200
Ω
200
Ω
2k
Ω
20k
Ω
200k
Ω
2000k
Ω
20M
Ω
Short
100
Ω
1 k
Ω
10k
Ω
100k
Ω
1000k
Ω
10M
Ω
00.00 to 00.07
99.86 to 100.14
.9988 to 1.0012
9.988 to 10.012
99.88 to 10.012
997.3 to 1002.7
9.973 to 10.027
Calibration Adjustments
The calibration adjustment procedure should be used any time your instrument has been repaired or fails to pass
the Performance Test. Adjust R306A, R336A if U301, U308 are replaced or if VR302, VR304 do not have enough
adjustment range. Replace U501 if VR502 does not have enough adjustment range. The RMS Converter Offset
Adjustment should not normally need to be done. Adjust only if VR501 (AC) does not have enough adjustment
range or if the display reads .0010 or greater with AC V, 2V range selected and the input shorted.
NOTE Allow the UUT to warm up a minimum of 5 minutes and conduct the calibration at an ambient temperature
of 23 ± 5°C (73 ± 9 °F).
DC Voltage Calibration
On the UUT select DC V, 2V range, and connect the calibrator HI volts output to the V-
Ω terminal and the
calibrator LO volts output to the COM terminal. For each step in Table 8, select the listed range, program the
calibrator for the corresponding UUT input, and make the specified adjustment or check.
Table 8. DC Calibration
Step Range
Input
Adjust
Display
Limits
1
2
3
4
5
200mV
2V
200mV
200V
1000V
Short
+ 1.9000V
+ 190.00mV
+ 190.00V
+ 1000.0V
VR303
VR302
VR304
VR202
VR203
Less than ± 00.04
+ 1.9000V exactly
+ 190.00mV exactly
+ 190.00V exactly
+ 1 000.0V exactly