7 install crt trackball option/ mouse option, Figure 5-5 headset jack, Install the black trim strip (141230970a) – EFJohnson VR-CM50 User Manual
Page 44: Figure 5-6 cip board, 9 install second volume control knob, Table 5-3 volume control hardware
CRT-BASED ELECTRONICS ASSEMBLY PART II
5-4
February 1996
Part No. 004-3039-274
5.7 INSTALL CRT TRACKBALL OPTION/
MOUSE OPTION
TRACKBALL OPTION - TDV-OP490
MOUSE OPTION - TDV-OP491
Plug the DE9-M connector into the PC CPU
(COM 2) Mouse/Trackball DIN. Refer to Figure 5-1.
5.8 INSTALL HEADSET JACK (Options TDV-
OP406, 407, 409)
This installation applies for either one or two
headset jacks.
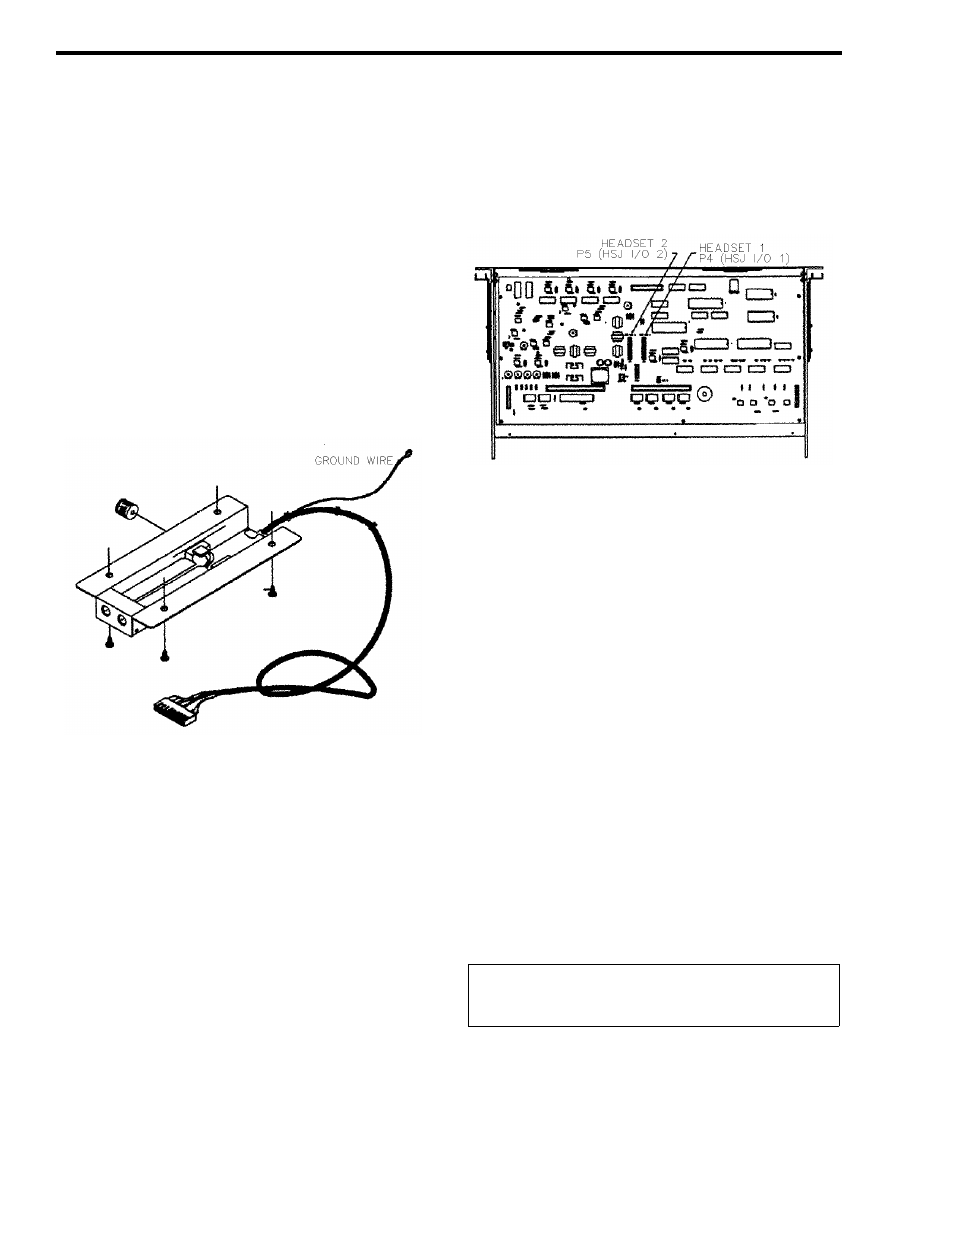
Figure 5-5 HEADSET JACK
1. Mount the headset jack(s) to the Formica writing
surface in the location desired using the four #10
flakeboard screws (280SCSM0112P) provided.
2. VERY IMPORTANT! Connect the ground wire,
located at the rear of the headset, to the rail of the
console supporting the Formica using the 8-32x1/2
pan head Phillips screw and 8-32 nut attached to the
ground wire. Refer to Figure 5-5.
3. Plug the connector end(s) of the headset jack(s) into
the CIP board. Connect the first headset to P4(HSJ
I/O 1) and the second headset to P5(HSJ I/O 2).
Refer to Figure 5-6.
4. Install the black trim strip (141230970A).
5. Secure the tray using the four 12-24x1" black truss
head screws (280129122406) and #12 black nylon
washers (280359120010) provided.
Figure 5-6 CIP BOARD
5.9 INSTALL SECOND VOLUME CONTROL
KNOB
TDV-OP409 (Electronic 1A2 TELCO Headset)
will be equipped with two volume control knobs. The
volume control knob mounted on the right side, con-
trols the radio audio to the headset. The volume con-
trol knob mounted on the left, controls the audio from
the enhanced TELCO.
I M P O R T A N T
Option TDV-OP409 provides two volume control
knobs. If your system does not include option TDV-
OP407 (second headset jack), store the leftover parts
from TDV-OP409 for a future order of a second head-
set.
NOTE: If the system was ordered with TDV-OP409,
these steps will have been done at the factory. If the
option was ordered after delivery, these steps will
have to be performed to install the second volume con-
trol knob. Refer to Figure 5-5.
Table 5-3 VOLUME CONTROL HARDWARE
Qty
Part No.
Description
1
1
240FPV12BA1
4751904Z5001
Volume Control Knob
5k Pot