Hubs, bearings, and seal components – SAF-HOLLAND XL-TA10006OM Drum Brake Axles Tapered and Parallel Spindle Axles User Manual
Page 9
9
XL-TA10006OM-en-US Rev B · 2014-03-13 · Amendments and Errors Reserved · © SAF-HOLLAND, Inc., SAF-HOLLAND, HOLLAND, SAF,
and logos are trademarks of SAF-HOLLAND S.A., SAF-HOLLAND GmbH, and SAF-HOLLAND, Inc.
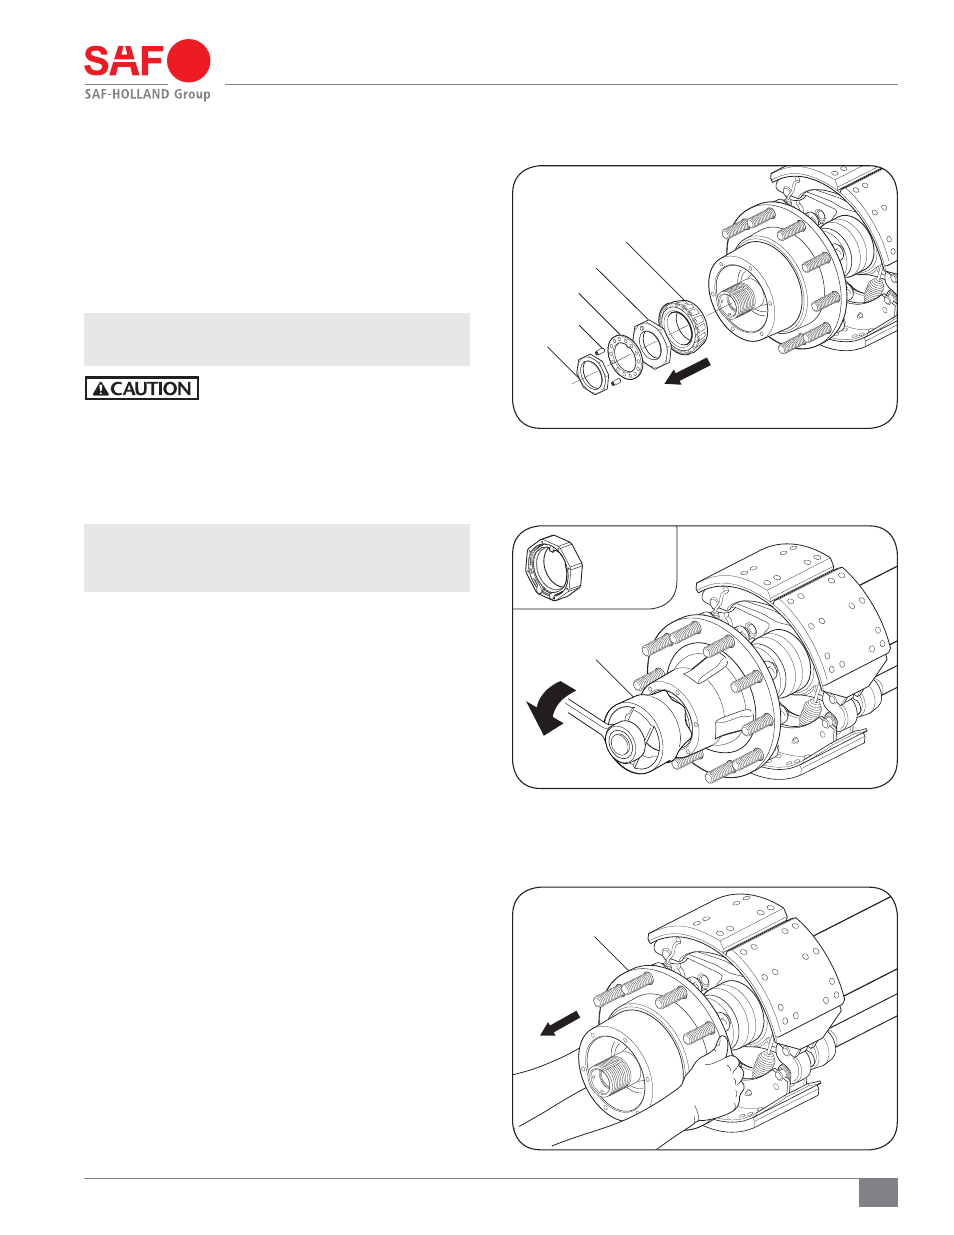
Hubs, Bearings, and Seal Components
Figure 7
4. Remove set screws (Figure 5).
5. Remove the axle nut from the spindle using a wrench
with the axle nut socket. If the unit is equipped with
a Pro-Torq
®
spindle nut, remove nut and skip Step 5.
(Figure
6).
6. Release the axle washer and inner axle nut from the
spindle (Figure 6).
7. Remove the outer hub bearing from the spindle (Figure 6).
NOTE: With axle nut, washer, and inner nut removed, it is
possible to access the outer bearing.
DO NOT hit steel parts with a steel
hammer as parts could break, sending
flying steel fragments in any direction
creating a hazard which, if not avoided,
could result in minor to moderate injury.
8. Grasp the hub assembly with both hands and pull the
hub assembly off the axle spindle (Figure 7).
NOTE: Depending on the type of hub seal, the hub seal
and inner bearing could remain on spindle or come
off with hub assembly.
HUB ASSEMBLY
Figure 5
AXLE WASHER
INNER AXLE NUT
SET SCREWS
OUTER HUB BEARING
3-PIECE SPINDLE NUT SHOWN
AXLE NUT
Figure 6
AXLE NUT
SOCKET
PRO-TORQ
®
SPINDLE NUT