Hubs, bearings, and seal components, Hubs, bearings and seal installation – SAF-HOLLAND XL-TA10006OM Drum Brake Axles Tapered and Parallel Spindle Axles User Manual
Page 11
11
XL-TA10006OM-en-US Rev B · 2014-03-13 · Amendments and Errors Reserved · © SAF-HOLLAND, Inc., SAF-HOLLAND, HOLLAND, SAF,
and logos are trademarks of SAF-HOLLAND S.A., SAF-HOLLAND GmbH, and SAF-HOLLAND, Inc.
Hubs, Bearings, and Seal Components
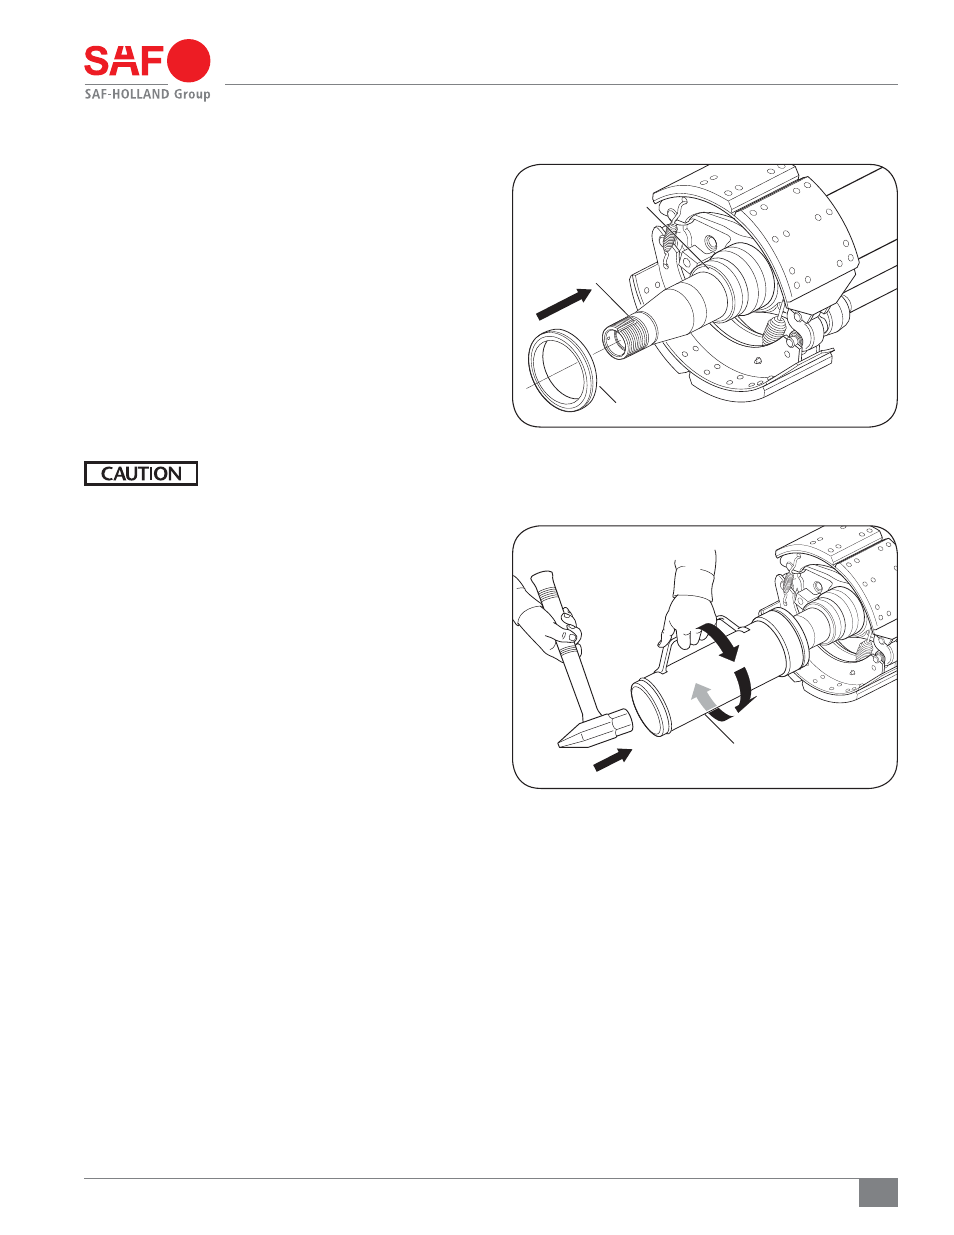
Figure 9
Figure 10
6. Hubs, Bearings and Seal Installation
6.1. Spindle mounted Hub Seal Installation
instructions. (Refer to 8.2. for hub
mounted Hub Seal instructions).
1. Before installing the hub seal on the axle spindle, inspect
the machined spindle seal surface for nicks, scratches,
burrs or marks. If needed, use crocus cloth or emery cloth
to repair any damaged areas.
2. Clean the threads and keyway thoroughly with a wire
brush to avoid false bearing adjustments and to avoid
introduction of contaminants into the lubricant cavity.
3. Thoroughly clean the spindle and spindle threads of rust,
dirt, grease or any other contaminants that could damage
the hub seal and cause it to leak.
NEVER install a spindle mounted hub
seal in the hub and then force it onto the
axle spindle by tightening the axle nut.
Damage to seal will result.
4. The seal assembly should be placed on the spindle so the
words “Oil Bearing Side” are exposed to the oil (Figure 9).
5. Drive the hub seal into place using the seal installation
tool and hammer. Rotate the hub seal installation tool in
1/4-turn intervals with every hammer tap until the seal is
properly seated with the metal face of the seal flush with
the inner shoulder of the axle spindle (Figure 10).
6. Apply a thin coat of oil to the O.D. of the seal.
7. Prepare the hub. Remove the old lube and thoroughly
clean the hub cavity and hub bore. Inspect the inner hub
bore for roughness. If needed, use emery cloth to remove
any burrs or old bore sealant.
HUB SEAL
KEYWAY
AXLE SPINDLE
INNER SHOULDER
HUB SEAL
INSTALLATION TOOL