Fig.2 fig.3 fig.4 – Sealey AP02WC User Manual
Page 2
3.3
Cabinet Assembly
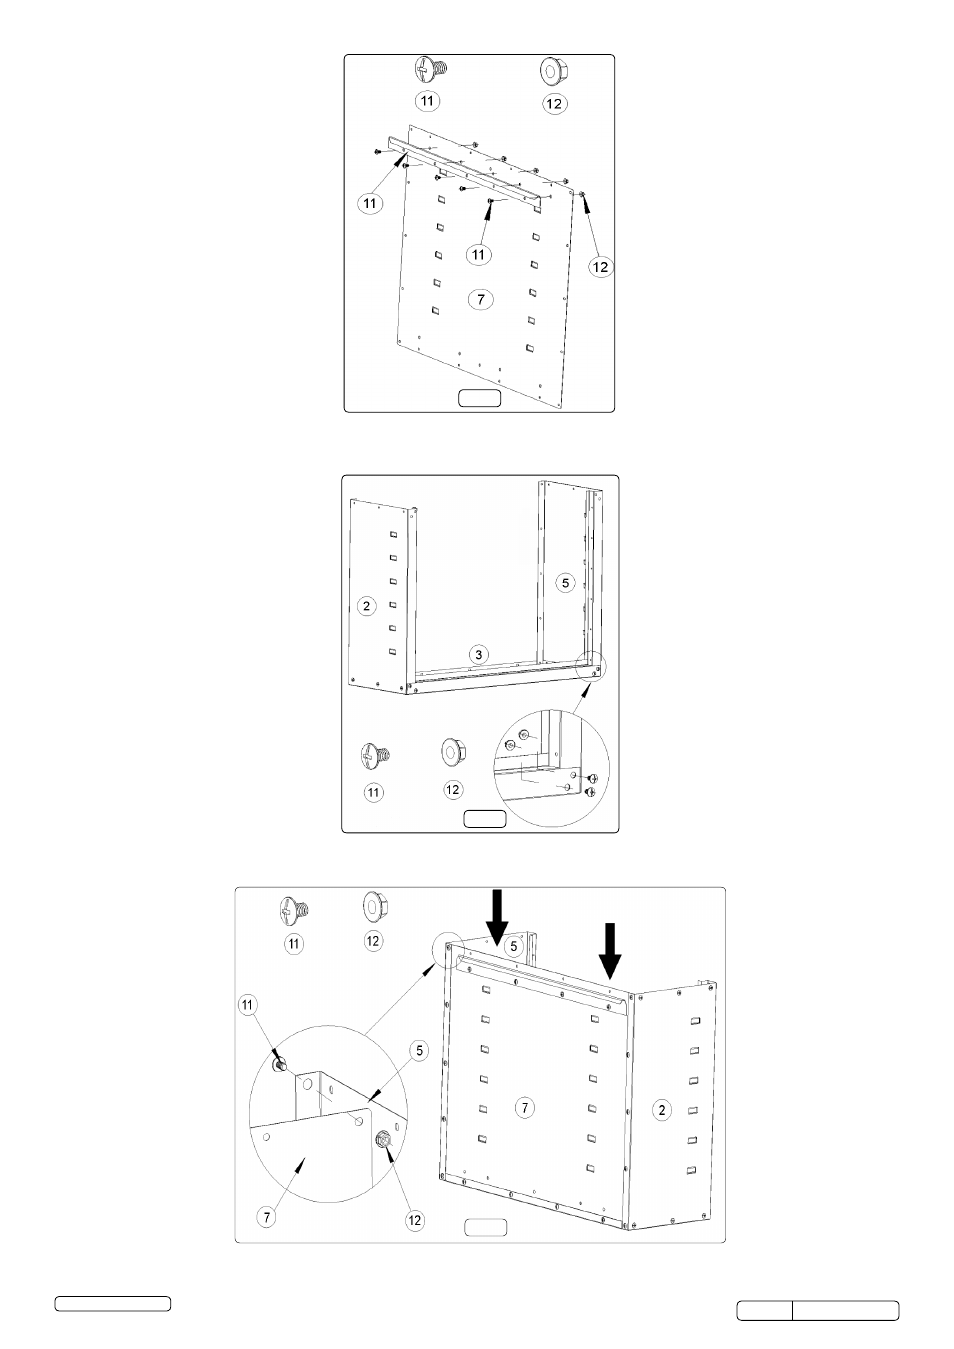
3.3.1 Hanger Assembly (Fig.2)
Align the hanger mounting holes with the top holes in the back panel and secure using screws (11) and nuts (12). Ensure that the tabs on
the back panel are on the opposite side and facing upwards.
Fig.2
Fig.3
Fig.4
3.3.2 Side Panel Assembly (Fig.3)
Attach the side panels (2 & 5) to the bottom panel (3) with screws (11) and nuts (12).
DO NOT fully tighten. Ensure that the side panel tabs
are positioned inside the cabinet and facing upwards.
3.3.3 Back Panel Assembly (Fig.4)
Slide the back panel inside the two side panels as shown in fig.3, align the holes and secure with screws (11) and nuts (12).
DO NOT fully
tighten.
AP02WC Issue: 2(L) - 15/07/14
Original Language Version
© Jack Sealey Limited
- SA0615 (7 pages)
- SAC2203B (8 pages)
- SAC2203B (6 pages)
- SAC2203B (6 pages)
- SSC12710D (14 pages)
- SAC0610E (4 pages)
- SAC10030 (4 pages)
- SSC11003 (9 pages)
- SAc3503B (6 pages)
- SSQC2409 (4 pages)
- SSQC2409 (4 pages)
- SSQC2409 (5 pages)
- SA1565 (5 pages)
- SA5055 (4 pages)
- SAC3203B3PH (6 pages)
- SAC72775BLN (6 pages)
- SAC55075B (5 pages)
- SAC03290 (3 pages)
- SAC05020 (4 pages)
- SAC106B (3 pages)
- SAC2203BLN (6 pages)
- ADB3000 (2 pages)
- SAC89025VLN (6 pages)
- CBOX2212V (1 page)
- PW2000 (5 pages)
- PW1712 (3 pages)
- PW4000 (4 pages)
- PW2500 (5 pages)
- PW5000 (5 pages)
- PWM1300 (7 pages)
- PWM2500SP (6 pages)
- LC300ST (2 pages)
- LC800ST (2 pages)
- LS1050V (4 pages)
- LS575VH (3 pages)
- LS520H (3 pages)
- LS450H (2 pages)
- LSH180V (2 pages)
- TP16 (1 page)
- TR3000 (2 pages)
- TP17 (2 pages)
- AK460DX (3 pages)
- AK466D (2 pages)
- TP69 (2 pages)
- TP6906 (3 pages)