Sealey AP7200 User Manual
Page 2
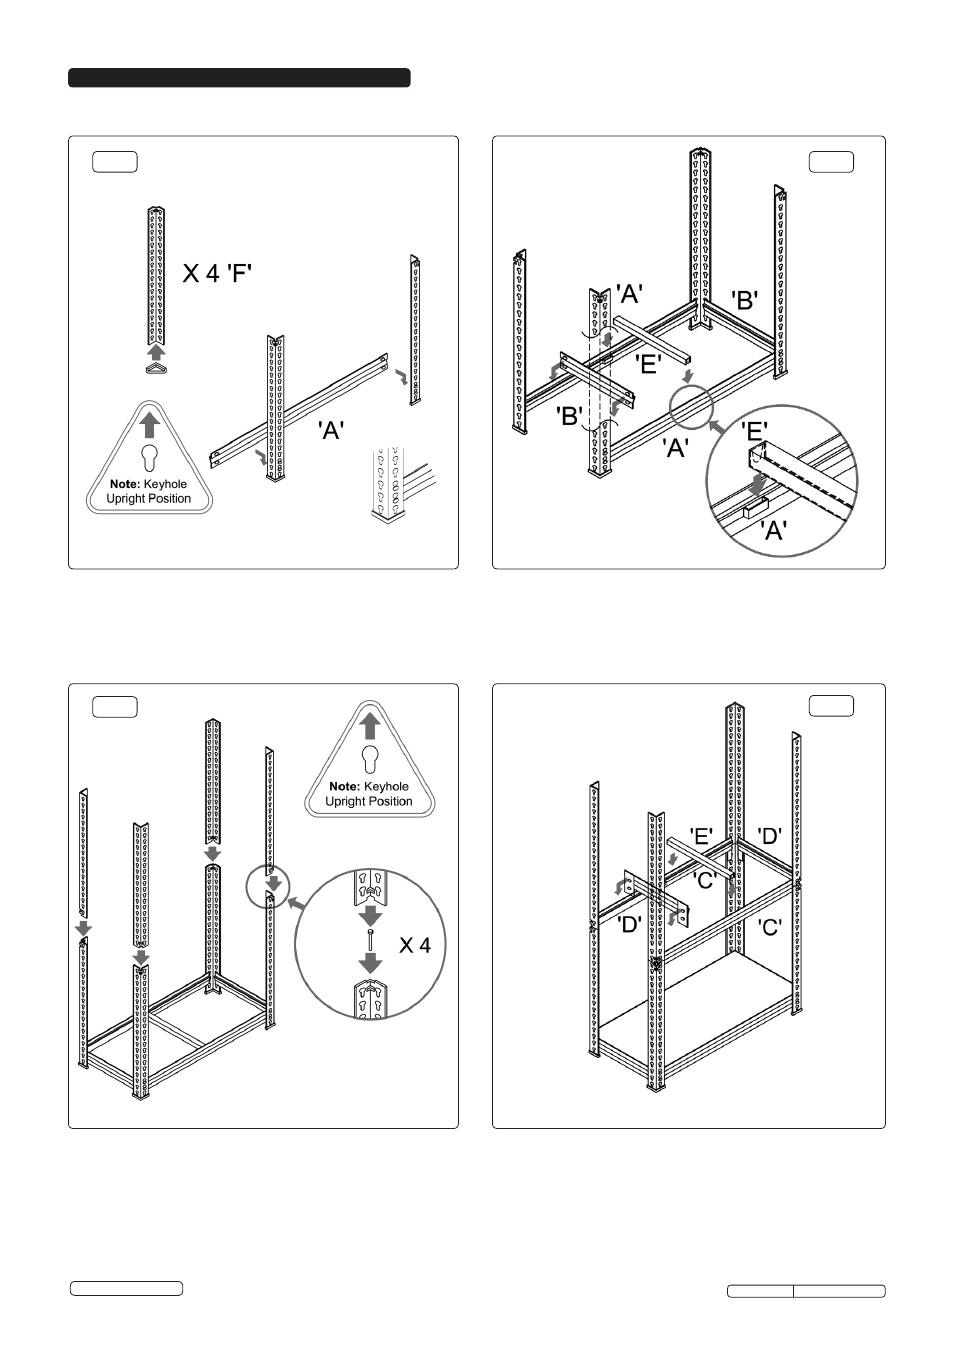
4.1. Assemble the racking unit following the sequence below, referencing the parts list overleaf.
no tools are required although a rubber mallet is useful for tapping the brackets together.
4. aSSeMbly
fig.1
Fig.2
Fig.3
Fig.4
4.2. Place foot caps onto the bottom of four legs f. fit
shelving brackets A onto the legs. A rubber mallet
can be used to lightly tap the brackets into place in the
keyholes in the legs. Allow one keyhole space between
the foot cap and the shelving bracket (note the upright
position of the keyhole).
4.3. fit shelving brackets B at the same height as shelving
brackets A, then fit a shelf brace E.
4.4. Place MDf shelf in bottom position to minimise
movement in unit. Join the lower and upper legs using
the connector pins (note the upright position of the
keyhole).
4.5. fix shelving brackets D so that the top rivet sits in the
upper legs and the lower rivet sits in the lower legs.
repeat with shelving brackets c, followed by brace E.
Original Language Version
AP7200 Issue: 1 - 23/08/12
© Jack sealey Limited