Sealey GL60 User Manual
Safety instructions 2. introduction, Operation
Lightweight composite LED solar powered garden lights. Traditional style design, with a black finish and an old English horse
drawn coach lantern look. Fitted with "smart time" technology, allowing the lamps to automatically switch on during dusk and off at
dawn, with up to 8 hours illumination time. All garden lamps are rain-proof. Supplied with mounting flange and four fixing screws
and fixing plugs.
INSTRUCTION MANUAL FOR:
LED SOLAR
POWERED GARDEN LAMP
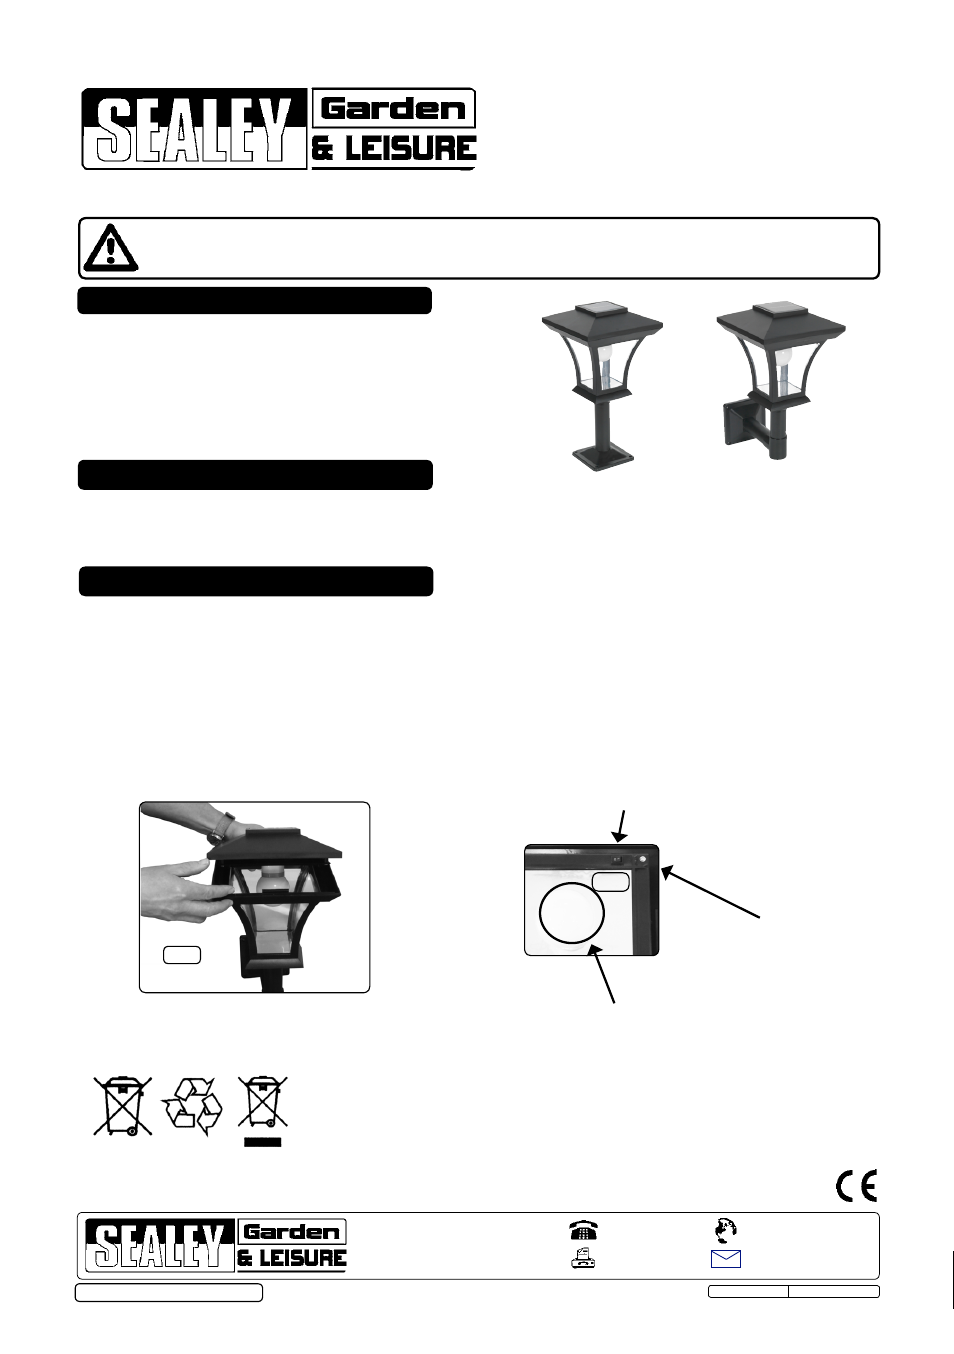
Model No’s: GL60 & GL61 (Wall
mounted)
Thank you for purchasing a Sealey product. Manufactured to a high standard this product will, if used according to these instructions and properly maintained,
give you years of trouble free performance.
Decide on a safe location and fix mounting flange securely. A 4mm
hole in lantern frame boss enables fixing to vertical stem with self
tapping screw (not supplied).
The lamp is designed as a beacon not a floodlight.
DO NOT attempt to replace the bulb.
DO NOT use the solar lamp for any purpose other than for which
it is designed.
DO NOT dis-assemble the solar panel.
1. SAfETy iNSTRucTiONS
2. iNTRODucTiON
IMPORTANT: PLEASE READ THESE iNSTRucTiONS cAREfuLLy. NOTE THE SAfE OPERATiONAL REQuiREMENTS, WARNiNGS &
cAuTiONS. uSE THE PRODucT cORREcTLy AND WiTH cARE fOR THE PuRPOSE fOR WHicH iT iS iNTENDED. fAiLuRE TO DO
SO MAy cAuSE DAMAGE AND/OR PERSONAL iNJuRy, AND WiLL iNVALiDATE THE WARRANTy. PLEASE KEEP iNSTRucTiONS
SAfE fOR fuTuRE uSE.
NOTE: It is our policy to continually improve products and as such we reserve the right to alter data, specifications and component parts without prior notice.
iMPORTANT: No liability is accepted for incorrect use of this product.
WARRANTy: Guarantee is 12 months from purchase date, proof of which will be required for any claim.
iNfORMATiON: For a copy of our latest catalogue and promotions call us on 01284 757525 and leave your full name and address, including postcode.
01284 757500
01284 703534
Sole uK Distributor, Sealey Group,
Kempson Way, Suffolk Business Park
,
Bury St. Edmunds, Suffolk,
IP32 7AR
www.sealey.co.uk
Web
Original Language Version
GL60, GL61 Issue: 1 - 27/11/12
3.1
An arrow on the lamp frame indicates a tab position and finger lifting lip for access to I/O switch. Note tab positions in
canopy and lamp frame when refitting.
3.2
Gently lift off the canopy and bulb module (Fig.1) and operate switch located in canopy border (Fig.2).
3.3
changing the batteries (when batteries no longer sustain a satisfactory charge)
3.3.1
Remove the 4 corner screws (Fig.2) and the bulb mounting plate to reveal battery housing. Beware bulb (diffuser) is
fragile.
3.3.2
Remove all 3 "AAA" rechargeable batteries and replace with 3 new "AAA" rechargeable batteries. Observe polarity.
3.3.3
Replace bulb mounting plate and 4 corner screws. Beware bulb (diffuser) is fragile.
Model GL60
Model GL61
ON/OFF Switch
Lamp canopy removal (no tools required)
Remove 4 screws, when replacing
3 x "AAA" rechargeable batteries
Bulb (diffuser housing 6 LED's)
fig.2
fig.1
3. OPERATiON
Environmental Protection. Recycle unwanted packaging materials or dispose of in a manner
which is compatible with the environment. When the product is no longer required, dispose of
in an environmentally protective way. Open battery compartment as described in Section 3.3.2.
and dispose of batteries according to local authority guidelines.
© Jack Sealey Limited 2012