Cleaning and maintenance, Gb ie cy – Florabest FRT 450 A1 User Manual
Page 12
12
GB IE
CY
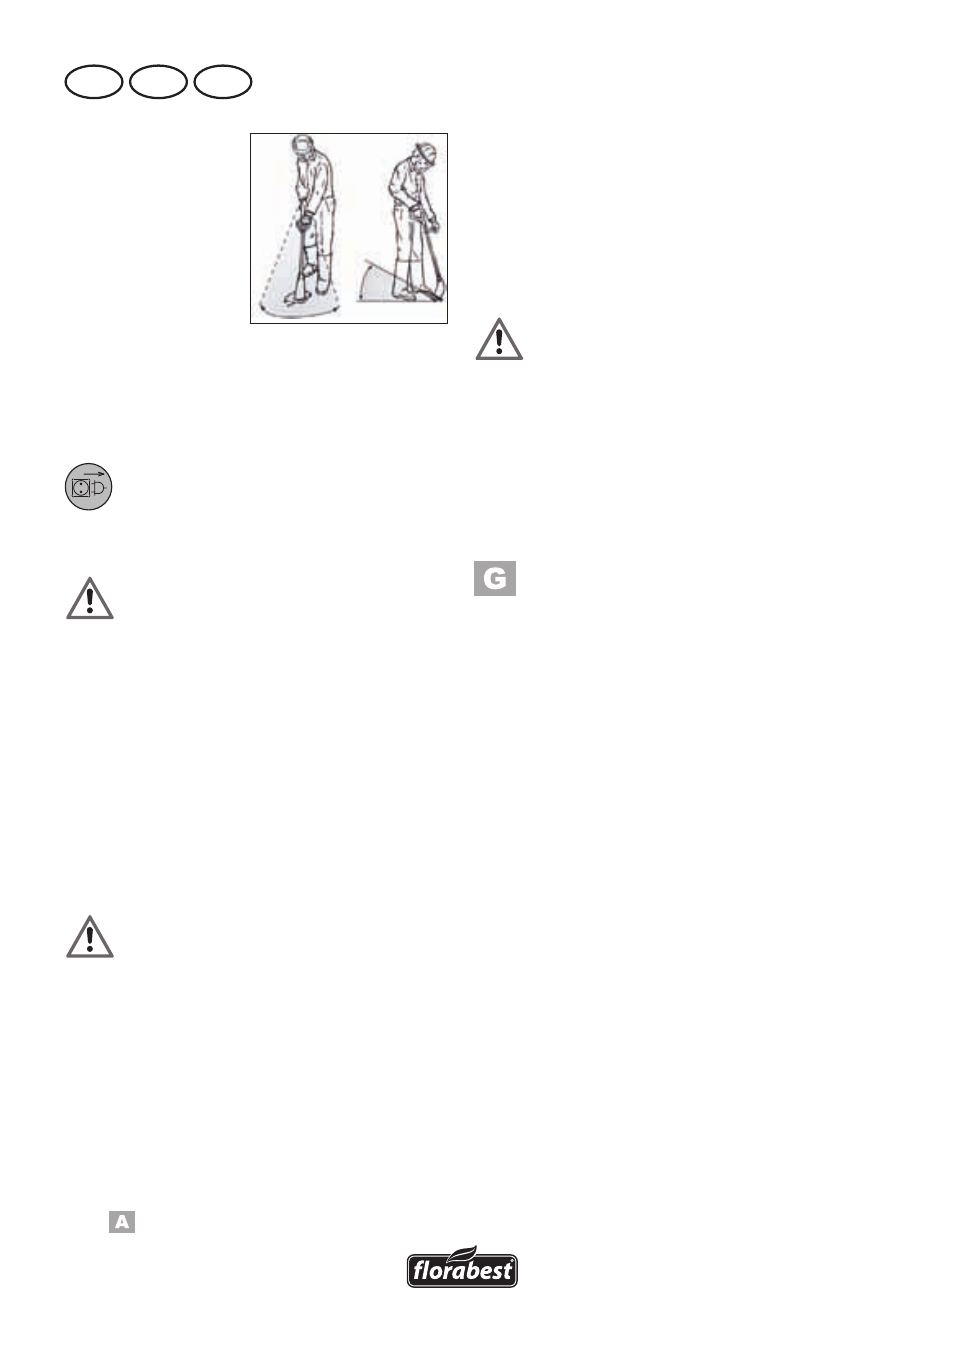
Cut the grass by
swaying the trimmer
sideways to the right
and left. Cut slowly,
keeping the appli-
ance inclined for-
ward slightly when
cutting.
Cut tall grass by a series of levels from
top to bottom.
Cleaning and maintenance
Always disconnect the plug from
the mains socket before working
on the trimmer.
. Any.work.that.is.not.described.
in.these.Instructions.must.be.
carried.out.by.a.servicing.agen-
cy.authorized.by.us..Only.use.
original.parts.and.be.very.care-
ful.with.the.line.cutter.during.in-
stallation.work..Danger.of.injury!.
Disconnect the plug from the mains
socket after every use and check the ap-
pliance for damaged parts.
Cleaning
. Do.not.jet.water.onto.the.trimmer.
and.do.not.clean.it.under.flowing.
water..This.would.result.in.the.
danger.of.an.electric.shock.and.
the.trimmer.could.be.damaged.
Always.keep.the.trimmer.clean..Do.no.
use.cleaning.agents.and.solvents.
• After the work has been completed
remove all grass and soil from the cut-
ting device and the protective cover
(
8).
• Ensure that the ventilation slots are
always clean and free of grass.
• Clean the trimmer with a soft brush or
a cloth.
Exchanging the line spool
. Never.manipulate.the.cutting.de-
vice.by.inserting.worn.out.original.
or.alien.parts..Only.use.original.
spare.parts..Never.use.metal.lines..
The.use.of.alien.parts.can.result.in.
serious.personal.injury.and.cause.
irreparable.damage.to.the.trimmer.
and.the.guarantee.will.become.
instantly.null.and.void.
1. Disconnect the plug from the
mains socket.
2. Turn over the trimmer so that
the cutting head (9) is facing up-
wards.
3. Simultaneously press the two
locks on the cutting head (9) and
remove the hood (17).
4. Remove the line spool (15) from
the cutting head (9).
5. Insert the new spool with the
smooth side facing upwards in
the cutting head and thread the
two lines through the line eyelets
(18). Ensure that the line ends
do not slip out of the spool slots.
6. Return the hood.(17) Ensure that
the locks (19) of the hood are
accurately inserted in the corre-
sponding recesses of the cutting
head. They lock in audibly.
7. Press the retaining head (14),
release it again and pull the ends
of the cord out a little. Repeat this
process until the ends of the cord
project a little beyond the cord cut-
ter (13).