Cortez – Kichler 300113 User Manual
Page 11
10
Cortez
TM
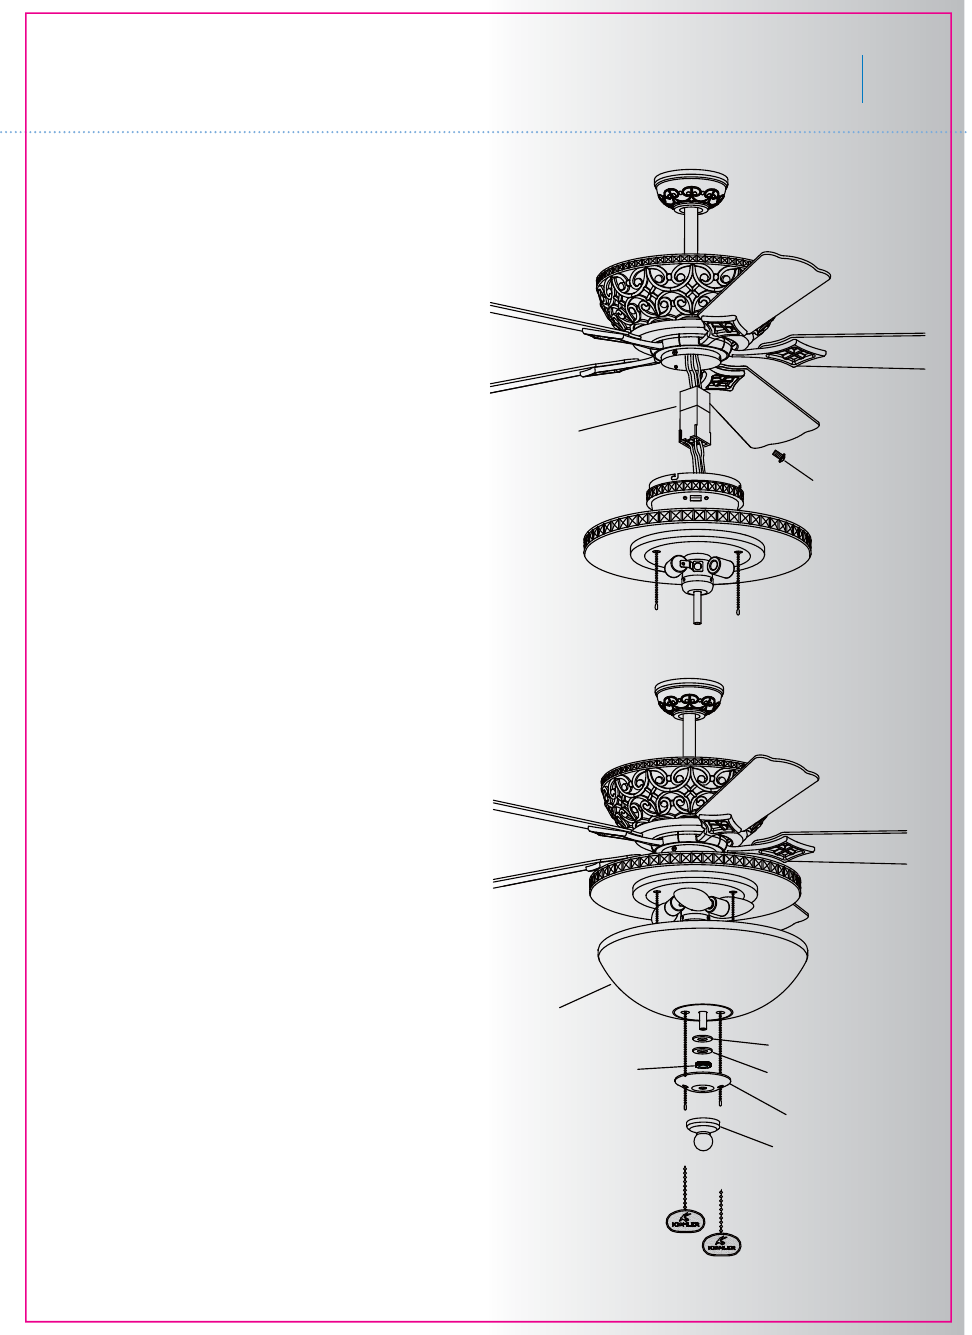
Fig. 23
Fig. 24
Step 6. Tuck the connections neatly into the
switch housing. Align the key hole on the
switch housing with the 2 screws on the side
of the mounting plate. Turn the light fixture
until it locks in place at the narrow end of the
key holes. Reinstall the screw you removed
and tighten the 2 other screws. Now, install 3,
40 watt candelabra base lamps (not included)
in the light fixture. (Fig. 23)
Step 7. Feed the two (2) pull chains from light
kit through the holes in the center of glass
shade. Now secure the glass shade to the
fixture by fitting it up securely to the light kit.
Secure the glass shade with the washer
(rubber against the glass), metal washer and
manual nut. (Fig. 24)
Step 8. Feed each of the pull chains through
the appropriate holes on the decorative cap,
then place decorative cap against the under-
side of the glass and attach the finial nut snug
but do not over tighten.
Step 9. Attach a decorative fob to the pull
chain. (Fig. 24)
NOTE: The LONGER pull chain is for motor
speed control and it has four positions. High,
Medium, Low and Off. Pulling the Fob once
for each position. The SHORTER pull chain is
for light control, pull for ON or OFF.
NOTE:
With the optional light installed, the
pull chain functions as follows.
* One pull on the chain turns the UP Light ON.
* Second pull on the chain turns the UP Light
OFF and the DOWN Light ON.
* Third pull on the chain turns BOTH the UP
and the Down Light ON.
* Fourth pull on the chain turns BOTH Lights
OFF.
NOTE: Reversing the direction of the ceiling
fan blades is controlled by a horizontal “Slide
Switch” located on the side of the switch
housing.
Your New Kichler Ceiling Fan is now ready
to use. Remember to RESTORE all power.
Screw
Connector
Bottom Glass
Silicon Washer
Metal Washer
Manual Nut
Decorative Cap
Finial