Calibrating the bevel angle gauge, Operation, Sawing – Powerplus POW8002 MITRE SAW 1400W 210MM EN User Manual
Page 8
POW8002
EN
Copyright © 2014 VARO
P a g e
| 8
www.varo.com
7.3
Calibrating the bevel angle gauge
The angle gauges are set at the factory, but we recommend that for precision work you
check and if necessary calibrating them as follows:
Fig. 7
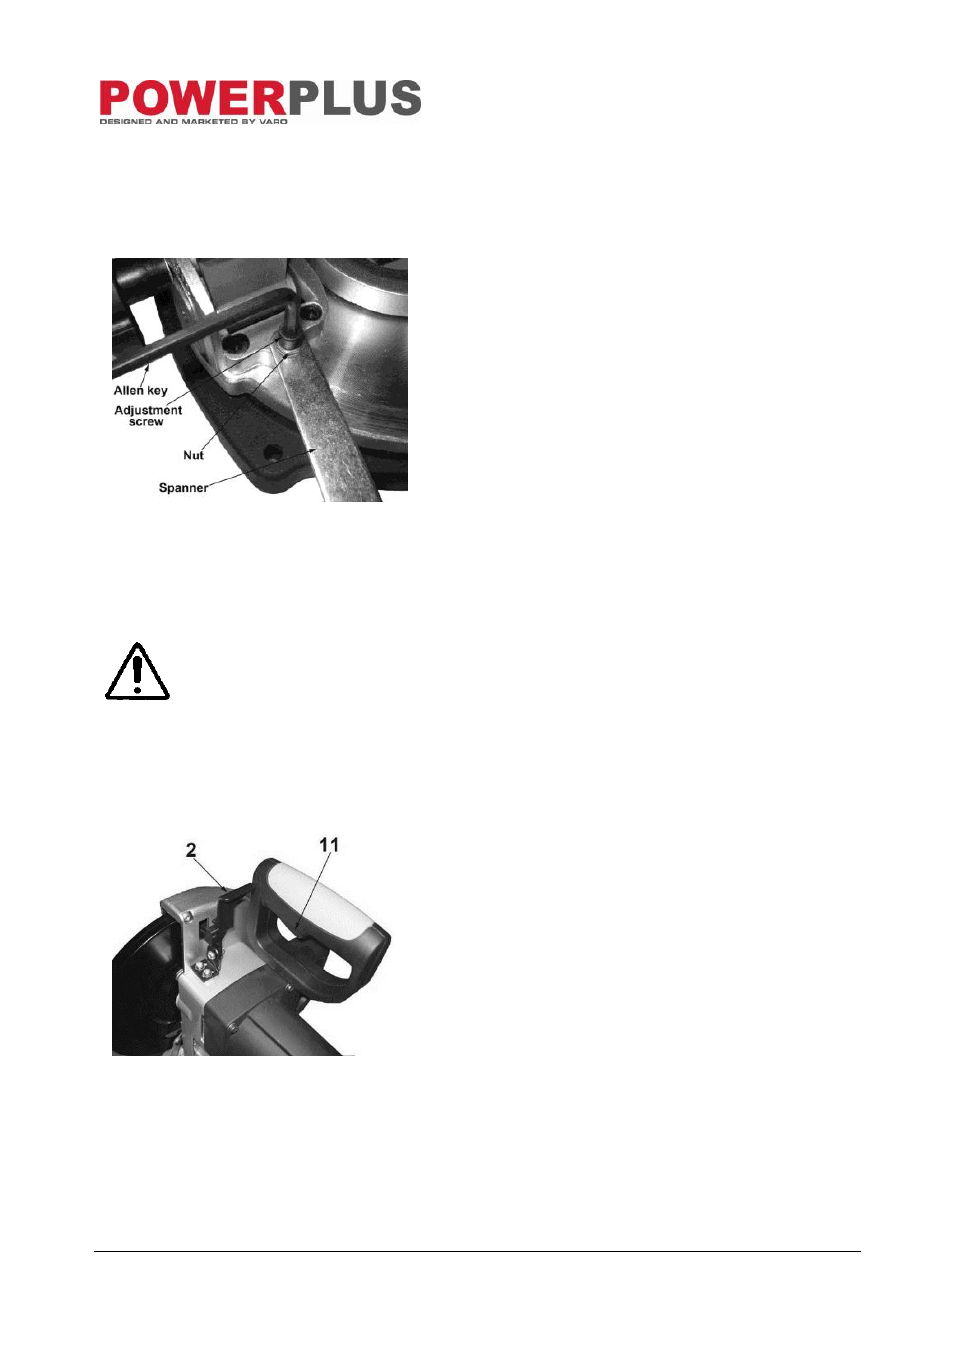
90°Bevel angle: Lock the upper arm in its
lowered position by the release knob (18), and
set bevel and mitre angles to 0°on the angle
gauges. Place a protractor at the side of the
saw blade and table, if the angle is not 90°bevel
angle. Achieve the right angle through turning
the adjustment screw (5) clockwise or counter-
clockwise by using Allen key (supplied) until the
angle is the correct angle, tighten the nut by
using the spanner (supplied). (see Fig. 7)
45°Bevel angle: Lock the upper arm in its
lowered position by the release knob (18), set
bevel angle to 45°and mitre angle to 0°on the
angle gauges. Place a protractor at the side of
the saw blade and table , if the angle is not 45°
bevel angle. Adjusting the height of the
adjustment screw (15) until the bevel angle is
the correct angle. Finally tighten the nut and
check the angle once more.
8 OPERATION
NOTE: Always ensure that the blade is not touching the workpiece before
the trigger is pressed.
8.1
Sawing
Fig. 8
Always secure item to be worked with clamps or the
like. Never hold the item to be worked by hand.
Ensure long items are supported.
Set mitre and/or bevel angles as described above if
required.
Check that the saw is correctly set up and that all
handles and bolts are correctly tightened before
starting to saw.
Depress the switch button (11) on the handle, allow
the saw reach full speed before starting to cut.
Pull the lock lever for removable guard (2) and
lower the upper arm to the item .
Do not press the saw sideways.
Release the switch immediately if the blade gets
stuck in the item.
Release the switch when the cut is finished and
wait until the blade has come to a complete stop
before lifting the arm. The removable blade guard
(1) will close automatically when the upper arm is
raised.