Loading paper, Testing the printer – Epson Stylus Photo 750 User Manual
Page 6
EPSON Stylus Photo 750
6 -
EPSON Stylus Photo 750
2/99
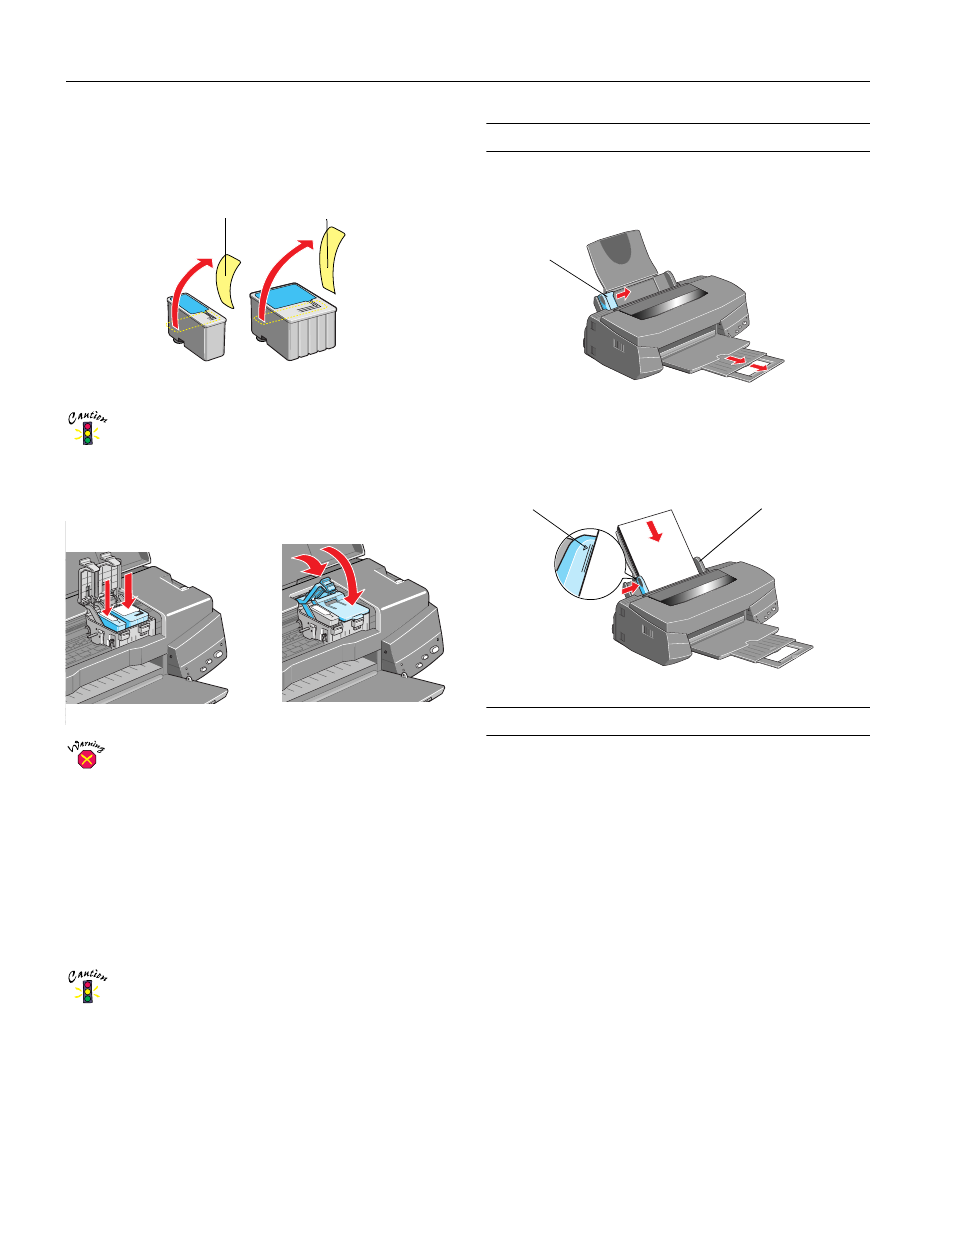
5. Remove the ink cartridges from their packages. Then
remove only the yellow part of the tape seal on top. Don’t
pull off the blue portion or remove the clear seal on the
bottom of the cartridge.
You must remove the yellow tape seal from the
cartridge top or you will permanently damage it.
6. Load the ink cartridges as shown with the labels facing up
and toward the back of the printer. Then press down the
clamps until they lock into place.
If ink gets on your hands, wash them thoroughly with
soap and water. If ink gets in your eyes, flush them
immediately with water.
7. Press the
R cleaning button to begin charging the ink
delivery system, then close the printer cover.
Charging takes about a minute. The
Ppower light flashes
and the printer makes noise until it’s finished.
Don’t turn off the printer or interrupt the charging process
or it will start over, using more ink than necessary.
Charging is finished when the
Ppower light stops flashing
and stays on.
Never turn off the printer while the
P
power light is
flashing, unless the printer hasn’t moved or made
any noise for more than 5 minutes.
Loading Paper
1. Open the output tray extensions. Slide the left edge guide
right until it is a little wider than your paper.
2. Load a stack of plain paper and slide it against the right edge
guide. Then slide the left edge guide against the paper’s left
edge. Don’t load paper higher than the arrow on the guide.
Testing the Printer
You can run a printer operation check to determine whether
the problem comes from the printer itself or some other
source. If the check page prints, the problem lies in your
software or application settings, the interface cable, or your
computer. If the check page does not print correctly, you may
have a problem with your printer.
1. Make sure both the printer and computer are turned off.
2. Disconnect the interface cable from the printer.
3. Make sure paper is loaded in the printer.
4. Hold down the
E
load/eject button, then press and release
the
Ppower button. Continue holding down the
E
load/eject button until the
Ppower light starts to flash,
then release it. The printer prints its ROM version number,
an ink counter code, and a nozzle check pattern (as shown
on page 10).
5. After the test page prints, turn off the printer. Reconnect
the interface cable and turn on your printer and computer.
black cartridge color cartridge
Remove the yellow tape
Left edge
guide
Load paper only
up to this arrow
Slide paper
against the right