Chapter 2, Hardware setup, Installing the hard disk – Lanner FW-8877 User Manual
Page 14
8
Hardware Setup
Chapter 2
Network Application Platforms
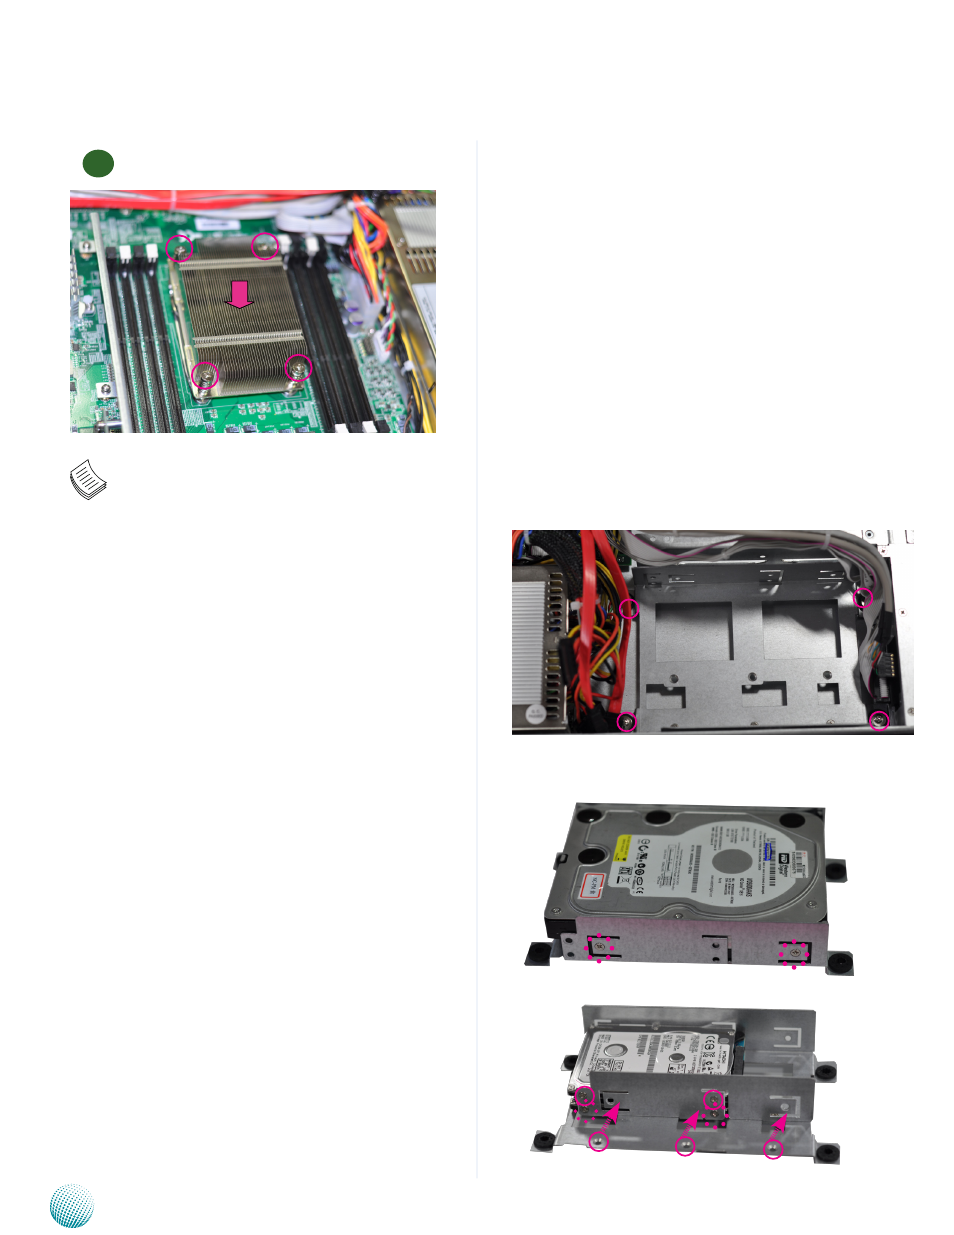
Installing the Hard Disk
The system support one 3.5” or two 2.5” internal HDD
installation.
Follow these steps to install a HDD:
Unsrew the 4 screws on the hard disk tray to take out
1.
the hard disk tray from the system.
Place hard disk on the hard disk tray and align the
2.
holes on the hard disk with the mounting holes on
the tray.
Secure the hard disk with 4 mounting screws on the
3.
hard disk tray.
Connect the Serial-ATA power and data cables to the
4.
hard disk’s power and data connectors respectively.
Fix the hard disk back to the system with the screws.
5.
Plug the Serial-ATA cable to the Serial-ATA Connector
6.
on the main board.
Note:
To protect the CPU socket pins, retain the CPU
cap when the CPU is not installed.
6
3.5” HDD Installation
2.5” HDD Installation
Move the side plate to adjust for
the size of the 2.5” HDD
- LVC-2000 (39 pages)
- LVC-5000(N4) (42 pages)
- LVC-5550S (41 pages)
- LVC-5570 (48 pages)
- LVC-5770 (49 pages)
- FW-6432 (16 pages)
- FW-7525 (41 pages)
- FW-5330 (38 pages)
- FW-6486 (18 pages)
- FW-6436 (19 pages)
- FW-7573 (44 pages)
- FW-7568 (52 pages)
- FW-7540 (47 pages)
- FW-8759 (47 pages)
- FW-7581 (23 pages)
- FW-8758 (42 pages)
- FW-7610 (44 pages)
- FW-8756 (24 pages)
- FW-7575 (48 pages)
- FW-8760 (53 pages)
- FW-8892 (58 pages)
- FW-8893C (49 pages)
- FX-3411 (48 pages)
- FW-8894 (31 pages)
- FW-8771 (47 pages)
- RS12-38800 (64 pages)
- MR-320 (20 pages)
- FX-3210 (54 pages)
- MR-301 (16 pages)
- MR-350 (12 pages)
- MR-330A (16 pages)
- MR-730 (18 pages)
- VES-220 (19 pages)
- VES-270 (19 pages)
- VES-310 (15 pages)
- VES-310 V2 (20 pages)
- VES-500 (21 pages)
- EM-F345 (30 pages)
- VES-8X2 (16 pages)
- VES-8X6 (17 pages)
- LEC-2026 (67 pages)
- LEC-2010 (65 pages)
- LEC-2136 (20 pages)
- LEC-2050 (38 pages)