Chapter 2, Hardware setup, Installing the compactflash card – Lanner FW-8877 User Manual
Page 13: Installing cpu and the heat sink
7
Hardware Setup
Chapter 2
Network Application Platforms
Installing the CompactFlash Card
FW-8877 provides one CompactFlash slot. Follow the
procedures bellow for installing a CompactFlash card.
Align CompactFlash card and the card slot with the
1.
arrow pointing toward the connector.
Push the card to insert into the connector.
2.
.
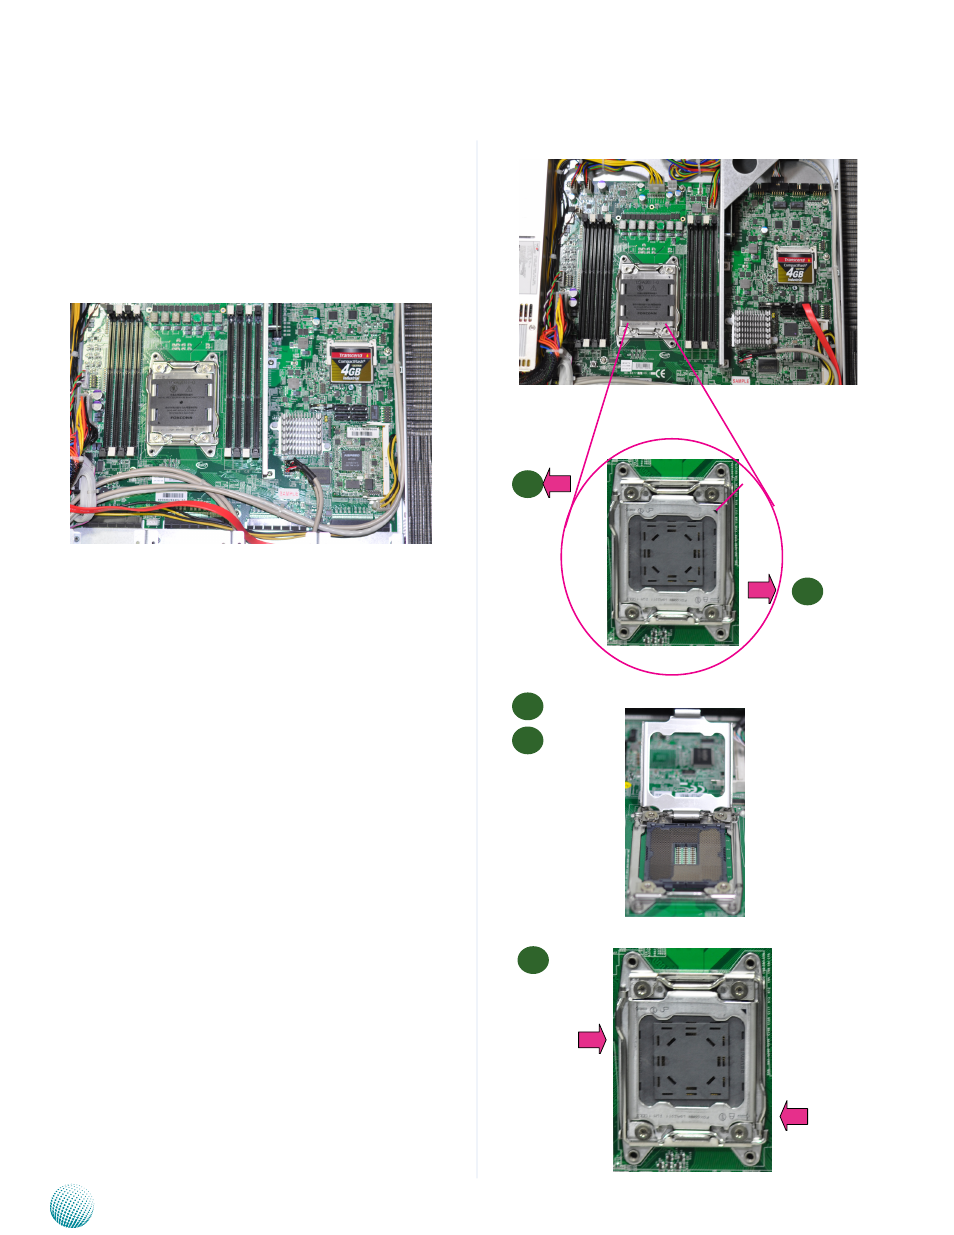
Installing CPU and the Heat Sink
The FW-8877 sever system is powered by the MB-8877
sever board, which comes with two LGA2011 CPU
sockets.
Follow the procedures bellow for installing a CPU
Remove the CPU socket cap.
1.
Press the load lever and release it from the retention
2.
tab. There are two levers for each CPU socket. Follow
the sequence as instructed on the right to release
both of them.
Lift the load lever and then the plate.
3.
Align the cut edge of the CPU and the notch on the
4.
socket. The CPU should fit perfectly into the socket.
Note that the CPU fits in the socket in only one
direction.
Close the plate and push the load lever to lock it back
5.
to the retention tab.
Put the heat sink on the installed CPU, match the
6.
screws with the screw holes on the board. Fasten two
screws which are opposite to each other at a time and
then the other two. It is easier this way to avoid the
force of spring.
Place the heat sink cover on top of the installed heat
7.
sink and to fasten it with screws on the chassis.
Open this side of
lever first
and then open this
side of lever
1
2
4
notch on the socket
3
5
Left side
Close this side of
lever first
and then close
this side of lever