SMA 20000TL Service Manual User Manual
Page 42
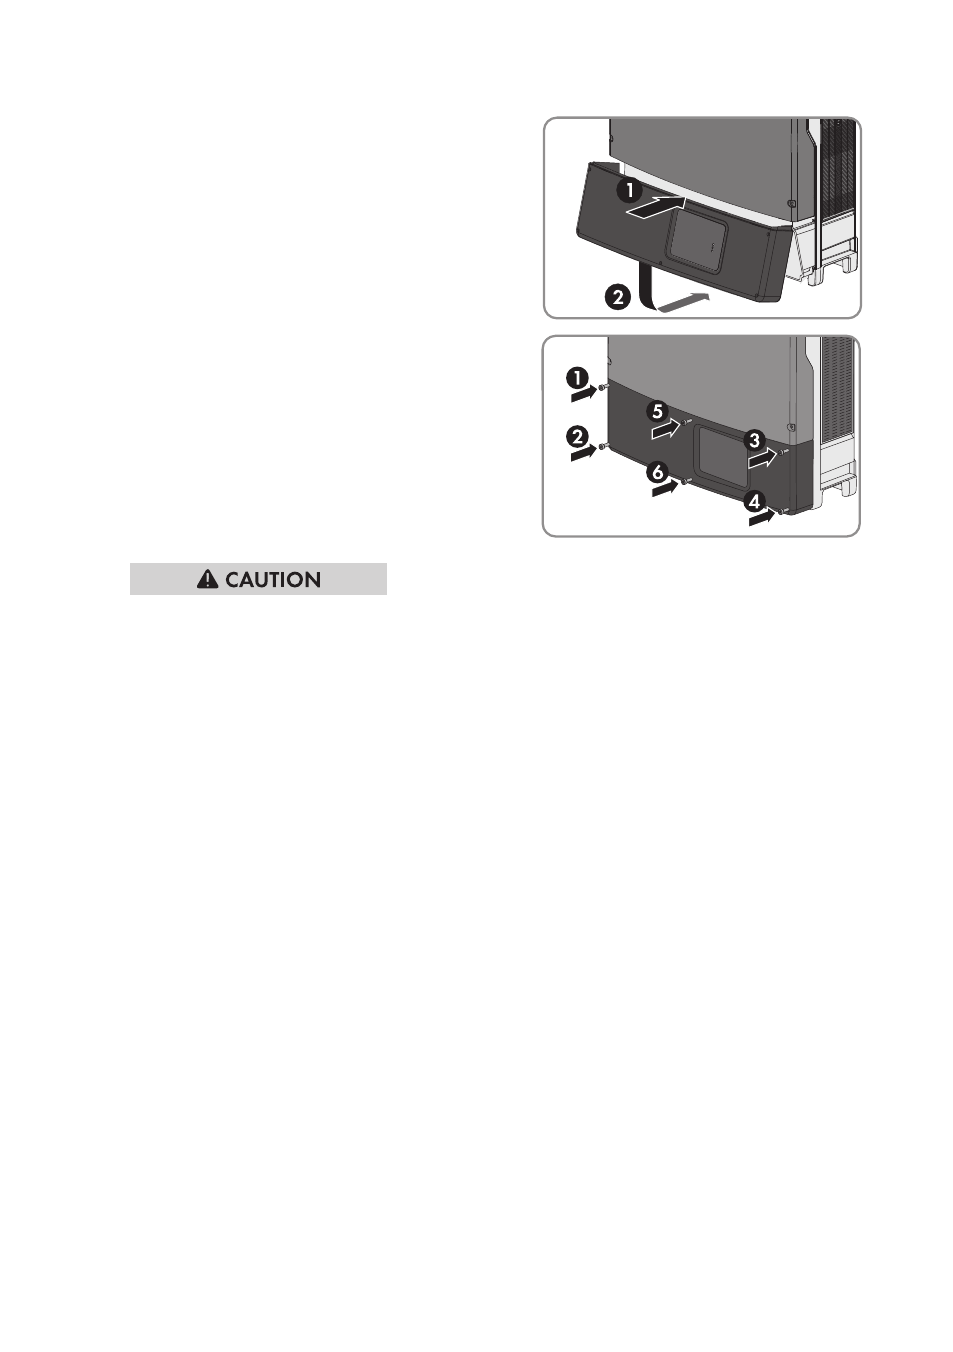
6. Insert the lower enclosure lid from above and
flip it down. The screws must protrude from the
lower enclosure lid.
7. Tighten all six screws with an Allen key (AF 3) in
the order 1 to 6 (torque: 2.0 Nm ± 0.3 Nm). By
tightening the screws in the prescribed order,
you avoid warping the lid, which would keep it
from sealing correctly.
Useful hint: If the screws fall out of the lower
enclosure lid, insert the long screw into the lower
middle hole and the five short screws into the
other holes.
8.
Risk of burns due to hot enclosure parts
• Wait 30 minutes for the enclosure to cool down.
9. If the inverter is protected from being lifted off, unscrew the screws out of the lower drill holes
in the rear panel of the inverter.
10. Remove the inverter by lifting it up and off the wall mounting bracket.
11. If the inverter is to be stored or shipped in packaging, pack the inverter, the wall mounting
bracket and, if applicable, the DC load-break switch. Use the original packaging or
packaging that is suitable for the weight and dimensions of the inverter.
12. Dispose of the inverter in accordance with the locally applicable disposal regulations for
electronic waste.
13 Decommissioning the Inverter
SMA Solar Technology AG
Service Manual for Installers
STP20-25TL-SG-en-11
42