ShoreLand'r SLB58T User Manual
Page 3
Midwest Industries, Inc.
Ida Grove, IA 51445
(800)859-3028
www.shorelandr.com
M304016
Page 3
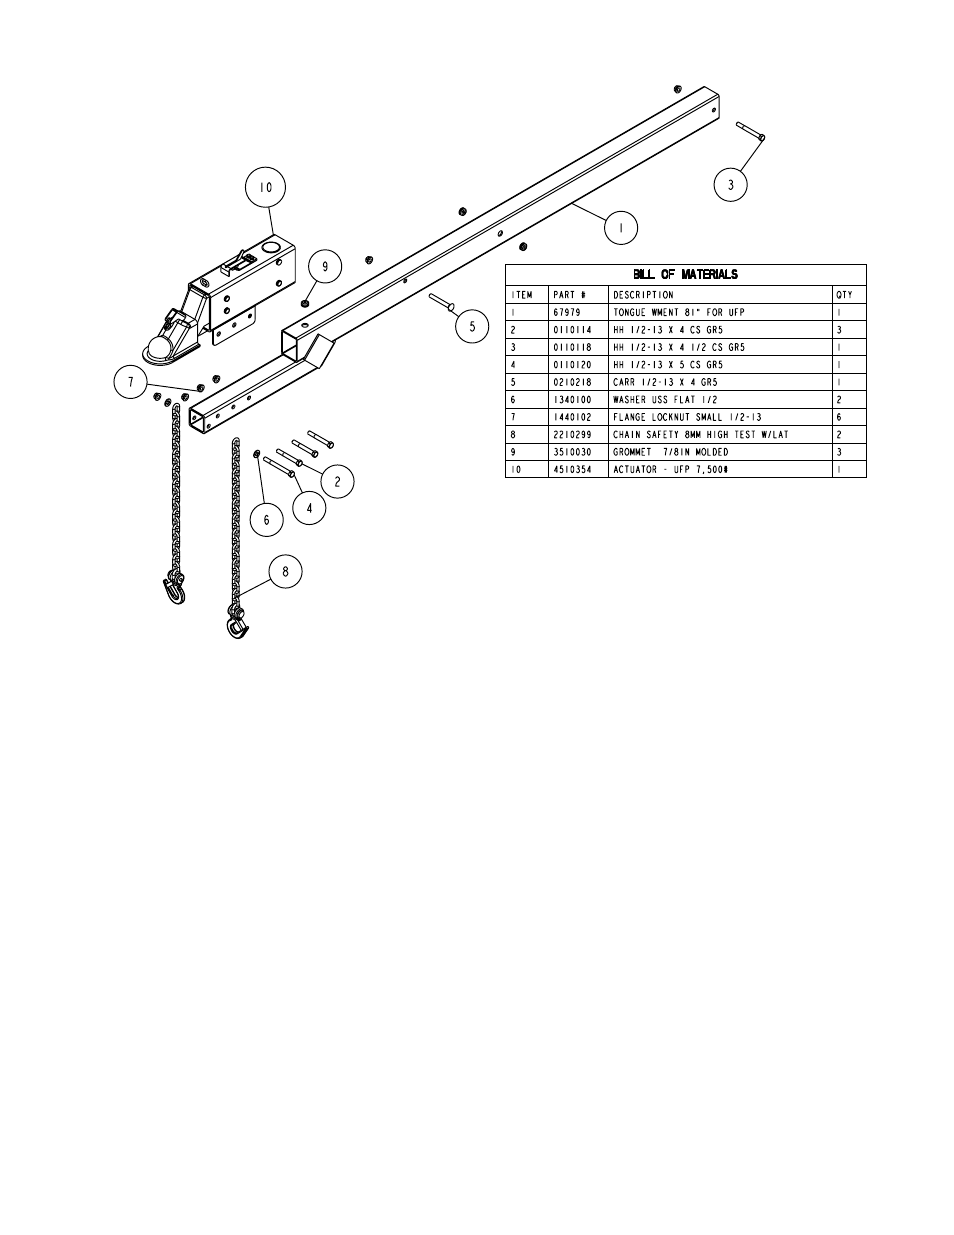
Tongue
The tongue comes shipped separately. Locate and install
under the frames front tongue channel and in the channel
welded to the front cross member which will support the rear
of the tongue.
Line the hole in the tongue with the hole in the tongue
channel. Install the 1/2” x 4-1/2” carriage bolt in the front cross
hole and secure with a 1/2” lock nut. Secure the rear of the
tongue to the frame with a 1/2” x 4” hex bolt and lock nut.
Tighten.
Tongue Wire Harness
Locate the tongue wire harness. Place the end of the wire
harness with the two double plugs into the hole in the top of
the tongue. Pull backwards through the tongue until they can
be fished through the holes in each side of the tongue. Note
that the brown and yellow plug must go to the left side of the
trailer and the brown and green plug must go to the right side
of the trailer.
Plug the tongue wire harness ends into the frame harnesses
by matching colors and ends. Place grommets into all the
wire holes. Push the extra wire provided either into the hole
in the tongue or else remove the grommet in the side frame
and place the extra wire in the side frame. Replace grommet
just removed.
Brake Line
Remove the brake line from the brake kit box 68140. Locate
the 58” tongue line. Uncoil the line and insert one end into
the rear of the tongue pushing it forward until the end comes
out of the front of the tongue. Locate the brass brake line
coupling in the hardware box and thread on the rear fitting of
the brake line.
Actuator
Locate the actuator, and position it on the front of the tongue
as shown. Look into the back end of the actuator and locate
the solenoid. Note there is a wire harness coiled around the
round solenoid. Uncoil the wire and plug it into the bullet plug
on the end of the blue wire of the tongue harness. Remove
the plastic plug from the port in the rear of the solenoid Thread
the fitting on the end of the tongue brake line into the port the
of the solenoid. Tighten.
Align the holes in the actuator with the holes in the tongue.
Secure the actuator to the tongue using three (3) 1/2” x 4”
hex bolts and lock nuts. Tighten.
Thread the brass coupling provided on the other end of the
brake line just installed. Bend the line coming out the rear of
the tongue in a smooth gradual radius being careful not to
kink the line. Bend so it can be mated to the brake line from
the side frame. Once aligned thread the side frame brake
line into the other end of the coupling. Tighten both lines into
the coupling.
Safety Chains
Mount the safety chains to the front of the tongue by placing
a 1/2” flat washer onto a 1/2” x 5” hex bolt, then insert the bolt
through the last link on one of the safety chains provided.
Insert the bolt through the hole provided in the front of the
tongue as shown. Once the bolt is completely inserted, place
on the other safety chain provided. Place on another 1/2” flat
washer and secure with a 1/2” hex lock nut. Tighten.