Removing and replacing the disk drive leds cable, Disk drive leds cable removal -12 – Grass Valley PDX 218 User Manual
Page 46
Chapter 3 Service
3-12
PDX 218 Instruction Manual
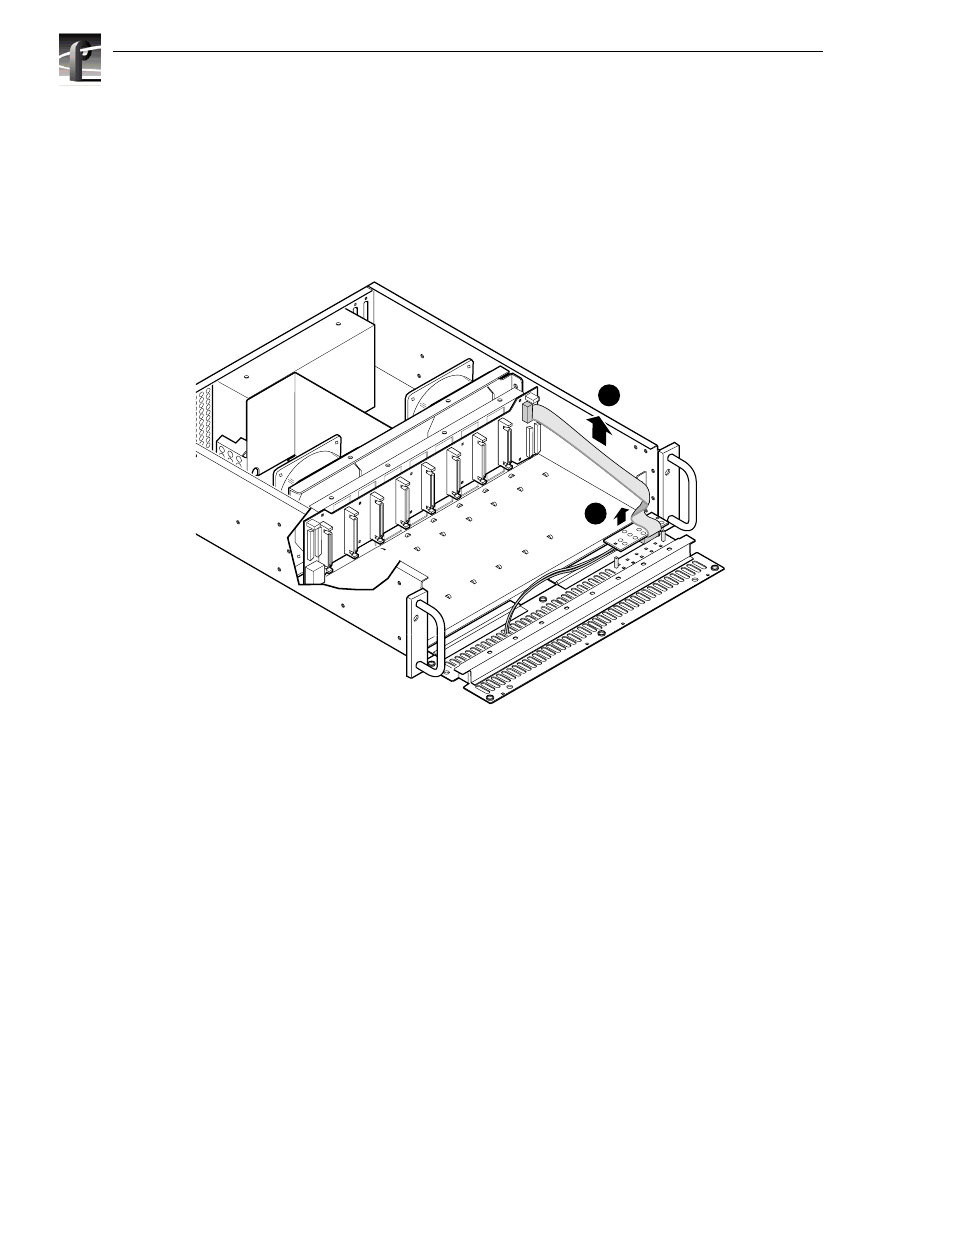
Removing and Replacing the Disk Drive LEDs Cable
This cable (item 10 in Table 3-1), for the disk drive activity LEDs, connects from the
LED board on the front panel to the SCSI Distribution board. It is not necessary to
remove the PDX 218 from the rack to perform this procedure. Figure 3-7 shows the
LED board and cables.
Figure 3-7. Disk Drive LEDs Cable Removal
To remove the Disk Drive LEDs cable:
1. Unsnap the front panel bezel by firmly pulling away from the front panel (Figure
3-1).
2. Remove the retaining screws from the front panel (Figure 3-4). (These are also
caddie retaining screws.)
3. Lower the front panel.
4. Unsnap the LED board from the mounting posts (Figure 3-6) by pulling the board
straight up from the front panel.
5. Disconnect the Disk Drive LEDs cable from the LED board (Figure 3-7).
6. Remove as many caddies as necessary to reach the Disk Drive LEDs cable where
it connects to the SCSI Distribution board (Figure 3-7). (See Removing a Disk
Drive.)
7. Disconnect the Disk Drive LEDs cable from the SCSI Distribution board.
9687-19
Unplug cable
connectors and
remove cable
2
Remove
LED board
1