K-frame video processor door removal clearance, K-frame video processor door removal – Grass Valley K-Frame Installation Planning Guide User Manual
Page 38
38
K-FRAME — Installation Planning Guide
Section 2 — K-Frame Installation
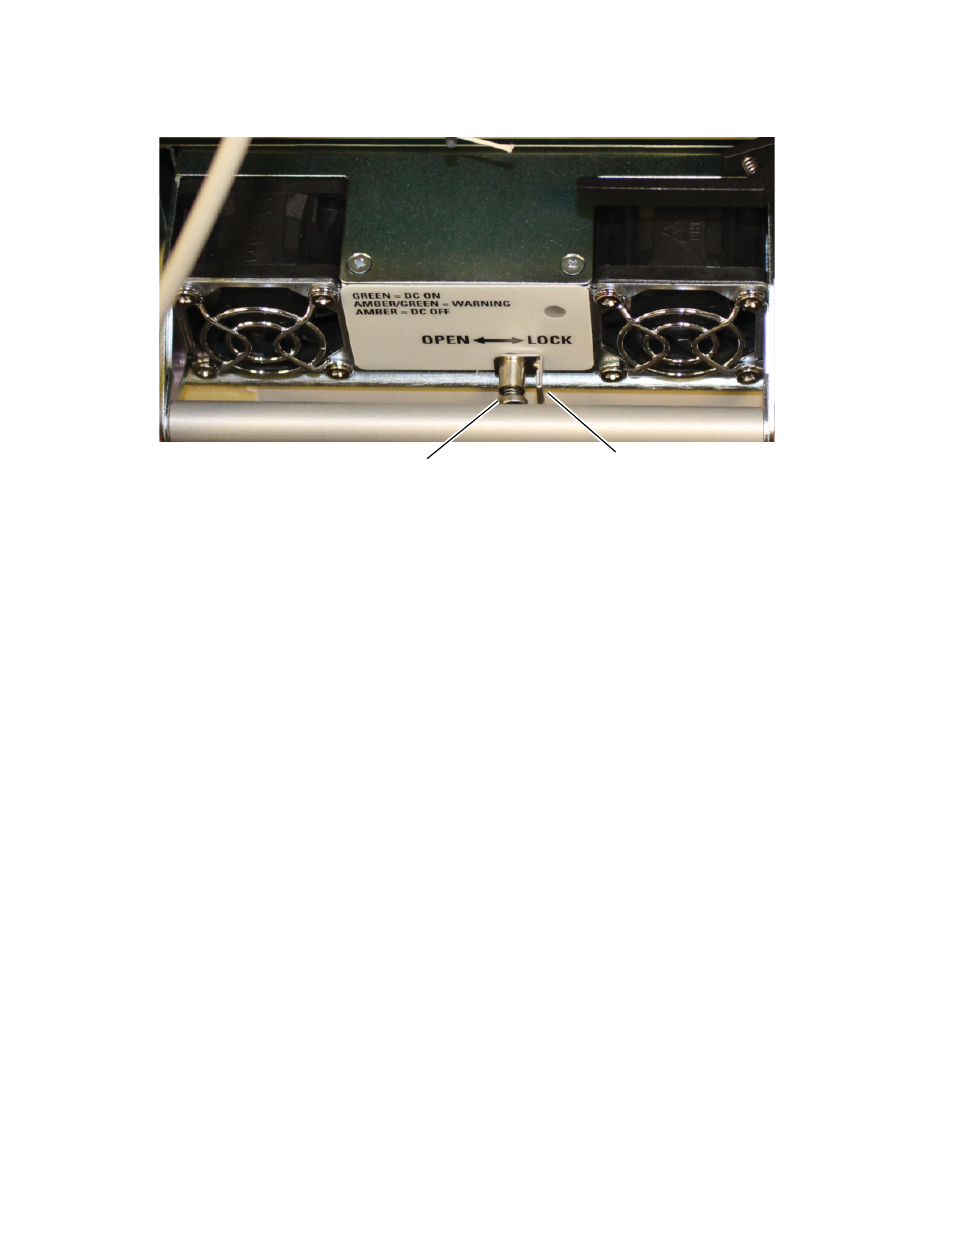
Figure 19. Compact Frame Power Supply Lock Screw
3.
Loosen the lock screw a few turns to the left, using a Phillips head
screwdriver.
4.
Slide the lock toward the OPEN label (left) and pull the power supply
straight out of the chassis.
Replace the power supply.
1.
Slide the replacement power supply straight in and make sure the lock
is in the LOCKED position.
2.
Tighten the lock screw to the right, just until tight.
3.
Close the Compact K-Frame door, making sure that it latches in the
closed position.
K-Frame Video Processor Door Removal Clearance
CAUTION The Video Processor front door must remain in place and closed during
normal system operation to maintain maximum cooling efficiency.
The K-Frame Video Processor door on all K-Frames can be completely
removed when installed in a rack immediately below conventional flush
mounted rack-ear only equipment. If the Standard K-Frame power supply
Frame is mounted directly above the Standard K-Frame chassis, the chassis
door can be completely removed after removing the power supply’s front
screen. However, mounting any K-Frame (including Compact Performance
and Compact S-series) in a rack immediately below other equipment that
7504_01
Lock Screw
Power Supply
Lock