Installing the k2 asi card driver – Grass Valley K2 ASI Media Client Installation User Manual
Page 32
32
K2 ASI Media Client Installation and Service Manual
August 14, 2008
Chapter 3 Servicing the K2 ASI Media Client
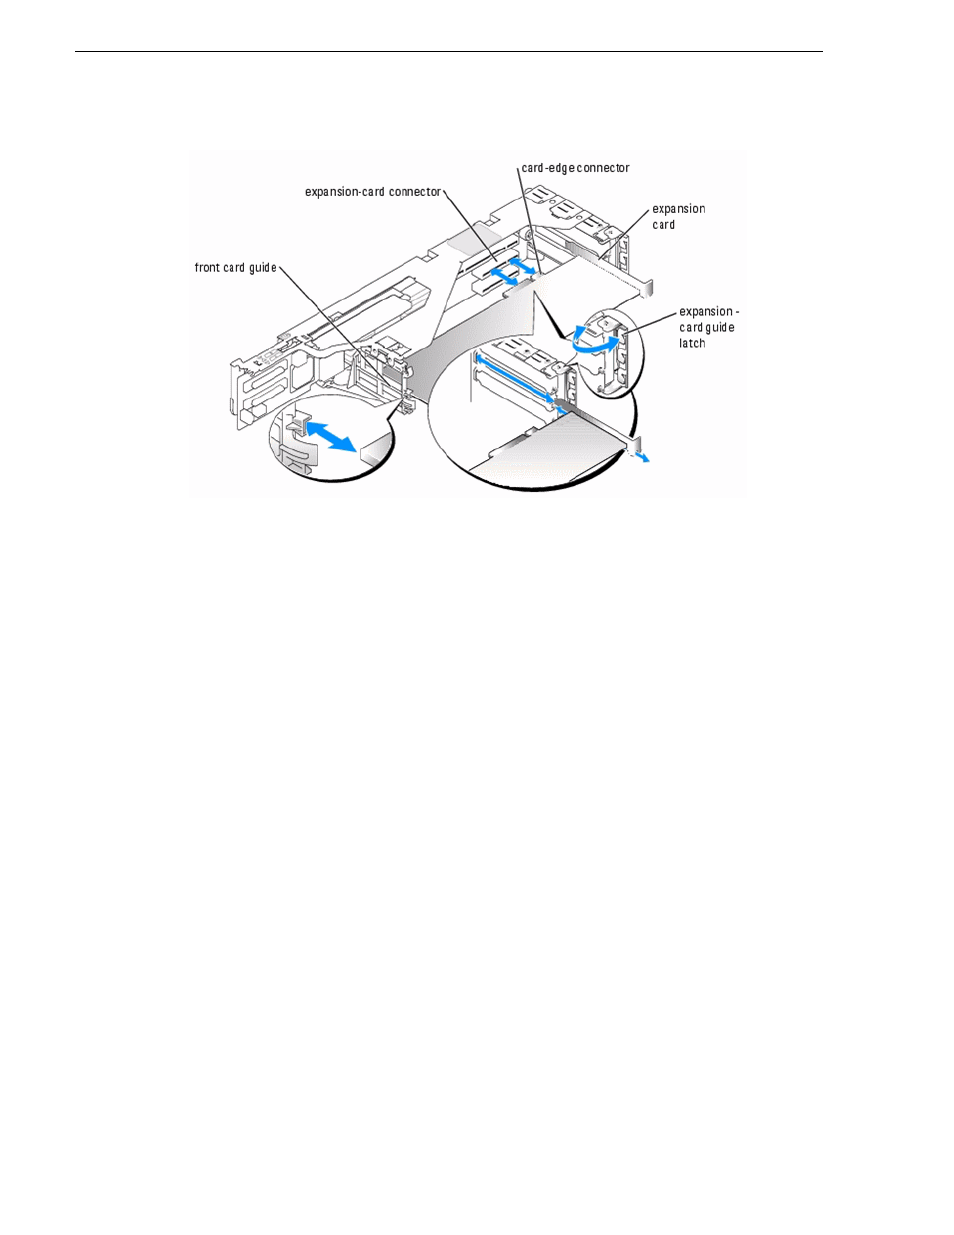
7. Open the expansion-card guide latch and remove the filler bracket.
8. Install the ASI expansion card as follows:
a. Align the front edge of the K2 ASI expansion card with the front card guide.
b. Position the expansion card so that the card-edge connector aligns with the
expansion-card connector on the expansion-card riser board.
c. Insert the card-edge connector firmly into the expansion-card connector until the
card is fully seated.
d. When the card is seated in the connector, close the expansion-card latch.
9. Replace the expansion-card cage as follows:
a. Reconnect the backplane cable(s) to the riser board.
b. With the expansion-card cage lever rotated to a 90-degree angle, align the guides
on each end of the expansion-card cage with the guides on the chassis wall, and
lower the cage.
c. Rotate the expansion-card cage lever down until the handle is flush with the top
of the cage to secure the cage in the chassis.
10.Reconnect all the cables.
11.Replace the cover, plug the system and its peripherals back in and switch them
back on.
Installing the K2 ASI Card Driver
Since the driver is already installed on the K2 ASI Media Client, it is not necessary to
install it when you replace the ASI card. Install the driver only if directed by Grass
Valley Support.
To install the K2 ASI card driver, proceed as follows.