Amped Wireless ACA1 - High Power 500mW Dual Band AC Wi-Fi USB Adapter User Manual
Aca1, Windows driver installation, Insert the setup cd
3
v050813
Windows Driver Installation
4
Disconnect your original Wi-Fi adapter from any Wi-Fi networks
Network 1
If your PC is connected to a Wi-Fi network using the original
embedded Wi-Fi adapter, you will need to disconnect it.
In the Networks tab, disconnect from any networks
listed under the embedded Wi-Fi adapter ("Wi-Fi" not "Wi-Fi 2").
— R E A D F I R S T —
SETUP GUIDE
High Power 500mW Dual Band AC Wi-Fi USB Adapter
Need Help? Give us a call.
Phone: 888-573-8820
Email: [email protected]
Web: www.ampedwireless.com/support
?
ACA1
Insert the Setup CD
1
No CD Slot? Download the drivers:
http://www.ampedwireless.com/support/model/aca1.html
Install Software
2
The menu page should appear.
Select the instructions for your operating
system below and install the driver for the
USB adapter.
Windows Instructions:
This Side
Mac Instructions:
Back Side
Do not insert the USB Adapter until after
the software/driver has been fully installed.
C. Continue the Driver Installation
Follow the instructions that appear and
click
Install
to continue the installation.
D. Restart your Computer
A prompt will appear asking you to restart your
computer. Select
Yes
and click
Finish
to restart.
E. Insert the High Power USB Adapter
After the computer has fully rebooted, locate
a USB port and insert the USB Adapter. A USB
3.0 port is recommended. USB 2.0 / 1.0 will
also work but at slower speeds.
B. Start the Driver Installation
If prompted, click
Yes
to begin the installation.
A. From the Menu page, select
Install Software
If the Menu page does not appear, browse the
CD drive and double-click the
Autoload.exe
file
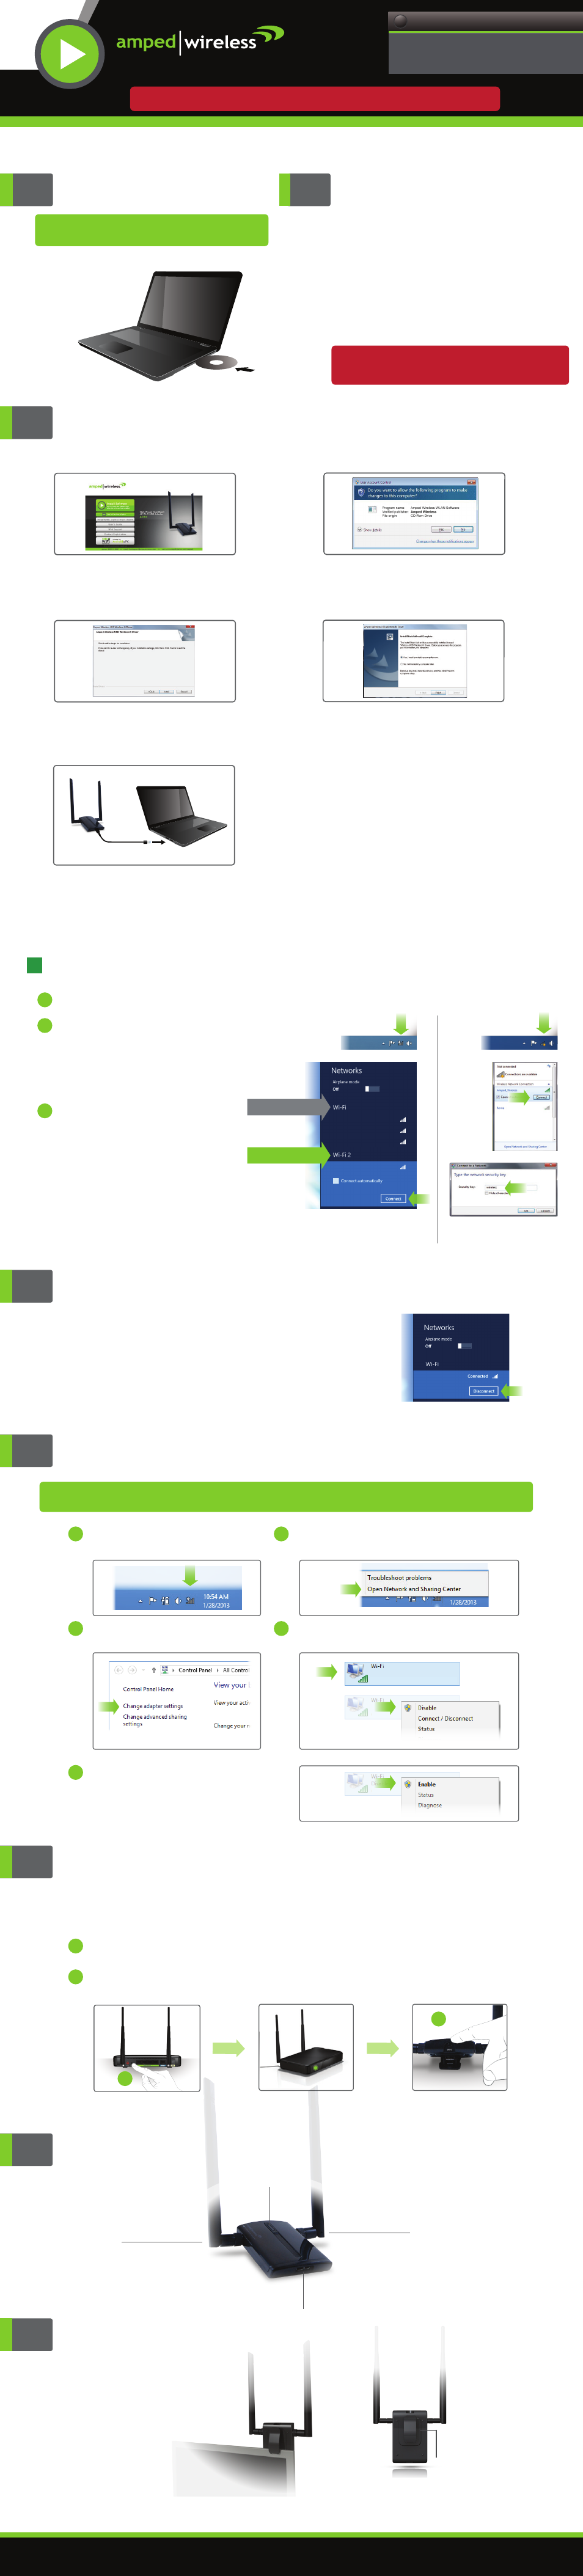
Connect to a Wi-Fi network
a
Select the Wi-Fi icon on your Windows desktop taskbar.
If your PC has a previously installed Wi-Fi adapter,
your new Amped Wi-Fi adapter should appear as
"Wi-Fi 2" or "Wireless Network Connection 2".
Your original Wi-Fi adapter will be labeled as
"Wi-Fi" or “Wireless Network Connection".
Choose any network under "Wi-Fi 2"
or "Wireless Network Connection 2"
to connect to and enter the security
key if prompted.
b
c
Amped_Network
Network 1
Network 2
Network 3
Wi-Fi 2
Amped Wireless Wi-Fi Adapter
Wi-Fi
Original Wi-Fi Adapter
Windows 8
Windows 7 & XP
Amped_Network
Amped_Network
a
Go to the Windows 8 desktop and
find the Wi-Fi icon.
Right-click on the Wi-Fi icon in the taskbar
and select "Open Network and Sharing Center".
b
Find your Wi-Fi icon (Not Wi-Fi 2), right-click it
and "Disable" from the dropdown menu.
d
To re-enable your original Wi-Fi adapter,
follow the same steps above and click
"Enable" at Step D instead of "Disable".
e
Select "Change Adapter Settings"
from left side.
c
Disabling Wi-Fi 1 will stop it from showing up in your Wi-Fi available network list.
This is not permanent. You can re-enable it by following Step E below.
5
Optional: Disable the Embedded Wi-Fi Adapter (Wi-Fi 1)
If your Wi-Fi network (router) supports WPS one-touch setup, you can use the WPS button on the
Adapter to connect to your network.
Initiate WPS setup by pressing the WPS button on your router for 3 seconds. The WPS LED
should begin to blink.
As it blinks, push the WPS button on the ACA1 Wi-Fi Adapter. WPS will automatically configure
the connection settings for the ACA1 to connect to your Wi-Fi network.
A.
B.
a
b
b
a
6
Wi-Fi Protected Setup
(One-Touch Setup or Push Button Configuration)
Indicators and Buttons
Mounting Clip
Mini USB 3.0
Activity LED
Antenna Connector
Antenna Connector
Detachable
Laptop Clip
Mount on your laptop screen
for convenience and portability.