Amped Wireless TAN1 - High Power Wi-Fi Adapter for Windows 8 User Manual
Setup guide, Wi-fi protected setup, Tan1
— R E A D F I R S T —
SETUP GUIDE
Need Help? Give us a call.
Phone: 888-573-8820
Email: [email protected]
Web: www.ampedwireless.com/support
?
TAN1
High Power Wi-Fi Adapter for Windows 8
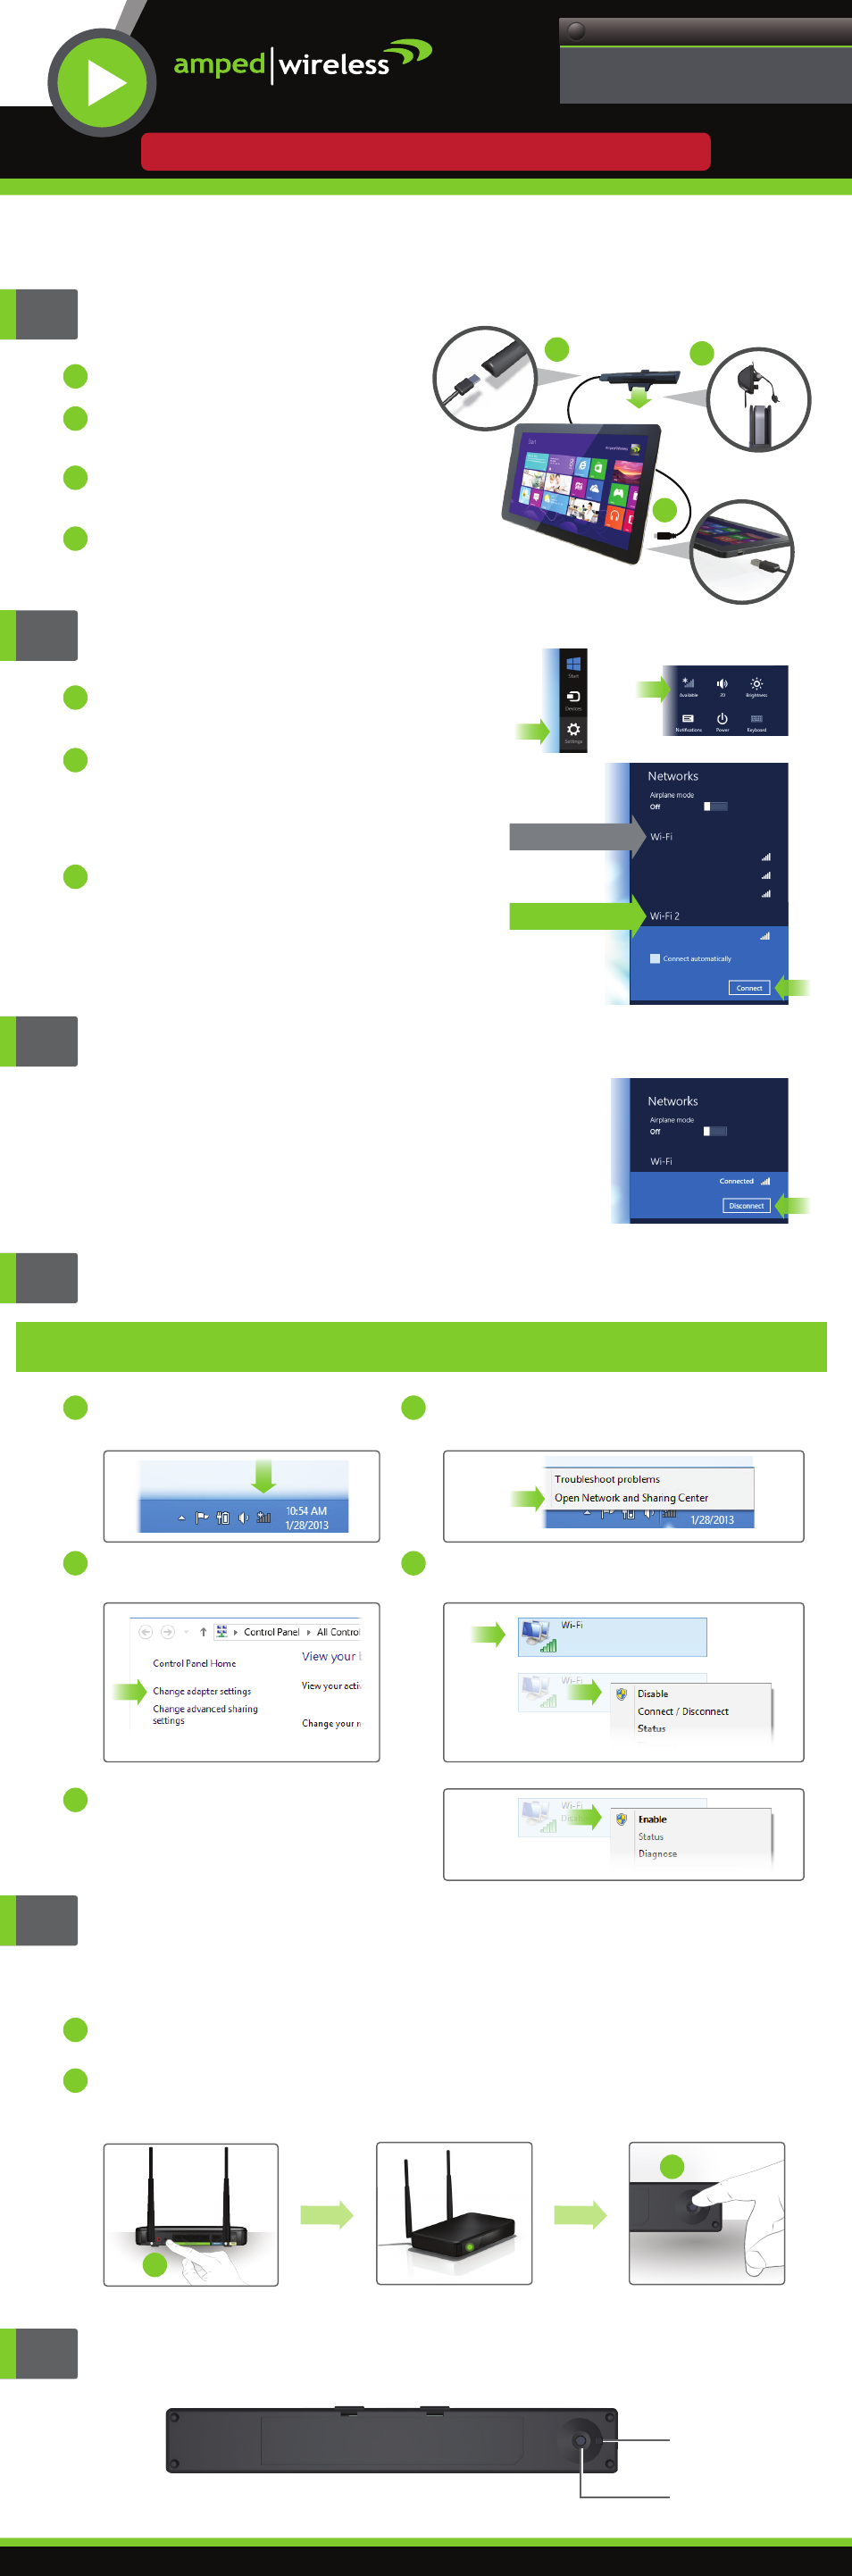
Attach the Adapter to your
Windows 8 PC, Tablet or Ultrabook
1
Connect to a Wi-Fi Network
2
Disconnect your original Wi-Fi adapter from any Wi-Fi networks
3
Optional: Disable the Embedded Wi-Fi Adapter (Wi-Fi 1)
4
Amped_Network
Network 1
Network 2
Network 3
Wi-Fi 2
Amped Wirelss Wi-Fi Adapter
Wi-Fi
Original Wi-Fi Adapter
Network 1
Amped_Network
Amped_Network
a
Power on your Windows 8 PC.
Connect the Micro USB side of the
USB cable to the Wi-Fi Adapter.
Use the tablet/monitor clip
and fasten the Adapter to your screen.
Connect the other end to an available
USB Port on your PC.
b
d
c
a
Windows 8 will automatically install the
software needed to operate the Wi-Fi adapter.
Go to "Settings" and access "Available Networks"
Your new Wi-Fi adapter should show up under
the Networks tab as "Wi-Fi 2".
Your original, embedded Wi-Fi adapter is listed as "Wi-Fi".
Choose any network under "Wi-Fi 2" to connect
to and enter the security key if prompted.
b
c
a
Go to the Windows 8 desktop and
find the Wi-Fi icon.
Right click on the Wi-Fi icon in the taskbar
and select "Open Network and Sharing Center".
b
Find your Wi-Fi icon (Not Wi-Fi 2), right-click it
and "Disable" from the dropdown menu.
d
To re-enable your original Wi-Fi adapter,
follow the same steps above and click
"Enable" at Step D instead of "Disable".
e
Select "Change Adapter Settings"
from left side.
c
If your PC is connected to a Wi-Fi network using the original
embedded Wi-Fi adapter, you will need to disconnect it.
In the Networks tab, disconnect from any networks
listed under the embedded Wi-Fi adapter ("Wi-Fi", not "Wi-Fi 2").
b
c
d
Wi-Fi Protected Setup
(One-Touch Setup or Push Button Configuration)
If your Wi-Fi network (router) supports WPS one-touch setup you can use the WPS button on the
Adapter to connect to your network.
Initiate WPS setup by pressing the WPS button on your router for 3 seconds. The WPS LED
should begin to blink.
As it blinks, push the WPS button on the TAN1 Wi-Fi Adapter. WPS will automatically configure
the connection settings for the TAN1 to connect to your Wi-Fi network.
A.
B.
a
b
a
b
Activity LED
WPS Button
BACK VIEW
Indicators and Buttons
Disabling Wi-Fi 1 will stop it from showing up in your Wi-Fi available network list.
This is not permanent. You can re-enable it by following Step E below.