Airmar – Airmar P48W User Manual
Page 6
AIRMAR
®
TECHNOLOGY CORPORATION
35 Meadowbrook Drive, Milford, New Hampshire 03055-4613, USA
www.airmar.com
Copyright © 2008 - 2013 All rights reserved.
Anti-fouling Paint
Aquatic growth can accumulate rapidly on the sensor’s surface
reducing performance within weeks. Surfaces exposed to salt
water that do not interlock, must be coated with anti-fouling paint.
Use water-based anti-fouling paint only. Never use ketone-based
paint, since ketones can attack many types of plastic possibly
causing damage to the sensor. Apply paint every 6 months or at
the beginning of each boating season.
Maintenance
Cleaning
Clean the transducer’s face with a Scotch-Brite® scour pad and
mild household detergent taking care to avoid making scratches.
If the fouling is severe, lightly wet sand with fine grade wet/dry
paper.
Damaged Cable Jacket
1. Should the outer jacket of the cable be abraded or cut, check
that the internal conductors are not damaged.
2. If the conductors are damage free, allow the cable to dry and fill
the damaged area with sealant.
3. Cover the damaged area with electrical tape.
Severed Cable
1. Slide heat-shrink tubing onto the cable.
2. Splice each pair of matching colored conductors with rosin core
solder.
3. Wrap each conductor with insulating tape at the splice.
4. Splice the braided shield wire with solder.
5. Fill the spliced area in the cable with sealant.
6. Cover the damaged area with the heat shrink tubing, following
the manufacturer’s directions for its use.
NOTE: If the instrument fails to provide a reading, the problem
may not be the damaged cable. The transducer, connector, or
instrument could be defective.
Reassembling the Transom Fitting
1. Slide the cover over the cable onto the transducer (see Figure 6
or 7).
2. P48W—While holding the wavy spring over the pocket in the
transom fitting, insert the transducer into the pocket. (The
spring fits under the lip of the transducer.) Orient the transducer
so the knob is facing 90
°
and the cable exits near the bracket at
about the 45
°
mark.
TM models—Insert the transducer into the pocket. Be sure to
face the cable toward the center of the bracket.
3. Using the two 6 x 1/2" screws supplied, fasten the cover onto
the transom fitting. Hand-tighten only. Do not over-tighten.
NOTE: Do not use the screws from the trolling motor fitting.
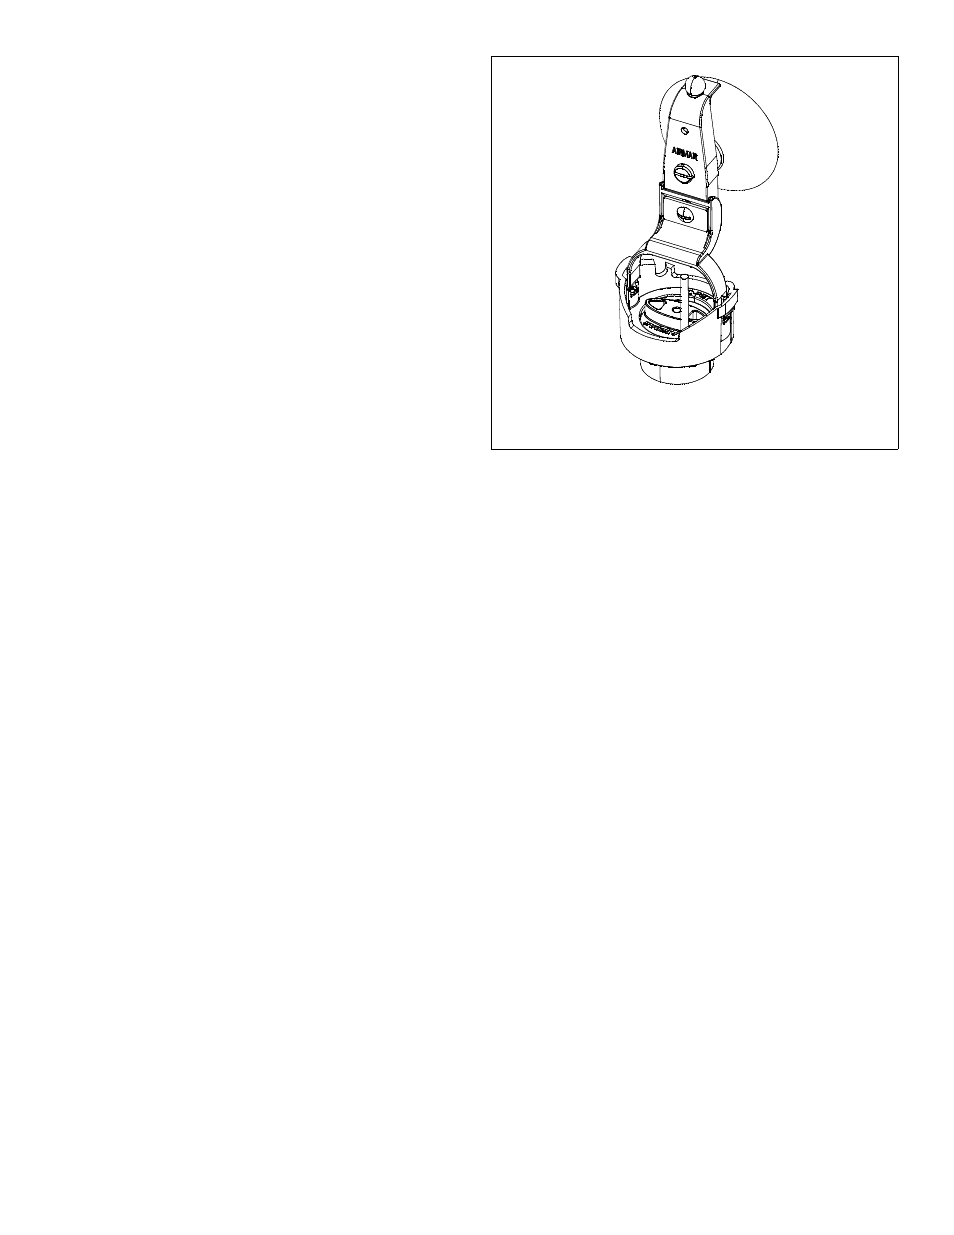
Optional Portable Bracket Kit:
P48W or TM150M Only
NOTE: The other TM models are too large for this fitting.
An optional Portable Bracket Kit is available to temporarily mount
the transducer to different watercraft, ice fishing apparatus, or a
fixed location (see Figure 12). Installation instructions are
included with the bracket.
Replacement Parts & Accessories
The information needed to order a replacement transducer is printed
on the cable tag. Do not remove this tag. When ordering, specify the
part number, date, and frequency in kHz. For convenient reference,
record this information on the top of page one.
Lost, broken, and worn parts should be replaced immediately.
Bracket & Wedge Kit
33-491-01
Trolling Motor Kit
33-653-02 (see Figure 8)
Portable Bracket Kit
33-076-01 (see Figure 12)
Obtain parts from your instrument manufacturer or marine dealer.
Gemeco
Tel: 803-693-0777
(USA)
Fax: 803-693-0477
email: [email protected]
Airmar EMEA
Tel: +33.(0)2.23.52.06.48
(Europe, Middle East, Africa) Fax: +33.(0)2.23.52.06.49
email: [email protected]
6
Airmar Part No. 33-076-01
Copyright © 2008 - 2012 Airmar Technology Corp.
Figure 12. P48W or TM150M: Portable Bracket
(P48W shown)