Cabling options, Installation procedures, Step 1: prepare the tilted mount – ACTi Outdoor Hemispheric / Fisheye Dome on Straight Wall with Tilted Mount User Manual
Page 3
Installation Guide
Cabling Options
It is highly recommended to mount the camera with a 10 tilt so there would be maximum
coverage of the floor in the field of view. The camera can be mounted on a straight wall using the
Tilted Mount accessory. There are two cabling options:
Cable goes through the wall
Cable goes along the wall
Installation Procedures
This section covers the step-by-step procedures in mounting the camera on a straight wall using
the Tilted Mount accessory and the cables go through the wall.
Step 1: Prepare the Tilted Mount
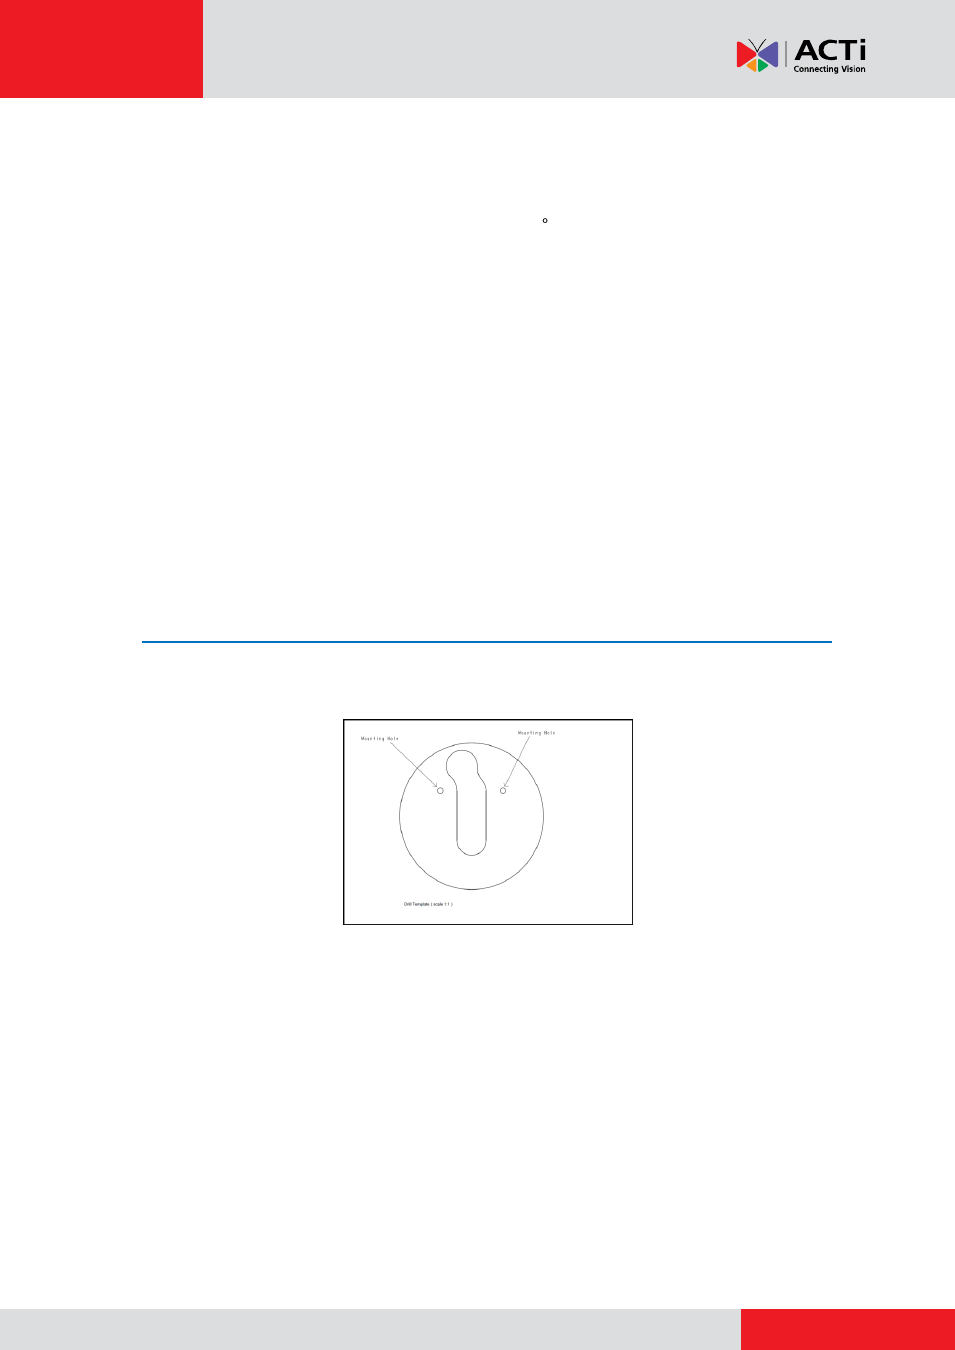
1.
Using the drill template (included in the Tilted Mount package), mark the location of the two (2)
screw holes on the wall. If necessary, drill the holes and insert the plastic plugs.
IMPORTANT!
Note that the tilted mount must be installed with the pre-cut cable hole facing
up.
2.
Determine how the cables will be routed:
pass through a hole on the wall
or
along the
wall
.
If the cables will pass through the wall
, drill the cable hole on the wall.
If the cables will be routed along the wall
, skip this step.