Installation, Step 1: track, cont’d – Extron electronic Low Profile Floor-Mount Raceway System for A/V Connectivity AVTrac User Manual
Page 12
Installation
AVTrac • Installation
10
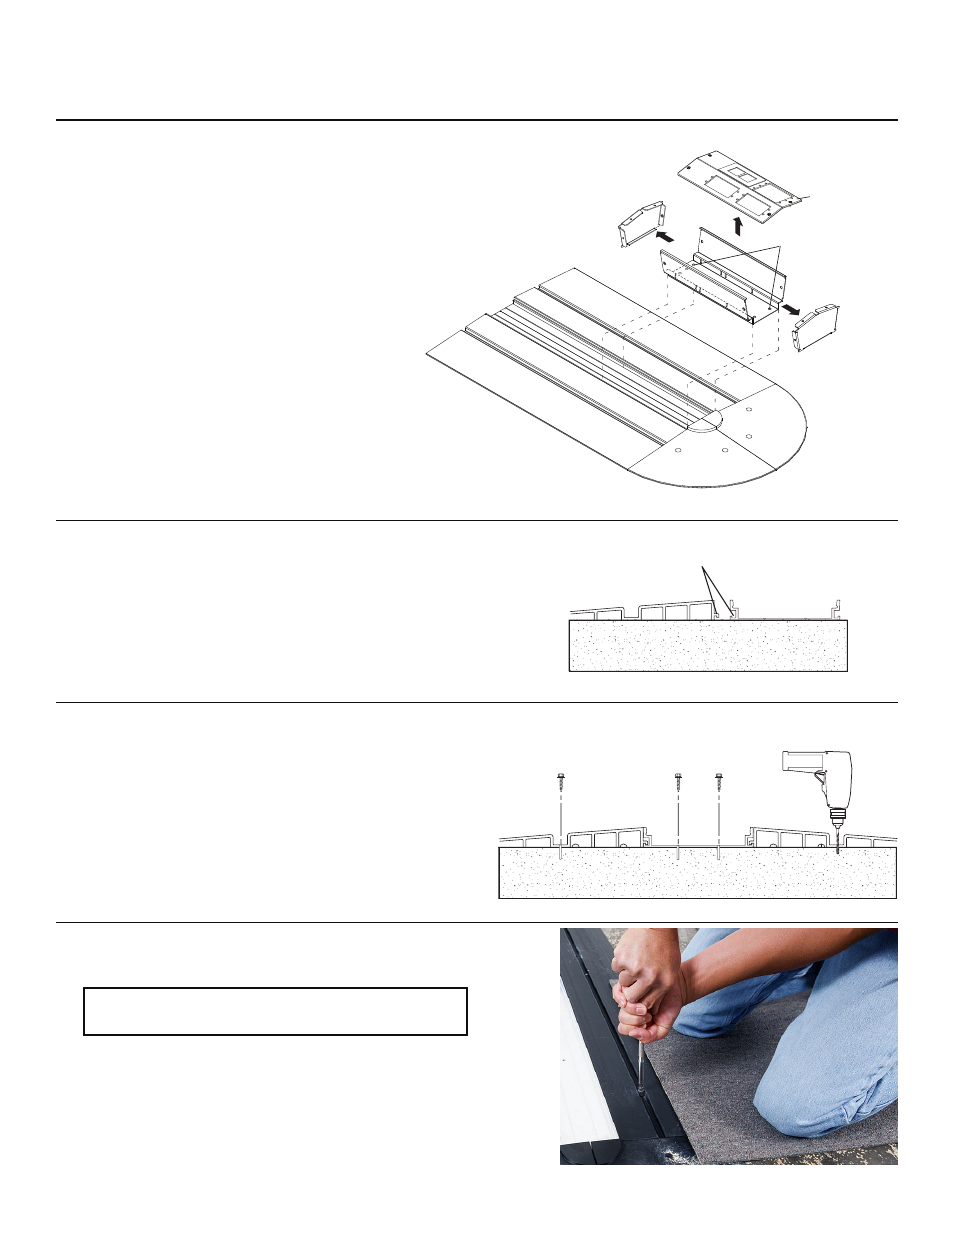
Step 1: Track, cont’d
Drill a 5/32” x 1 1/2” deep hole
into concrete.
Supplied Masonry Screws
Drill into concrete and screw down track
Screw side ramps to floor
1-9
With the provided masonry screws, secure the
track and ramps to the floor.
1-8
Using the provided masonry bit, drill 5/32"
diameter by 1 1/2" deep pilot holes into the
concrete through the predrilled mounting holes
in the track and ramps.
N
Do not use the holes that were drilled to
secure the connectivity box in step 1-6.
1-7
Lay the base track on the floor in the prepared
location.
Mate the tabs in the side ramps with the grooves
in the base track, and place the end ramps in
position at the end of the track furthest from the
wall.
Tab on side ramp
mates with groove
in base track.
Side Ramp
Base Track
Mate side ramp to base track
Pre-drill holes to secure connectivity box
End Plate
End Plate
Cover
Mounting Holes
The end of the
Connectivity Box
with three
mounting holes
faces back
towards the track.
1-6
Remove the cover panel and end plates
from the connectivity box.
Examine the bottom of the connectivity
box: one end has two mounting holes (one
in each corner), the other end has three
mounting holes (one in each corner and
one in the center). The end with three holes
faces toward the track.
Align the end of the box with two
mounting holes with the end of the
base track. Mark where the mounting
holes in the bottom of the box lie over
the base track.
Using a 1/4" bit for drilling metal (not
supplied), drill at least three mounting
holes in the base track to secure the
connectivity box.