Seal system – disassembly and assembly, cont – Watson-Marlow MR-Series User Manual
Page 16
Revision 1.4 / August 2013
Visit our website at
www.masosine.com
16
Seal System – Disassembly and Assembly, cont.
O-ring Seal Disassembly
1. Remove the dynamic radial o-ring, item 513, from the inner diameter of the o-ring seal housing,
item 620.
O-ring Seal Assembly
1. Replace the dynamic radial o-ring, item 513, by placing it into the groove on the inner diameter of
the o-ring seal housing, item 620. Apply a food grade lubricant to the inner diameter of the o-ring.
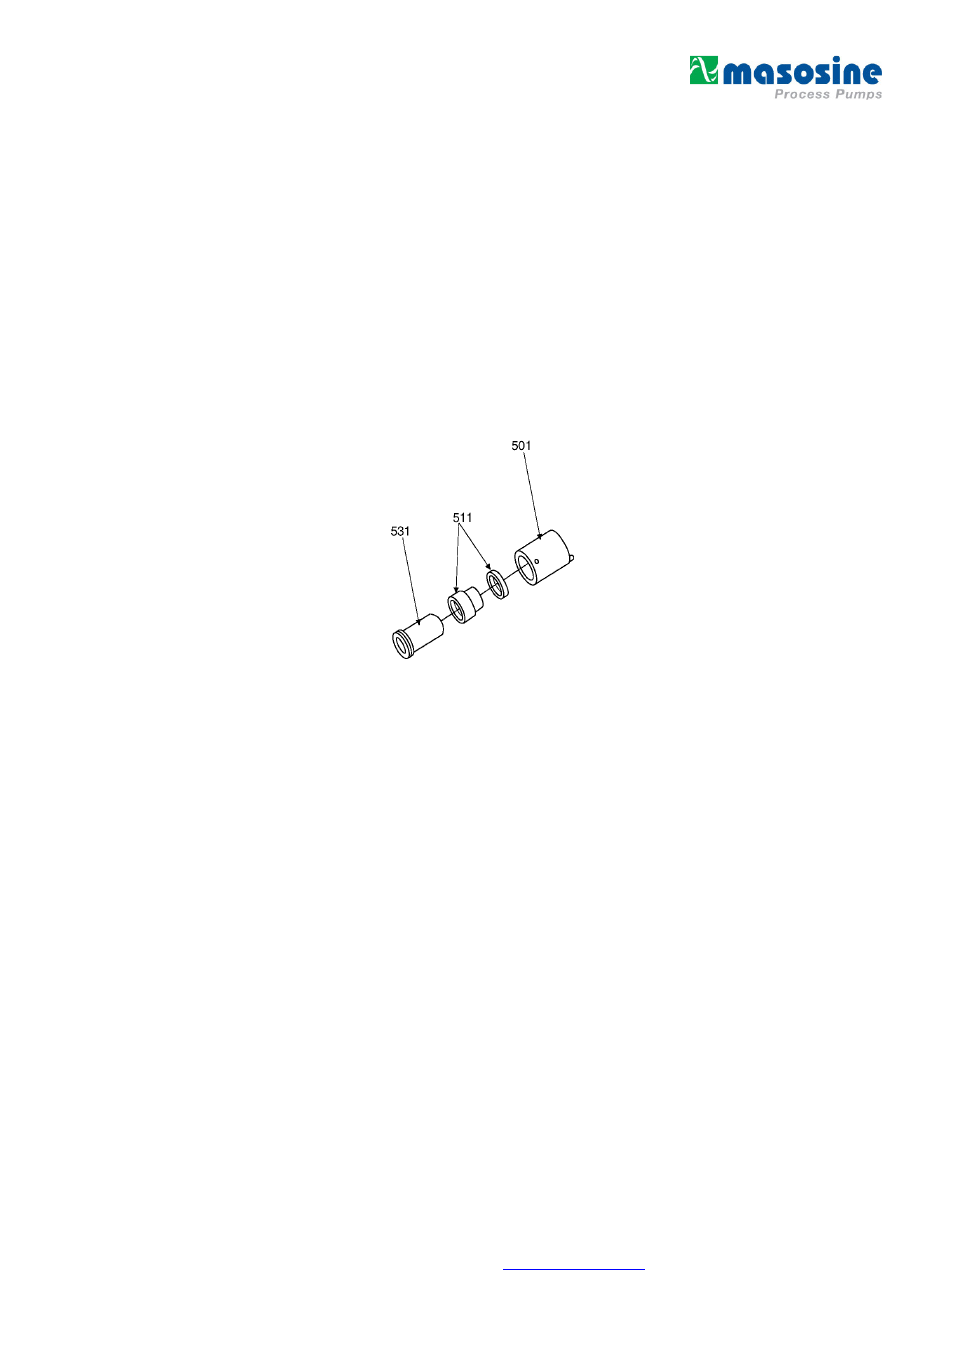
C. Mechanical Seal
Reference the isometric drawing in
Figure 6
for parts identification while following the mechanical seal
disassembly and assembly steps.
Figure 6 – Mechanical Disassembly / Assembly
Mechanical Seal Disassembly
1. Remove the shaft sleeve, item 531, from the mechanical seal housing, item 501. Slide the
mechanical seal, item 511, off of the shaft sleeve.
2. To remove the stationary ceramic face of the mechanical seal, item 511, place the seal housing in
a press with the removal holes at the bottom of the housing. Press the face out of the housing
using the press plug diameter listed in
Table 3
for your specific pump model.
Table 3 – Mechnical, Press (OUT) Plug Diameters
MR-120
=
1-1/2”
or
38.1 mm
MR-125
=
1-3/4”
or
44.4 mm
MR-130
=
2-1/8”
or
53.9 mm
MR-135
=
2-1/8”
or
53.9 mm
MR-150
=
3-7/16”
or
87.3 mm
Mechanical Seal Assembly
1. Apply a food grade lubricant to the inner diameter of the mechanical seal housing, item 501.
2. Place the mechanical seal housing, item 501, into a press with the removal holes at the top of the
housing. Press the stationary ceramic face of the mechanical seal, item 511, into the seal housing
until it reaches the step at the rear of the housing using the press plug diameter listed in
Table 4
for
your specific pump model.