Icon-xt quick start guide – Visara iCON-XT Quick Start User Manual
Page 2
Visara International • 2700 Gateway Centre Blvd, Suite 600 • Morrisville, NC • 27560 • 888 334 4380 • [email protected]
Getting Started
The Factory Default configuration that ships with your unit has all the twinax sessions set to allow connection
with no password requirements. Once you have cabled the unit and set the IP address you can connect to it
with the VT5250 Session Manager, and use the twinax connections immediately. If you have a monitor,
keyboard, and mouse connected to the ICON, you will see the VT5250 Session Manager ready to connect to
any of the twinax sessions. If you do not, you will need to download and run VT5250 from a Windows PC or
another ICON.
7 0 7 0 9 8 - 0 0 2
ICON-XT Quick Start Guide
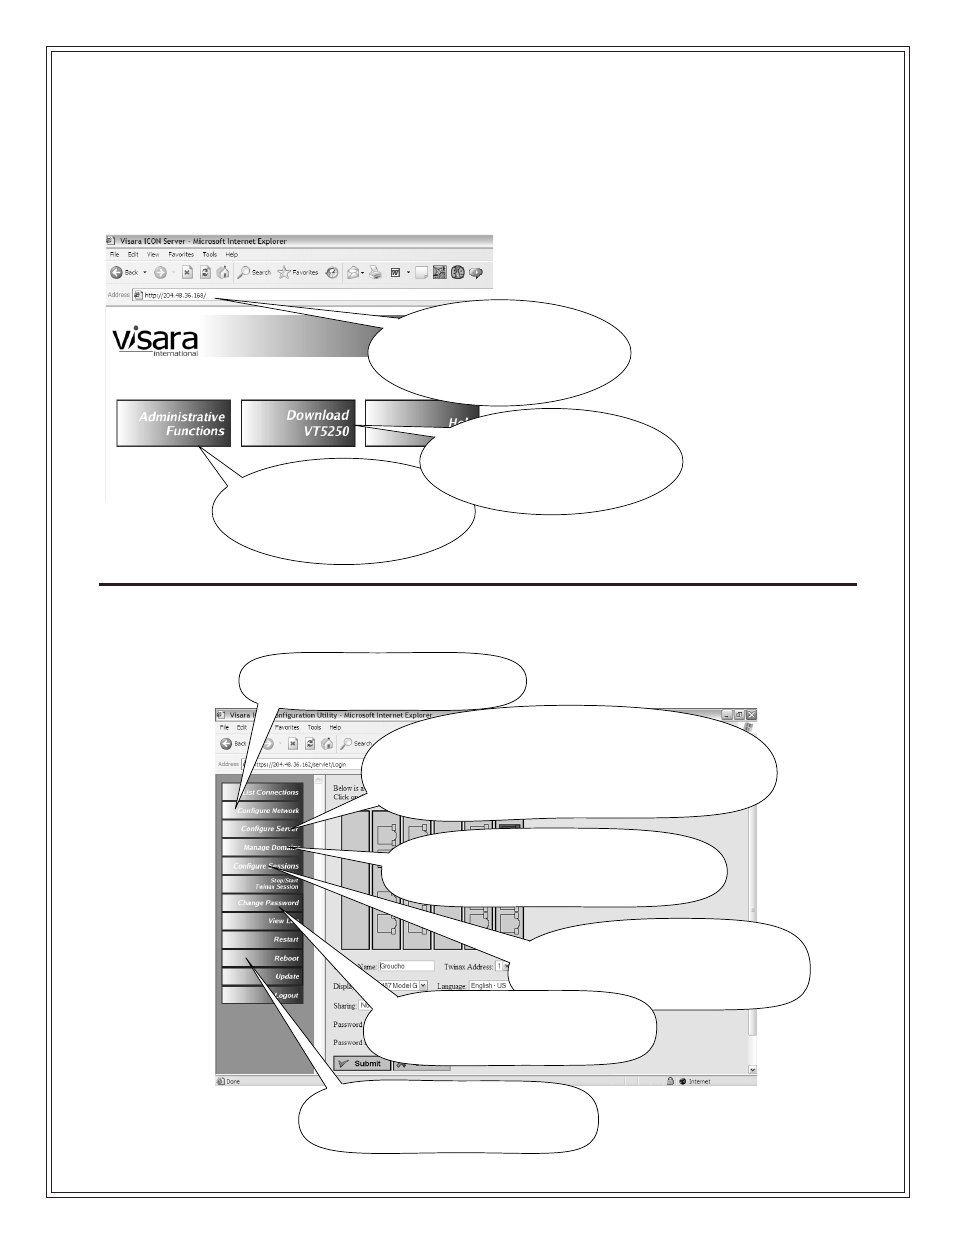
1. Configure the Ethernet connections.
3. Create your list of users, passwords and groups
(if this is the Domain Master).
4. Name the twinax sessions and assign
who can access them and how.
5. It’s a good idea to change the
Administrator’s password.
6. Reboot to apply your changes.
2. Name your ICON, and choose
whether this ICON administers the
usernames and passwords (the Domain Master
does this - a Domain is a group of ICONs,
sharing the same username/password database).
Use this button to configure
networking, sessions, users and
groups. The default password is
admin.
Key in the IP address of your ICON in the
browser address window, or 127.0.0.1
from the ICON itself.
You can download VT5250 from
the ICON by connecting to it with
your PC’s web browser. Download
VT5250 is on the main screen.
Configuring Users, Groups and Sessions