Desa DVF32TMHST User Manual
Page 10
- 9 -
For more information, visit www.desatech.com
LOG SET INSTALLATION
Before proceeding, make sure the gas control valve is in the
“OFF” position. Logs have been packaged separately to
prevent damage to glass or refractory.
1. Remove top and bottom louvers by simultaneously pulling
both top end spring latches towards the center of the appliance
until they are disengaged from locating holes. Repeat for
bottom end spring latches and pull outward. Reverse
procedure to install louvers back.
2. Remove the screen rod by sliding the screen rod to the front
of the unit until the other end is free.
3. To open the glass door, open the pairs of latches located on
the top and bottom of the firebox (refer to figure 20). Use
caution when opening these latches.
4. Carefully open the door. The glass door is mounted to the
firebox with 5 screws.
5. To remove the logs from the shrink-wrap, carefully cut the
plastic around the perimeter of the log. Do not tear the logs
from the package without first cutting the plastic.
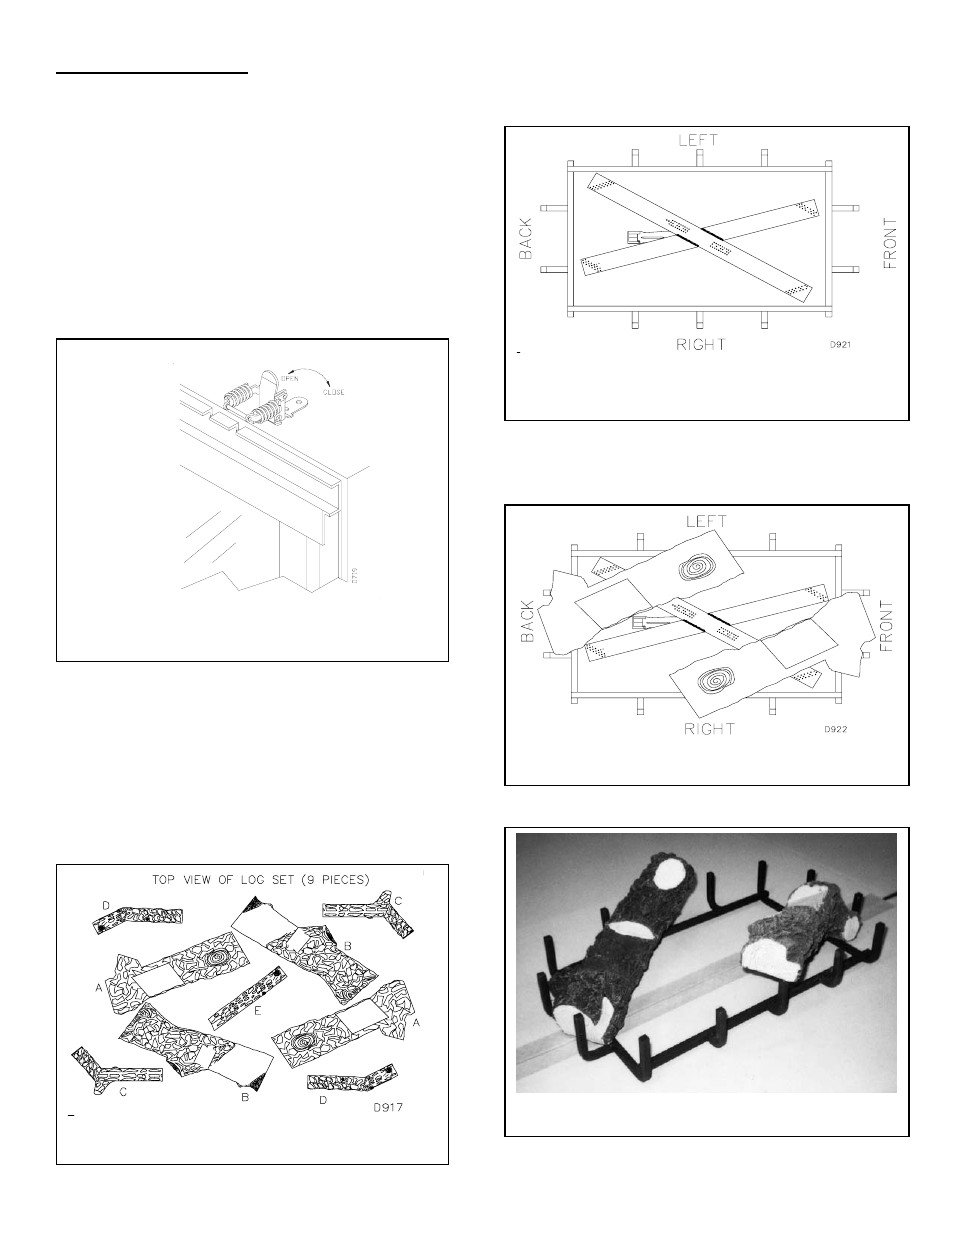
6. Figure 21 shows the log set. Logs “A” have the knot at the
end of the log. Logs “B” have the knot at the middle of the
log. Twigs “C” have the shape of a “Y”. Twigs “D” have the
shape of bent twigs. Twig “E” is a straight twig, which is
placed across the top of Logs “B”.
7. Figure 22 shows the top view of the burner and grate.
8. Place logs “A” as shown in figures 23 and 24.
Figure 20 SPRING LATCHES
Figure 21 TOP VIEW OF LOG SET
Figure 22 TOP VIEW OF BURNER AND GRATE
Figure 23 LOG “A” PLACEMENT
Figure 24 LOG “A” PLACEMENT