Control panel functions, Operating instructions, Figure 10 – Rena L-350 User Manual
Page 12
-10-
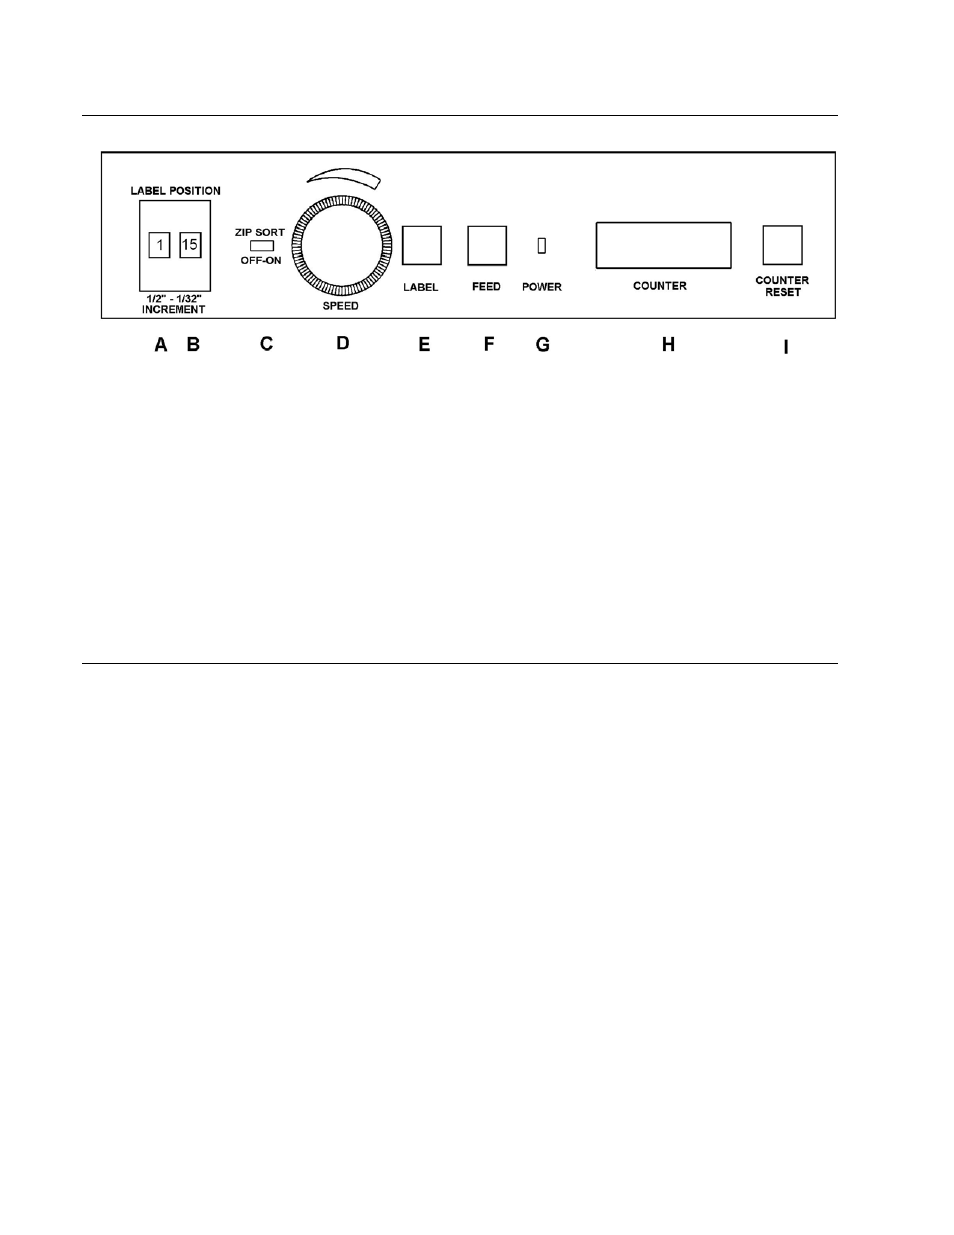
CONTROL PANEL FUNCTIONS
A. Label vertical position adjustment in
1
/
2
" increments
B. Label vertical position adjustment in
1
/
32
" increments
C. Zip-sort switch
D. Speed control
E. Label on/off switch - label ready light
F. Media feed on/off - reset switch media out light
G. Power indicator light
H. Counter
I.
Counter reset
OPERATING INSTRUCTIONS
1. After setting up the L-350 (see Setup Instructions), place a stack of envelopes
between the envelope guides.
2. Pull out the receiving tray one-inch more than the length of the envelope.
Note: If using a conveyor; slide out and remove the receiving tray.
3. Turn the speed control knob [Figure 10D] to minimum and press FEED switch [figure
10F]
4. Observe how the envelopes are feeding. If they are skewing, readjust the stripping
device [Figute2D]. Press the FEED switch again. The L-350 will stop. IF THERE IS
AN ENVELOPE BETWEEN THE EXIT ROLLERS, REMOVE IT SO IT DOES NOT
COVER THE MEDIA PHOTOSENSOR.
5. Set the LABEL POSITION switch to desired setting. Each position of the left switch
Figure 10A] moves the label
1
/
2
". Each position of the right switch [Figure 10B] moves
the label
1
/
32
".
NOTE: Any attempt place labels at a distance greater than the length of the envelope will
cause the labeler to feed media without affixing labels.
6. Make sure there is a label [Figure 11A] visible by the peeling mechanism of the
labeler [Figure 11B]. The photosensor that senses the presence of a label is located
Figure 10