PSE Archery Crossbow 2013 User Manual
Page 6
crossbow owner’s guide
®
10
crossbow owner’s guide
®
11
Loading and sHooting
your crossbow
1. With the crossbow cocked and pointed safely down range,
place an arrow of the correct size in the groove on top
of the rail with the odd colored fletching down (into the
groove). See Fig. 13. Slide the arrow back into the string
under the arrow retention spring until it makes complete
contact with the string. The crossbow is now loaded.
Handle with extreme care.
2. With the crossbow still pointed safely down range, place
the butt of the stock on your shoulder with the front hand
on the foregrip of the stock.
iMPoRTANT: Keep your
thumb and fingers well below the path of the string
and cables. Keep your eye at least 2 inches behind the
rear sight or scope.
3. Move the safety to the “fire” position by pushing it forward.
Take careful aim and squeeze the trigger smoothly to fire
the crossbow.
Fig. 13
Fig. 14
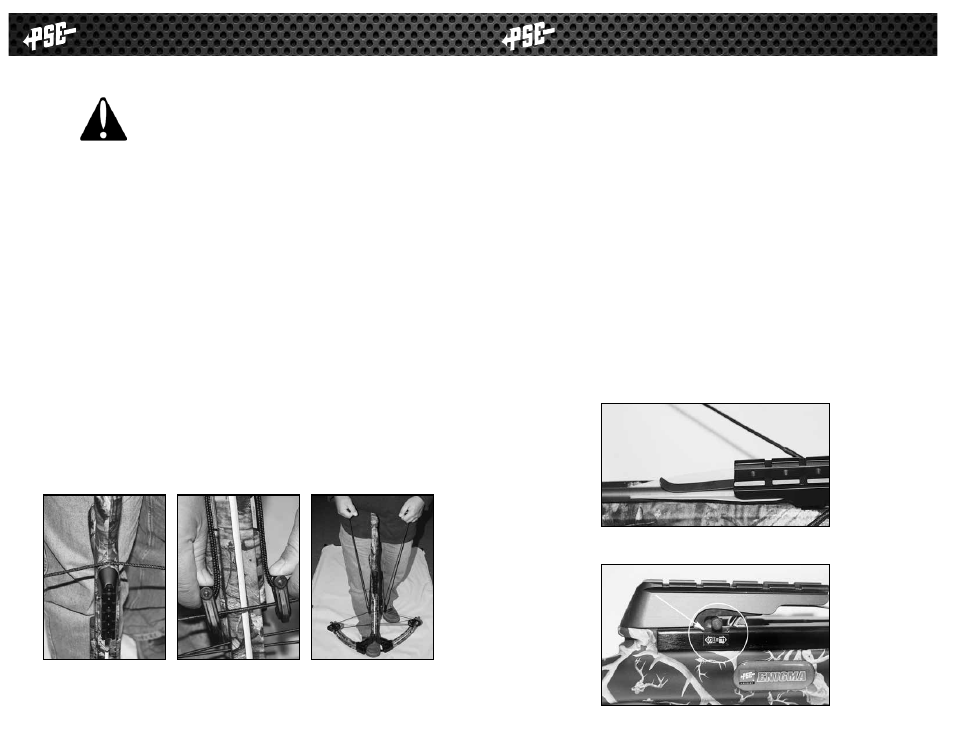
cocKing tHe crossbow
do
NoT cock or load your crossbow unless you
are in a safe area to do so.
1. Before cocking your crossbow, move the safety into the
“fire” position by pushing it forward and pull the trigger to
assure that the mechanism is ready to accept the string.
2. With the stirrup of the crossbow resting on the ground,
place your foot well into the stirrup and lay the center of
the auxilliary cocking rope under the shoulder of the grip
stock just behind the scope rail (Fig. 1). Set the auxilliary
cocking rope hooks securely on the string facing down,
on both sides of the rail (Fig. 2). Pull straight up using
the “T Handles” until the string is fully engaged.
do NoT
release the string completely until you are certain it
is engaged. If the trigger latch did not capture the string,
lower the string gently and repeat steps 1 and 2.
3. When the crossbow is cocked, the safety is automatically
in the “safe” position. Always check to ensure that the
safety is into the “safe” position. Never assume that the
safety is on!!
Fig. 1
Fig. 2
Fig. 3