Mounting the scope, Mounting the accessories, Crossbow owner’s guide – PSE Archery Crossbow 2013 User Manual
Page 5: Setting the safety, Smoke, Model
CROSSBOW OWNER’S GUIDE
CROSSBOW OWNER’S GUIDE
®
®
9
Fig. 1
Fig. 2
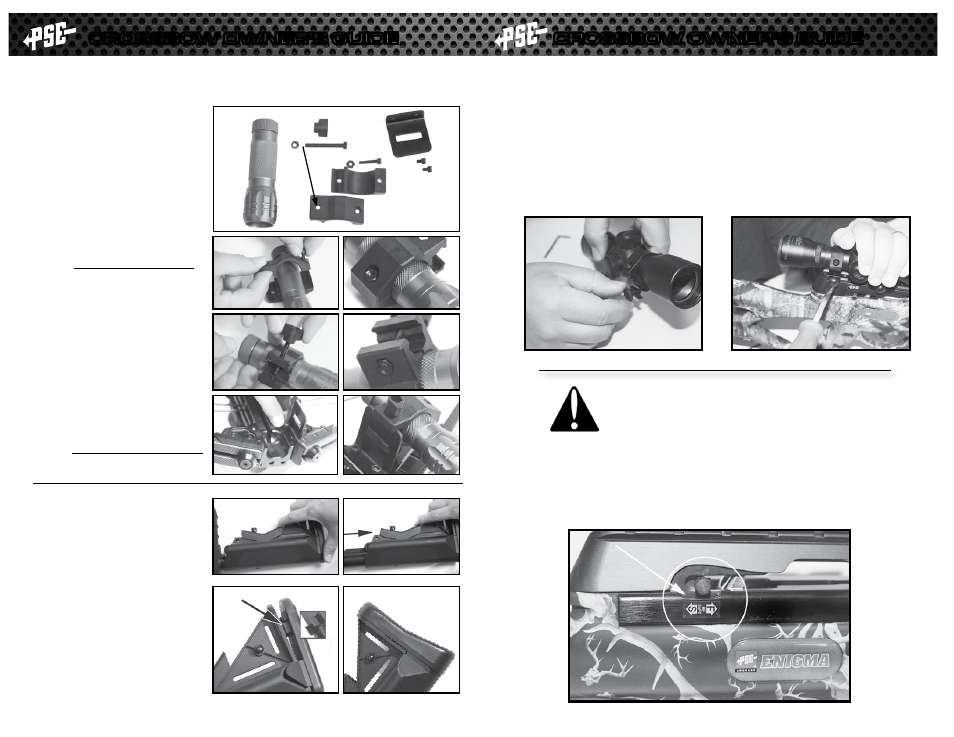
mounting tHe scope
Loosen screws on the scope rings (Fig.1) and mount the scope
to the 7/8” dovetail scope rail. (Fig.2)
Set the scope on the scope rail in the desired position and
secure the screws. (Fig 2)
setting tHe safety
The safety lever (located on the side of the trigger assembly)
is provided for your safety. Familiarize yourself with the correct
position prior to use! The illustration below shows the correct
position for safe and fire positions.
smoKe
™
modeL
mounting tHe accessories
Tactical flashlight
(included with Smoke
™
)
fig. A: Flashlight components
Place the two mounting clamps (3)
around the flashlight (6)
Place the shorter screw (4) into the
mounting brackets (3) as shown in
(fig. b). Place a nut into the opposite
side of of the bracket into the hexagonal
hole and tighten until slightly snug.
(fig. c) Do not overtighten the screw.
Fit the longer screw into the plastic
wing nut, (1) and slide the screw into
the notched side of the mounting
brackets.(3)
(fig. d) Fit a nut into the
opposite side of the hexagonal hole
of the bracket
(fig. E) and tighten the
wing nut a few turns.
Mount the bracket (5) as shown
(fig. f)
into the prod assembly of the crossbow
using the two bolts provided.(7)
Mount the flashlight assembly onto the
bracket (5) as shown
(fig. G) and
tighten the screws on the clamps until
secure. Do not over tighten the screws.
A
b
c
d
E
f
G
Adjustable Stock
(included with Smoke
™
)
fig. 1: Depress the lever
fig. 2: Slide the stock to your
desired position
optional buttstock
(included with Smoke
™
)
The Smoke includes a standard buttstock
(fig. 3) as well as a thicker buttstock for
longer reach. To remove, depress the two
clips on the inside of the buttstock and
slide it out. Replace with the optional
buttstock and slide it until it clicks snugly
into place.
(fig. 4)
1
2
3
4
clips
(1)
(7)
(3)
(6)
(5)
(4)
8