Motion detection configuration, Enable motion detection, Creating a detection area – OpenEye EasyNVR User Manual
Page 52
52
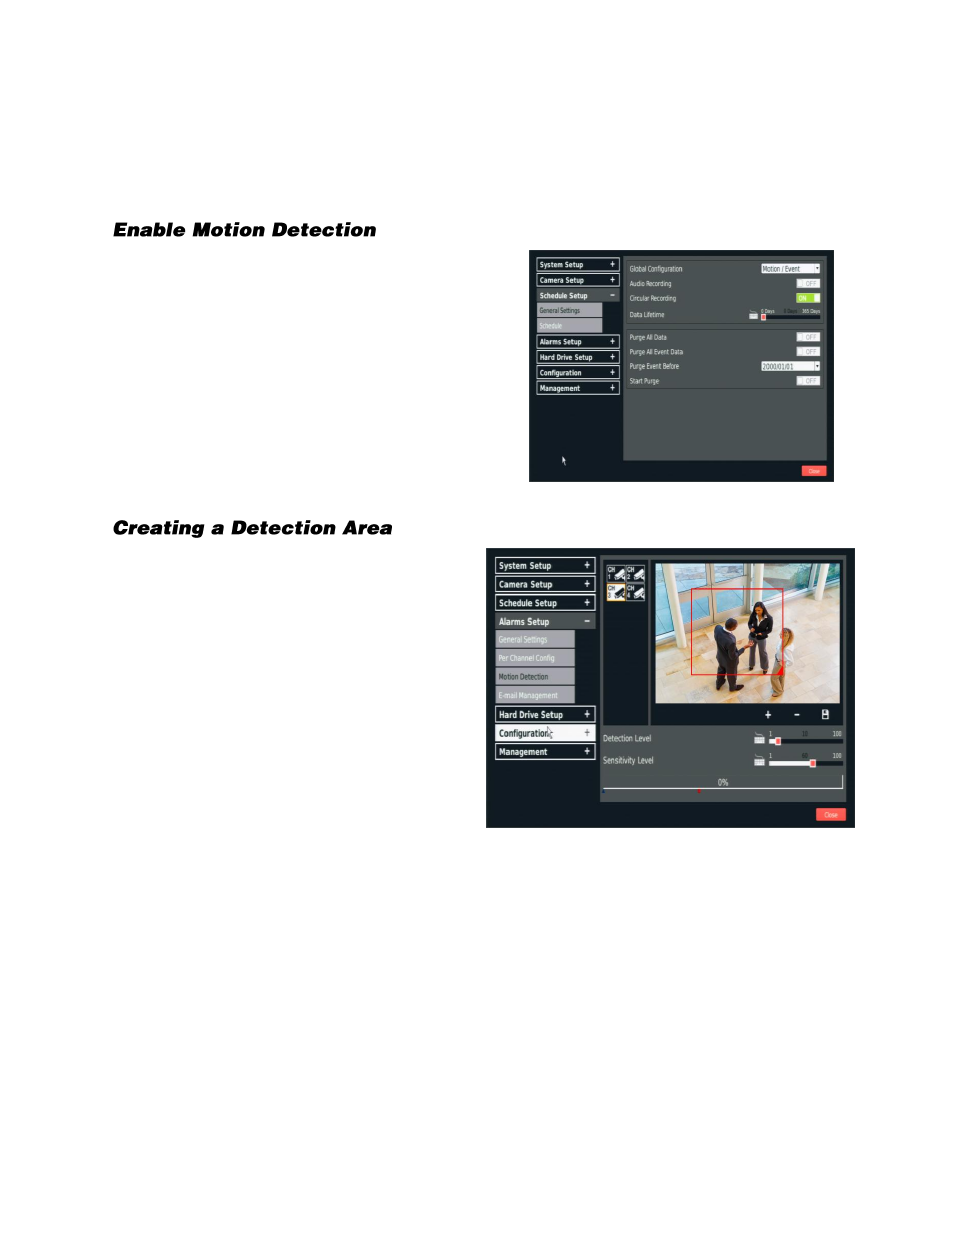
Motion Detection Configuration
Detection configuration allows you to designate an area in the camera view that will trigger motion
detection.
1.
On the Hover menu, click
Setup.
2.
Click
Schedule Setup,
and then click
General Settings.
3.
Set
Global Configuration
to
Motion / Event.
4.
Click
Alarms Setup
, and then click
Per
Channel Config
.
5.
Ensure that
Motion Detect
is set to
On
.
1.
On the Hover menu, click
Setup
.
2.
Click
Alarms Setup
, and then click
Motion Detection
.
3.
Click a
Camera Channel
.
4.
Click and drag your mouse pointer to
create a new detection square.
Note
The size of the detection square
can be modified by dragging the
lower right corner of the square to
the desired size.
5.
Modify the
Detection Level
as desired.
Detection Level
– controls the
amount of motion required for an
alarm to be triggered. The default
setting is 10. This sets the detection level for each sampling pixel; the smaller the value, the
more sensitive it is.
a)
Use the slider bar to adjust the detection setting.
6.
Modify the
Sensitivity Level
as desired.
Sensitivity Level
– defines how much of an area must change before a motion event is
triggered. The default setting is 80. Setting the Sensitivity Level to a higher value will make it
easier for motion detection to trigger a motion event.
a)
Use the slider bar to adjust the sensitivity setting.
7.
Click
Close
.