Cleaning scales, Smartprecision module mounting options – MicroE 3500V Mercury User Manual
Page 13
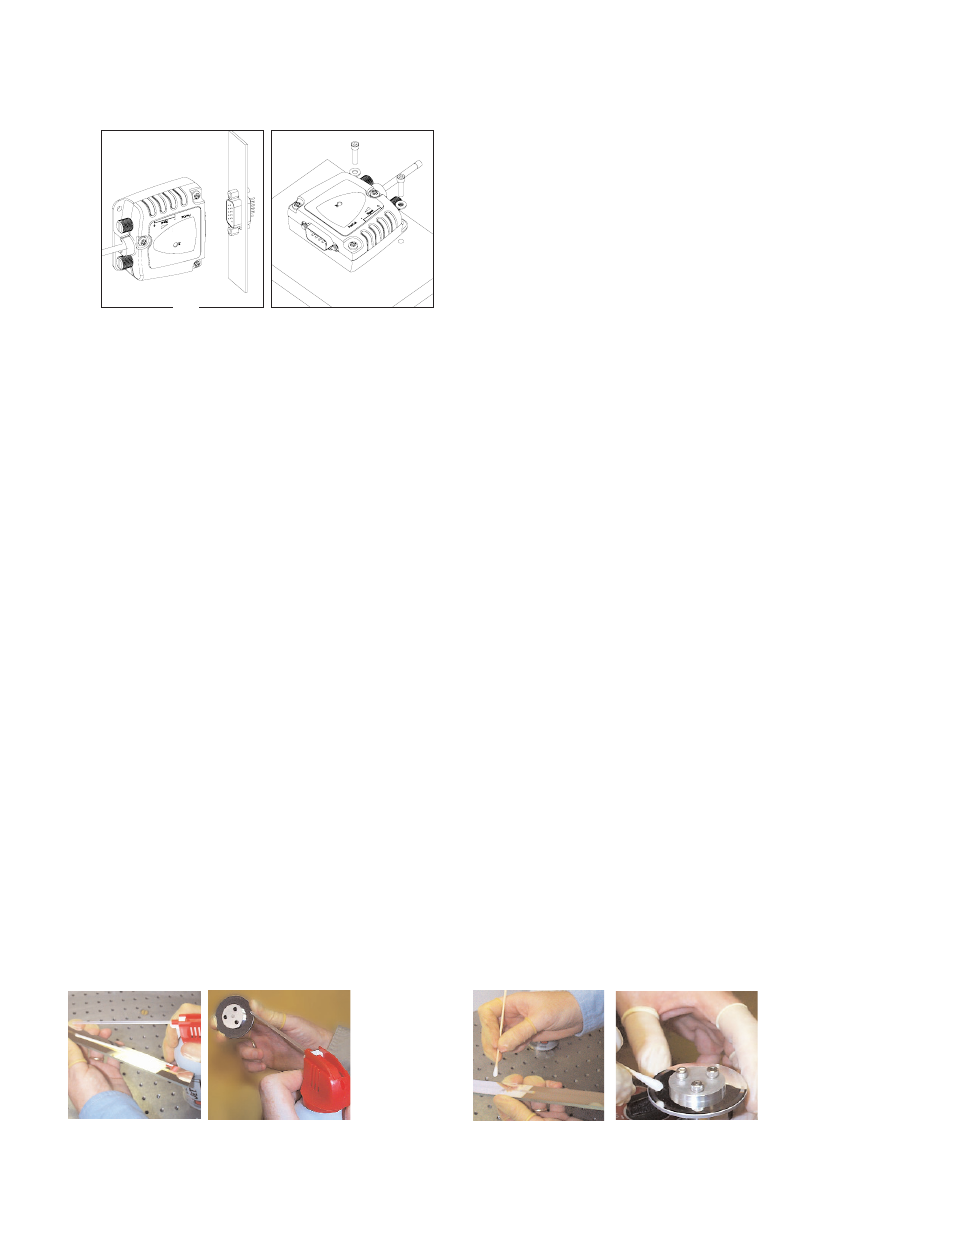
SmartPrecision Module Mounting Options
The SmartPrecision electronics module may be mounted directly to a
bulkhead connector using the integral thumb screws shown in figure A.
Alternatively, the module may be used with an extension cable and
mounted to a base plate using the mounting tabs as shown in figure B.
A
B
Reference Section
Troubleshooting
Problem
The Power/Calibration indicator will not come on.
Solution
• Make sure that the SmartPrecision
TM
electronics’ 15-pin D-sub connector is fully seated and connected.
• Confirm that +5 Volts DC is being applied to pin 12 on the SmartPrecision electronics’ 15-pin HD connector and that pin 13 is connected
to ground.
Problem
Can't get the SmartPrecision
TM
electronics’ "Signal" LEDs better than red or yellow; or the green, “ Proper Alignment”
indicator doesn't stay illuminated over the full length of the scale.
Solution
• Verify that the sensor has been aligned to the scale and that the mounting screws are tight. Check the dimensions for the mechanical
mounting holes (and clamps if any) to make sure that the sensor is correctly located over the scale. Refer to appropriate the
interface drawing.
• Check that the scale is firmly mounted and can't jiggle or move in other than the intended direction.
• Make sure that the scale is clean over its entire length or circumference.
Problem
The green Power/Calibration indicator is flashing unexpectedly.
Solution
• Part of the normal setup procedure is to activate the SmartPrecision
TM
electronics’ Index/Calibration process by pressing the recessed button
the SmartPrecision
TM
electronics’ connector body. The On/Index LED will begin to flash until the index mark on the scale passes under the
sensor at least one time in each direction.
Problem
Can't Complete the Index/Calibration process - the green Power/Calibration indicator doesn't stop flashing.
Solution
• Verify that the sensor is mounted in the correct orientation to the scale for the desired index mark. Refer to the interface drawing.
• Refer to step 5 of the installation procedure to insure proper operation.
Cleaning scales
General
Particle
Removal
Blow off the
contamination
with nitrogen,
clean air, or a
similar gas.
Page 11
Contamination
Removal
Use a lint-free cleanroom
wipe or cotton swab
dampened with isopropyl
alcohol or acetone only
to wipe the surface
clean. Handle the scale
by the edges. Do not
scrub the scale.