2 & 3) connect to the pc and connect power, Connect to the pc and connect power … -3 – Measurement Computing 200 Series DaqBook User Manual
Page 15
DaqBook User’s Manual
01-23-02
Setup and Startup 2-3
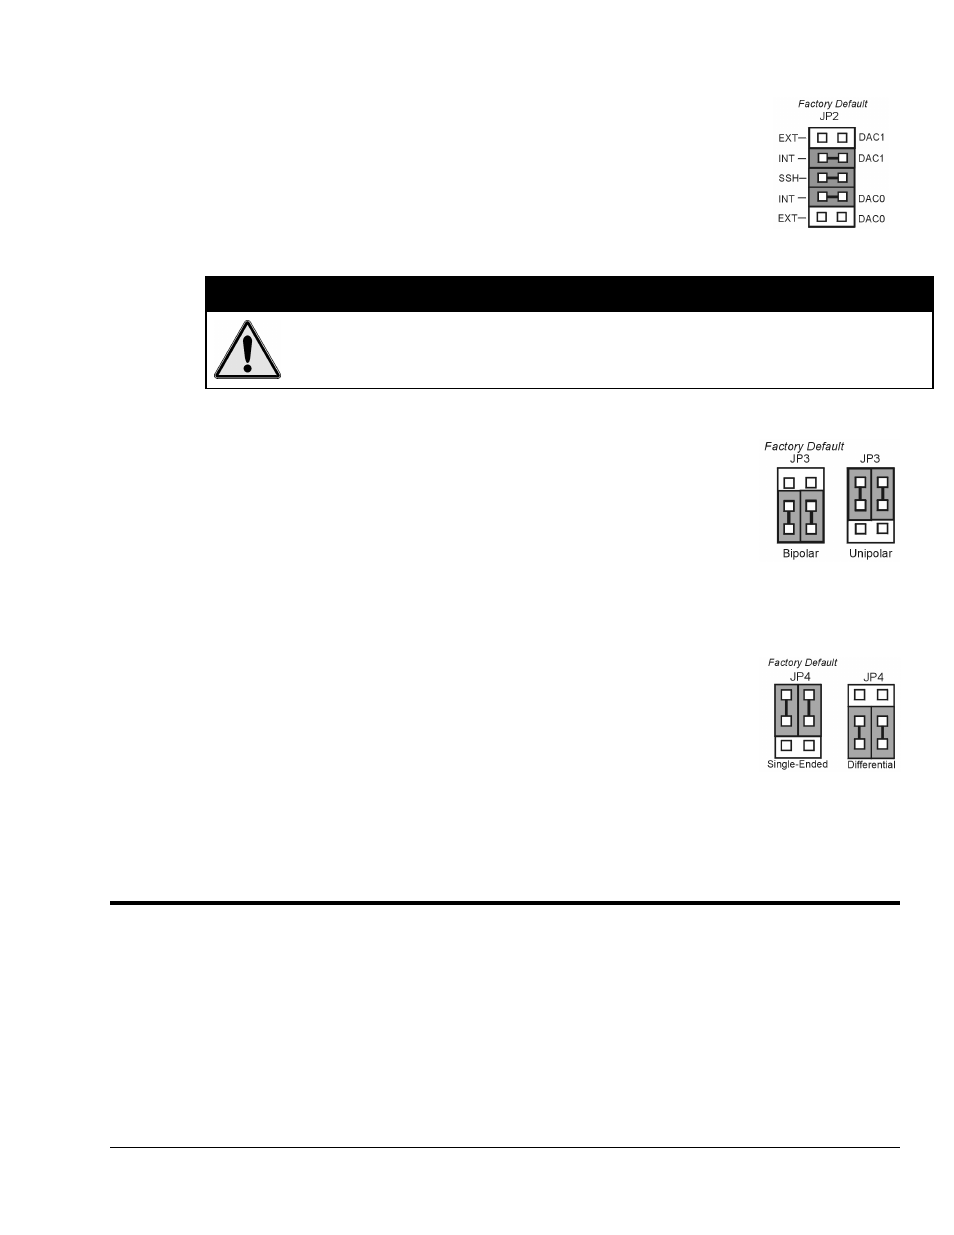
JP2 –
DAC Reference Voltage and SSH (Simultaneous Sample and Hold)
JP2 selects an Internal (default) or External reference voltage for the two separate
analog outputs.
JP2 also selects SSH (default) for applications using one or more of the following:
DBK2, DBK4, DBK5, DBK7, DBK17, DBK50, or DBK51.
We recommend that you leave these jumpers at the factory default setting
(see figure at right). Refer to the JP2 material in chapter 3 prior to making
changes.
&$87,21
Incorrect jumper placement can damage the DaqBook!
JP2 – If EXT DAC0 or EXT DAC1 are used, the SSH jumper must be removed!
JP3 and JP4 - Placing JP3 [or JP4] jumpers horizontally can damage DaqBook!
JP3 –
Bipolar or Unipolar A/D Operation
JP3 selects Bipolar (default) or Unipolar operation for the A/D converter.
•
If using DBK cards, leave these jumpers in the factory default positions.
•
If you want 0-10V range [instead of –5 V to +5 V] and are not using
DBK cards, position JP3 jumpers to select Unipolar.
Note: For DaqBook/200, /216 and /260 a JP3 equivalent setting is made in software.
JP4 -
Single-ended or Differential Analog Input Channels
JP4 selects the analog input lines as 16 Single-Ended channels (default);
or 8 pairs of Differential channels.
If using DBK cards, leave these jumpers in the factory default positions.
If you are not using DBK cards and you want differential channels, then position the
jumpers for Differential.
Note: For DaqBook/200, /216 and /260 a JP4 equivalent setting is made in
software.
(2 & 3) Connect to the PC and Connect Power
(a)
Verify DaqBook’s power switch is in the “0” (OFF) position.
(b)
Connect the female-end of the supplied cable to DaqBook’s connector labeled, “FROM PC PARALLEL
PORT.”
(c)
Connect the male-end of the cable to an available parallel port on the PC.
(d)
Connect the supplied AC-to-DC adapter’s jack-end to DaqBook’s POWER IN connector.
(e)
Connect the adapter’s plug to a standard AC outlet.
(f)
To verify connections, turn ON the power by placing the rocker-arm POWER switch to the “1” position.
The POWER LED should light up.