Kreg PRS1200 Precision Beaded Face-Frame System User Manual
Page 9
Use
9
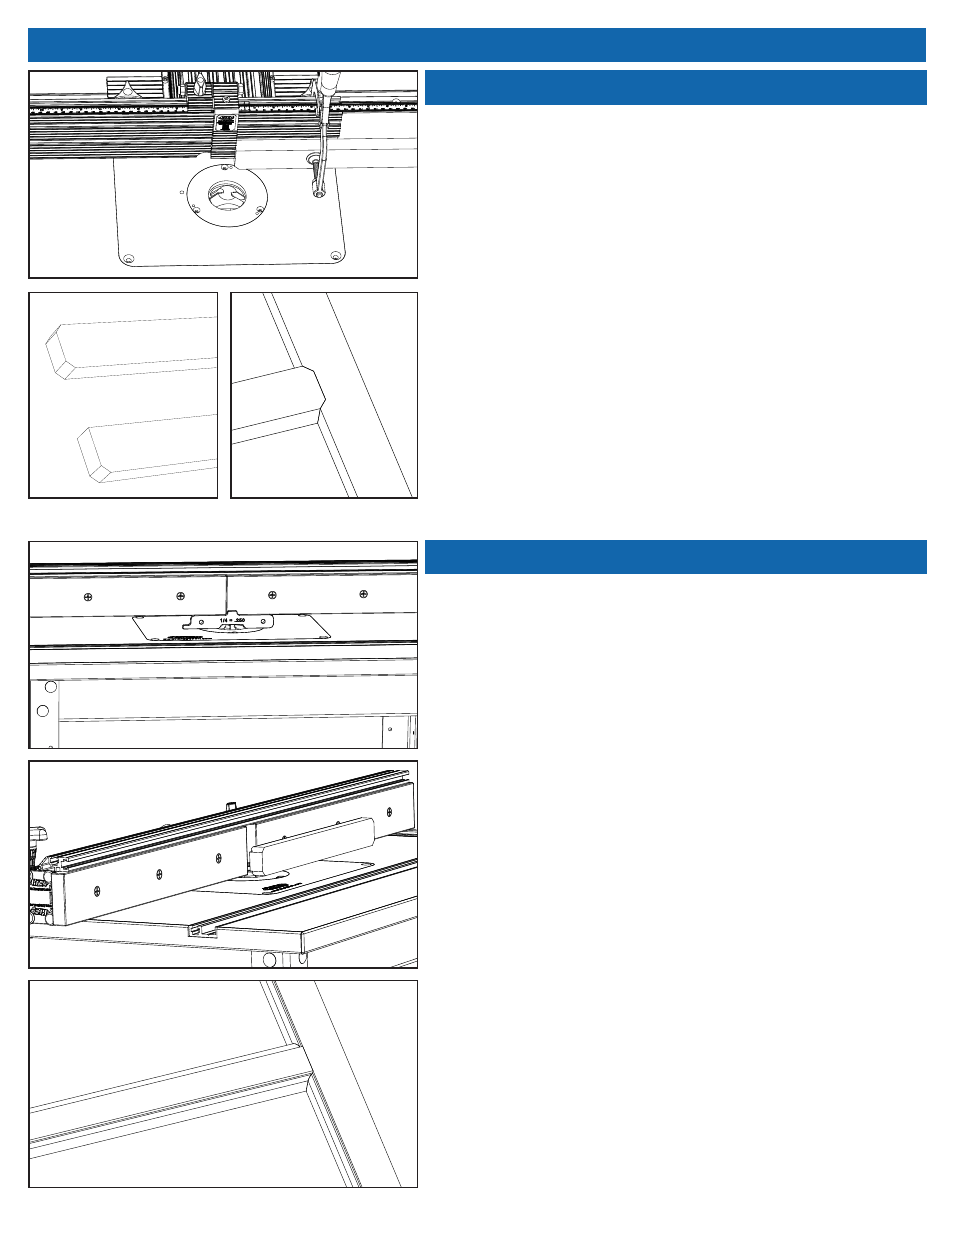
Notching the Rails
Routing the Bead
Secure your Router Stop at ½” on the left side of the bit. Gently rest the
workpiece against the stop and clamp down firmly. Make the cut and
then flip the workpiece to repeat. On the center rails, you’ll be making
the same cut to all four corners. On the outer rails, you’ll just be trimming
the inner corners.
After all of the rails have been machined, dry-fit the pieces and make
any adjustments as necessary.
Remove the ¼” notching bit, insert the ¼” beading bit, and replace the
Precision Beaded Face-Frame Fence with your standard router fence.
Next, carefully set the height of the bit by using the included setup bar.
The top of the cutter, below the bearing, should be just touching the
bottom of the setup bar.
Lock the bit into place, bring the bit up to speed, and run each workpiece
through as desired. The center rails will get both sides machined, while
the stiles and upper and lower rails will only have a bead on one side.
Again, dry-fit the workpieces to ensure a proper fit. If everything is as
it should be, assemble the frame using Kreg Joinery™. Any of our
popular Kreg Jigs or our high-speed production machines designed for
woodworking professionals will work perfectly.