1 hot spot function – Kemppi RA User Manual
Page 28
EN
6.1 hOt spOt function
NOTE!
The HOT SPOT component kit is suitable for use with the FE 20/25 welding guns only.
setting and function
1.
Before using HOT SPOT function, release the pressure tension arms at the wire feed
mechanism.
2.
Rotate the filler wire spool slowly clockwise, removing the filler wire away from the FE
welding gun contact tip and neck.
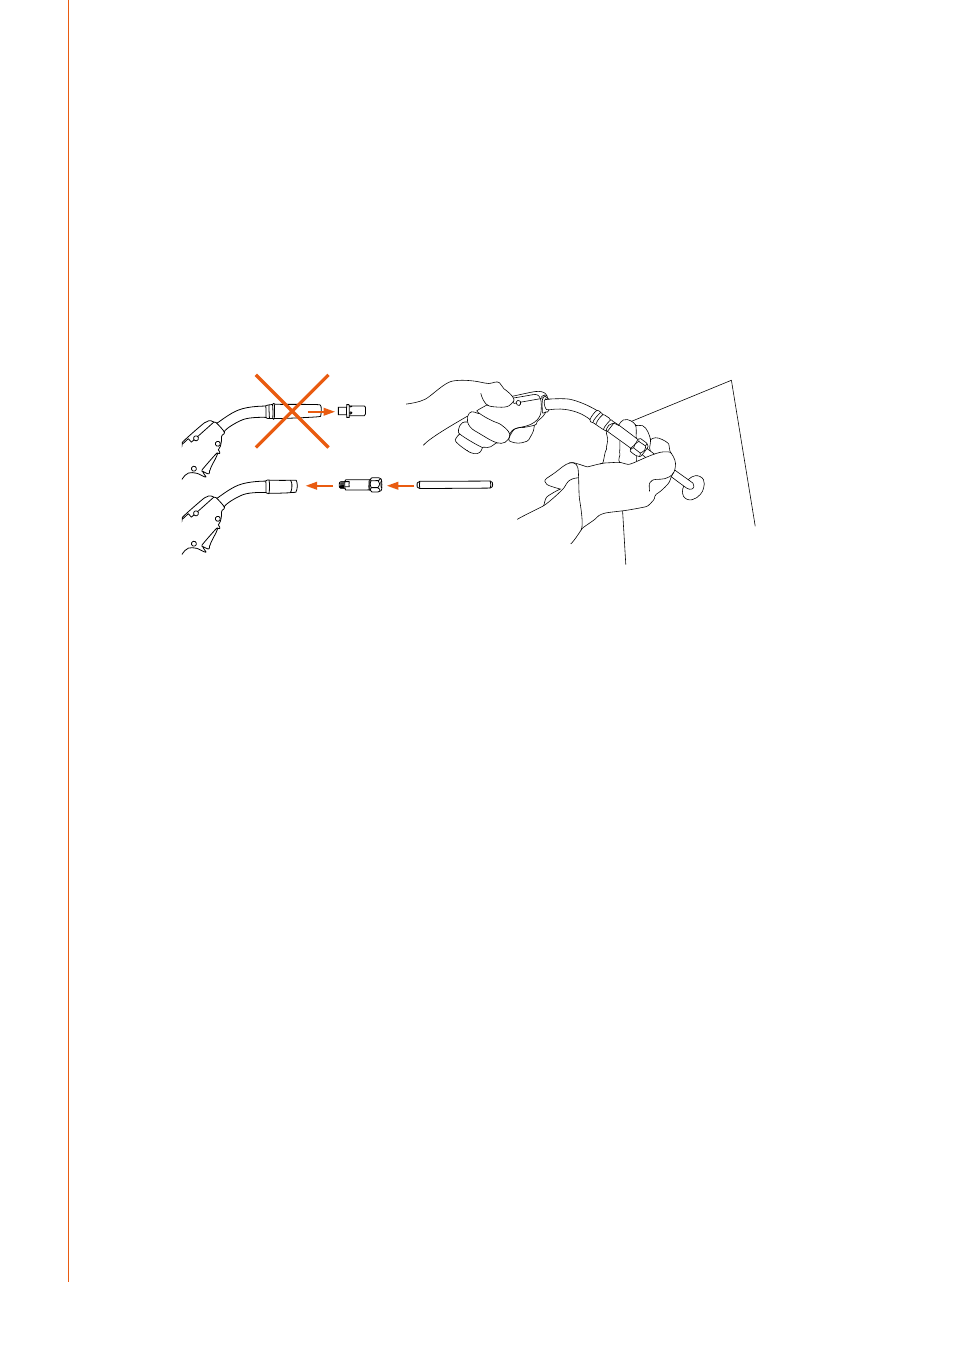
3.
Fit the special HOT SPOT electrode adaptor and carbon electrode into the gun head as
shown.
9592106 holder
4192160
carbon electrode
FE 25
FE 25
4.
Select HOT SPOT mode with the control panel button 6.
5.
Select the required HOT SPOT power level. There are 4 power level options depending
on the machine type in use.
6.
Place the carbon electrode to the work piece, fixing, or area requiring spot heating.
7.
Pull the trigger to activate the HOT SPOT function. The electrode will quickly heat up and
depending on the power level set , will glow red hot.
8.
When sufficient heating effect is reached, release the trigger and remove the electrode
from the work piece.
9.
When HOT SPOT process is complete, press control panel button 6 to return the machine
to standard MIG/MAG mode.
10. When cool and safe to handle, remove the HOT SPOT carbon and holder, replacing the
standard FE welding gun parts ready to continue welding.
NOTE!
HOT SPOT function is only possible in 2T gun trigger mode. If 4T selection is made, the
function will automatically revert to 2T operation.
Kempact RA 181A, 251R, 251A, 253R, 253A, 253RMV, 253AMV, 323R, 323A, 323RMV, 323AMV
26