2 mounting and locking of filler wire spool – Kemppi RA User Manual
Page 12
EN
NOTE!
In all cases the chassis design is not recommended for lifting its weight clear of the
ground by the handles or any other means, with or without a gas cylinder loaded in place. When
transporting the machine between sites, welding gas cylinders must be removed from the chassis,
secured and transported by other means.
4.
BefOre yOu start using the unit
4.1 installing filler wire
Kempact RA is designed for 300 mm wire spools and the following filler wire types:
• solid wires
• flux-cored wires
• self-shielded flux-cored wires
• stainless steel wires
• aluminium wires
• brazing wires
When choosing appropriate filler materials, remember that the wire must have approximately
the same melting point as the base material to be welded. MIG brazing process is an exception
to this rule.
NOTE!
When changing the filler wire, always check that the feed rolls, their groove shape and size
and the wire liner inside the welding gun cable are suitable for the wire you are using. Also check
that you are using the correct polarity for the filler wire.
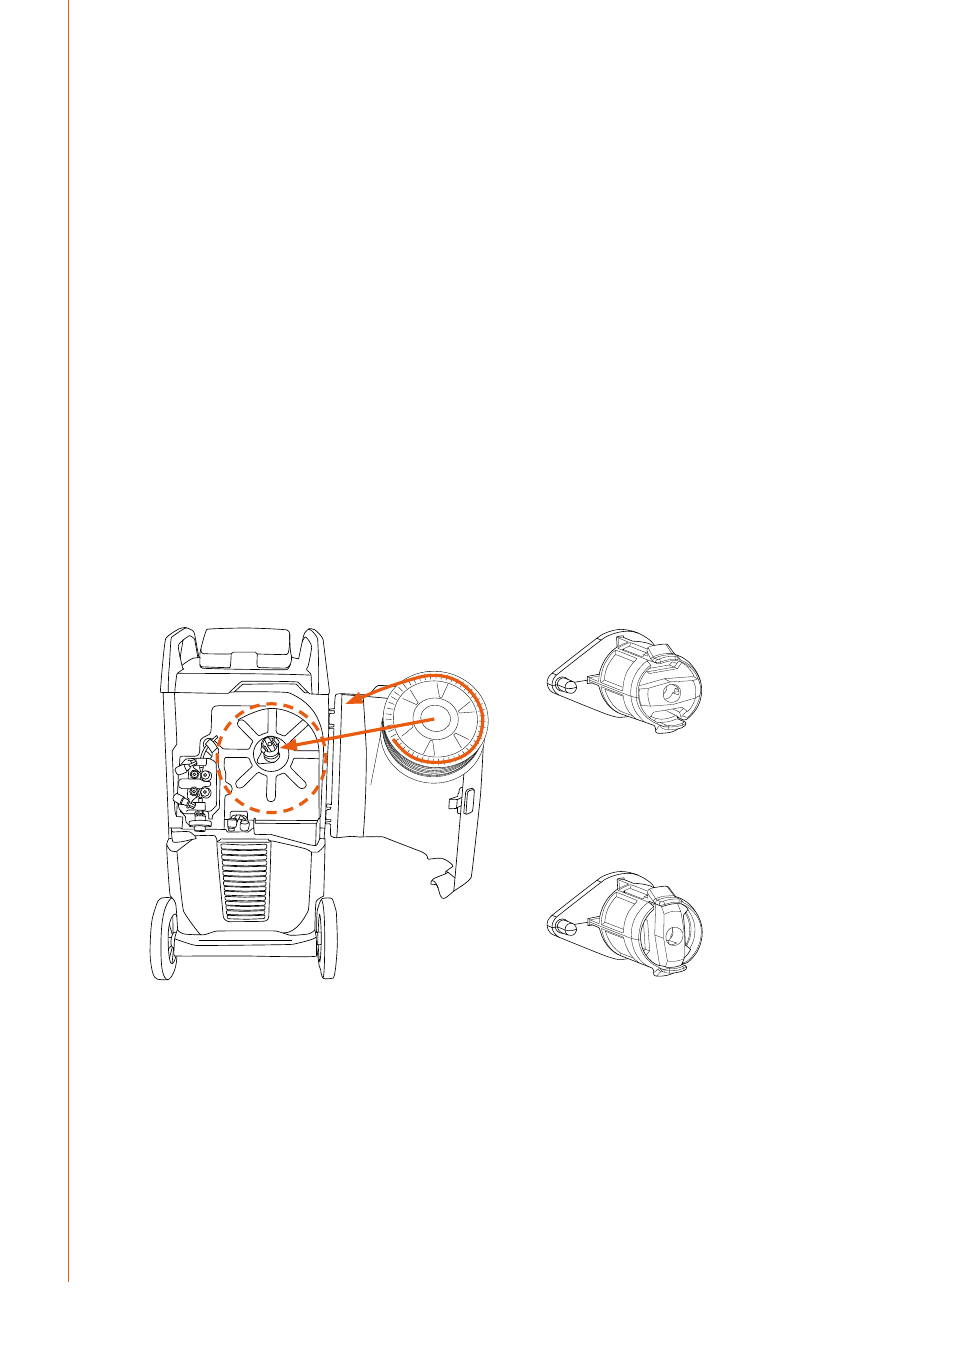
4.2 mounting and locking of filler wire spool
2.
1.
3.
to mount the wire spool:
1.
Turn the locking knob of the spool holder so that the locking clips are opened (1).
2.
Check the rotating direction of the wire spool and push the spool into its place so that it
rotates in the right direction (2).
3.
Turn the locking knob of the spool holder to close the locking clips (3).
NOTE!
Check that the filler wire spool is correctly mounted and locked into position. Ensure the
spool is not damaged or deformed in such a way that it can rub or chaff against the internal
surface of the wire feed unit chassis or door. This may result in increased drag, impacting on weld
quality. This may also result in long term wire feed unit damage, rendering the unit unserviceable
or unsafe to use.
Kempact RA 181A, 251R, 251A, 253R, 253A, 253RMV, 253AMV, 323R, 323A, 323RMV, 323AMV
10