JIMS Box 2 1208-1352 (all models of 120, 131, or 135 Alpha, Beta and Evo Mount Engines) User Manual
Page 3
555 Dawson Drive, Camarillo, CA 93012 Phone 805-482-6913 • Fax 805-482-7422
2
Rev I
8-12
No.1208-1352
A Division of Thiessen Products, INC
IIn
ns
st
tr
ru
uc
ct
tiio
on
n S
Sh
he
ee
et
t F
Fo
or
r B
Bo
ox
x 2
2 1
12
20
0”
”,, 1
13
31
1”
” o
or
r 1
13
35
5”
”
E
En
ng
giin
ne
e A
As
ss
se
em
mb
bl
liie
es
s O
Or
r E
En
ng
giin
ne
e R
Ra
ac
ce
e K
Kiit
ts
s
• Always handle pistons with great care. While they are capable of withstanding extreme
acceleration loads, they can also be destroyed by a two-foot fall onto a hard surface.
• Piston ring end gaps must be checked and adjusted if required, use a ring gap tool and do the work
away from the engine. Piston ring particles are very hard and should not be allowed anywhere near
the open engine. Make sure you wash your hands after adjusting ring gaps or doing any
other
grinding.
• Avoid the use of sandpaper. Keep all abrasives away from your work area and the internal compo-
nents of your new JIMS 120, 131 or 135 Race Kit.
• Do not use pressurized air to clean anything. Its use virtually guarantees damaging particles will get
into your new engine. If at all possible, use liquid cleaners, soft brushes and clean lint-free towels
instead.
STEP 1: Piston inspection
• There should be no dents, dings or gouges on any surface of the pistons. Pay particular attention to
edges and corners especially the corners formed by the piston pin hole and the sides of the pistons.
They should be smooth with no nicks or deformations. If any burrs are noted please contact the
JIMS Tech Department (805-482-6913)
• Inspect the piston ring grooves for any deformations.
• Clean the pistons and then proceed to the next step.
Piston and ring installation information:
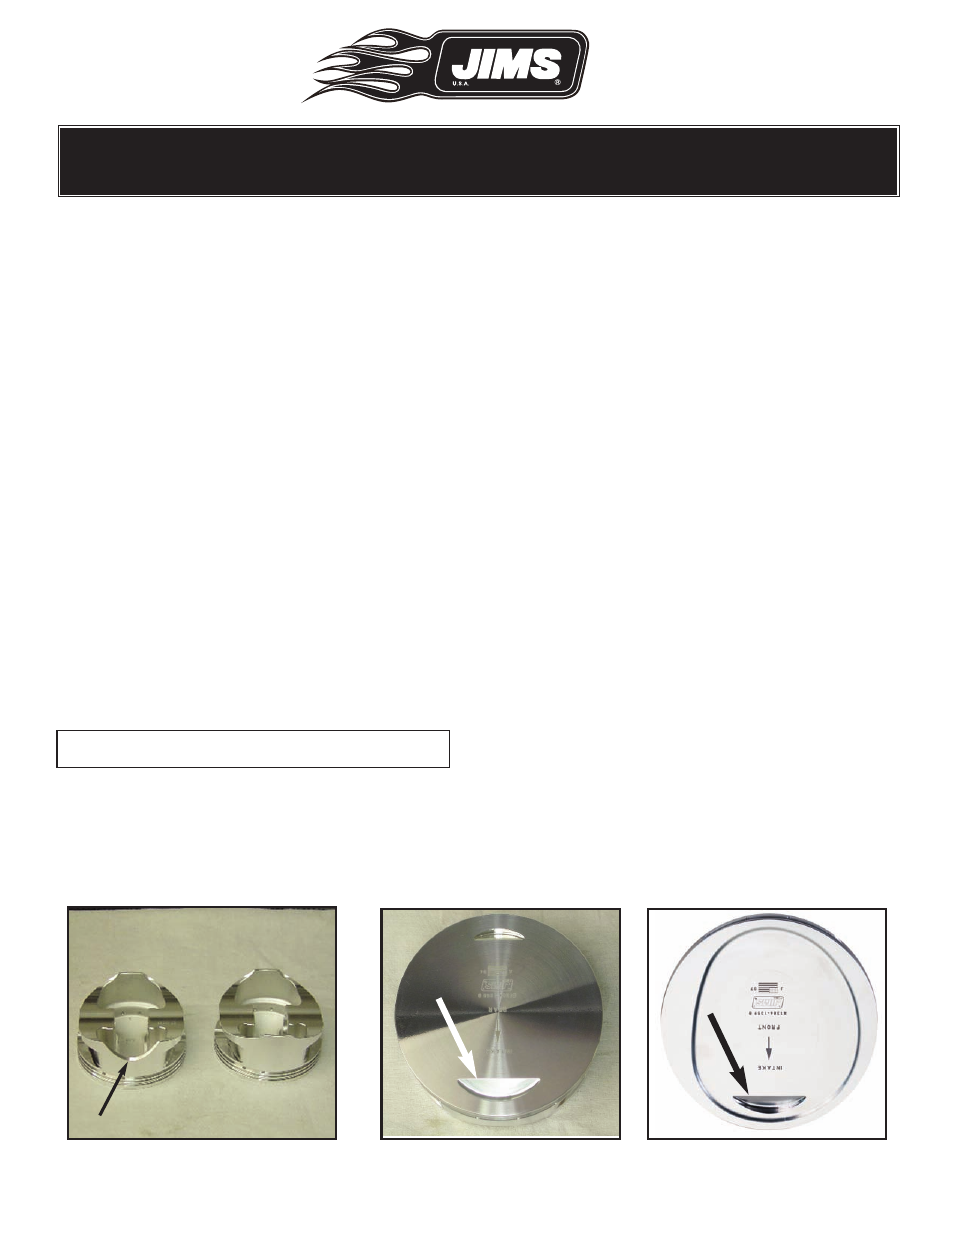
• The 120" flat top piston is shown in Fig. 4, and the 131"/ 135" with a recessed top is shown in Fig.
5. Both the 120" and 131" / 135" piston sets have a rear piston with a notch as shown in Fig. 3 on
the skirt. In the following installations we show figure photos of 120" the ring sets. The installation
of the 131" or 135" ring sets is the same procedure for installation as 120" sets.
Note: 120”, 131” or 135" Piston orientation
There is a front and a rear piston. They are not the same and must be installed correctly. See Fig. 3.
Fig.3 - Inspect pistons
• Both 120”, 131” and 135" pistons have valve reliefs machined into their tops. The intake valve reliefs
are clearly larger to clear the 2.080” diameter intake valves. See Fig.4 and Fig.5.
REAR
FRONT
Fig.4 - Intake relief is larger
120”
131”/ 135”
Fig.5 - Intake relief only
NOTCH