JIMS Box 2 1208-1352 (all models of 120, 131, or 135 Alpha, Beta and Evo Mount Engines) User Manual
Page 10
555 Dawson Drive, Camarillo, CA 93012 Phone 805-482-6913 • Fax 805-482-7422
9
Rev I
8-12
No.1208-1352
A Division of Thiessen Products, INC
IIn
ns
st
tr
ru
uc
ct
tiio
on
n S
Sh
he
ee
et
t F
Fo
or
r B
Bo
ox
x 2
2 1
12
20
0”
”,, 1
13
31
1”
” o
or
r 1
13
35
5”
”
E
En
ng
giin
ne
e A
As
ss
se
em
mb
bl
liie
es
s O
Or
r E
En
ng
giin
ne
e R
Ra
ac
ce
e K
Kiit
ts
s
• If you follow our piston installation directions, the piston rings will be
protected by keeping the ring gaps out of the cylinder spigot cut-
aways. See Fig. 37.
•
Cylinder differences and orientation: The front and rear cylinders are
different. Both cylinders have reduced fin width on their right sides
to allow for the pushrod tubes.
• Both cylinders have notched skirts.
• The front cylinder’s notch goes toward the rear of the engine. (toward
the center of the “V”formed by the cylinders) See Fig. 32.
• The rear cylinder’s notch goes toward the front of the engine. (again,
toward the center of the “V” formed by the cylinders)
• When the front cylinder is correctly placed, its shortened fins will be
on the right and the spigot notch will be toward the rear of the
engine.
•
When the rear cylinder is in place, its shortened fins will also be on
the right but the spigot notch will be toward the front of the engine.
•
Both cylinder notches go toward the center of the engine; they face
each other.
•
Piston differences and orientation: The front and rear pistons are dif-
ferent.
•
The rear piston has a notch at the bottom of its skirt.
•
The rear piston’s notch goes toward the front of the engine. See Fig.
33.
•
Toward the center of the “V” formed by the cylinders.
•
The front piston does not have a notched skirt. See Fig. 34.
•
The front piston’s larger valve pocket goes toward the rear of the
engine, the intake side of the cylinder.
•
Toward the center of the “V” formed by the cylinders.
Installation Procedure:
•
The JIMS 131”, 120” or 135" Race Kit piston installation procedure
differs from that found in Harley-Davidson’s Twin Cam shop manuals.
•
Our alternate procedure is commonly used and preferred by many
engine builders.
• Assembly: Rear Piston/Cylinder
•
Place the rear cylinder on your bench. Spigot, or bottom end up.
See Fig. 35
•
Place the rear piston assembly on your bench.
•
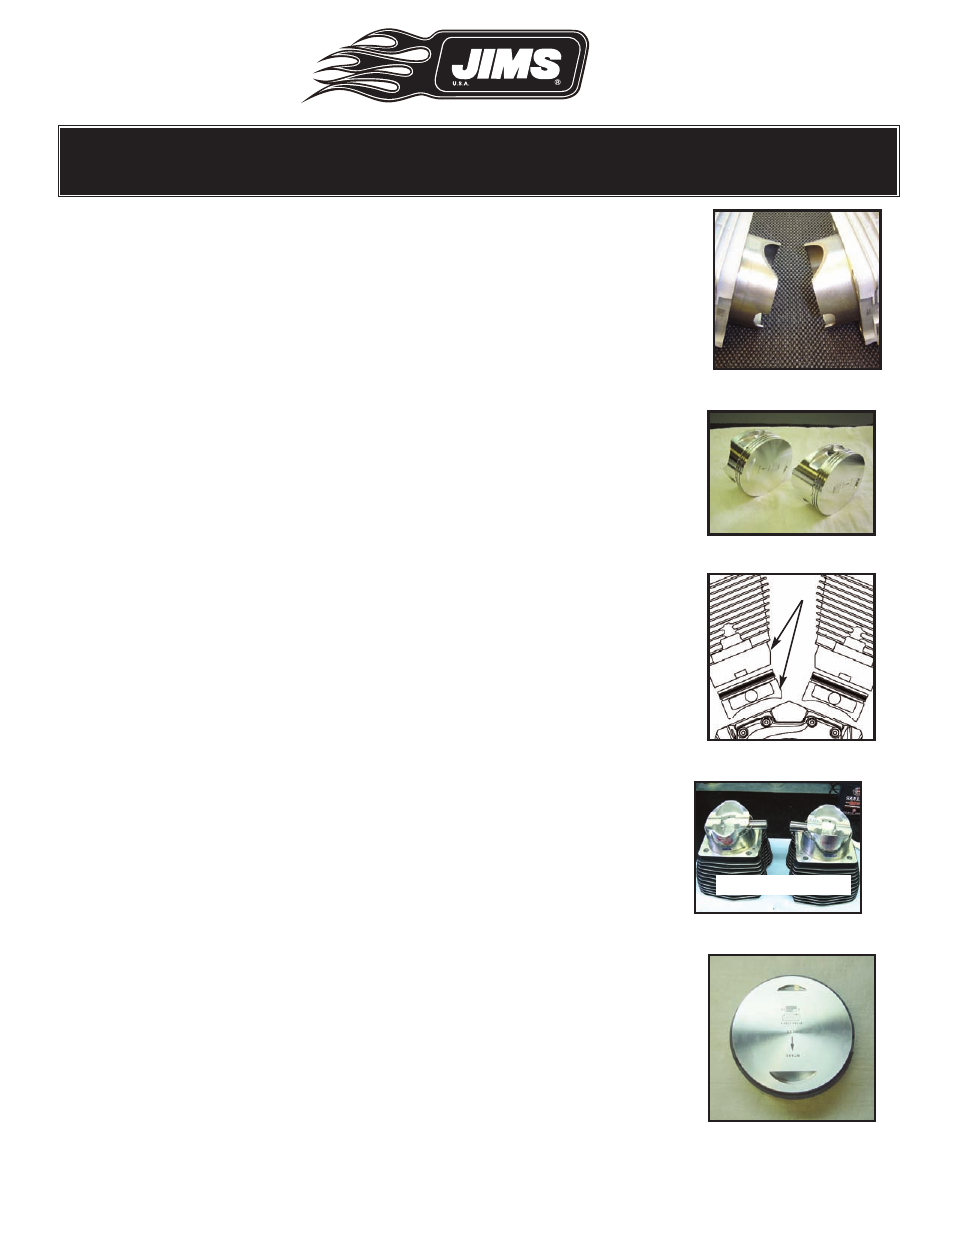
Top-end up See Fig. 36. Arrange the piston rings so that the end
gaps do not line-up (stagger alignment).
Fig.32 Cylinder spigot notches
Fig.33 Note piston notch
Fig.34 Rear piston notch
REAR
FRONT
REAR
FRONT
NOTCH
FRONT
Fig.35 - Align correctly
REAR FRONT
Fig.36 - Piston up