Pt3000_p5, Pt3000 – ikan PT3000 User Manual
Page 6
3903 Stoney Brook Dr. Houston TX 77063 | +1.713.272.8822 | www.ikancorp.com | [email protected] | © 2009 ikan Corporation. All right reserved.
9
9
a
b
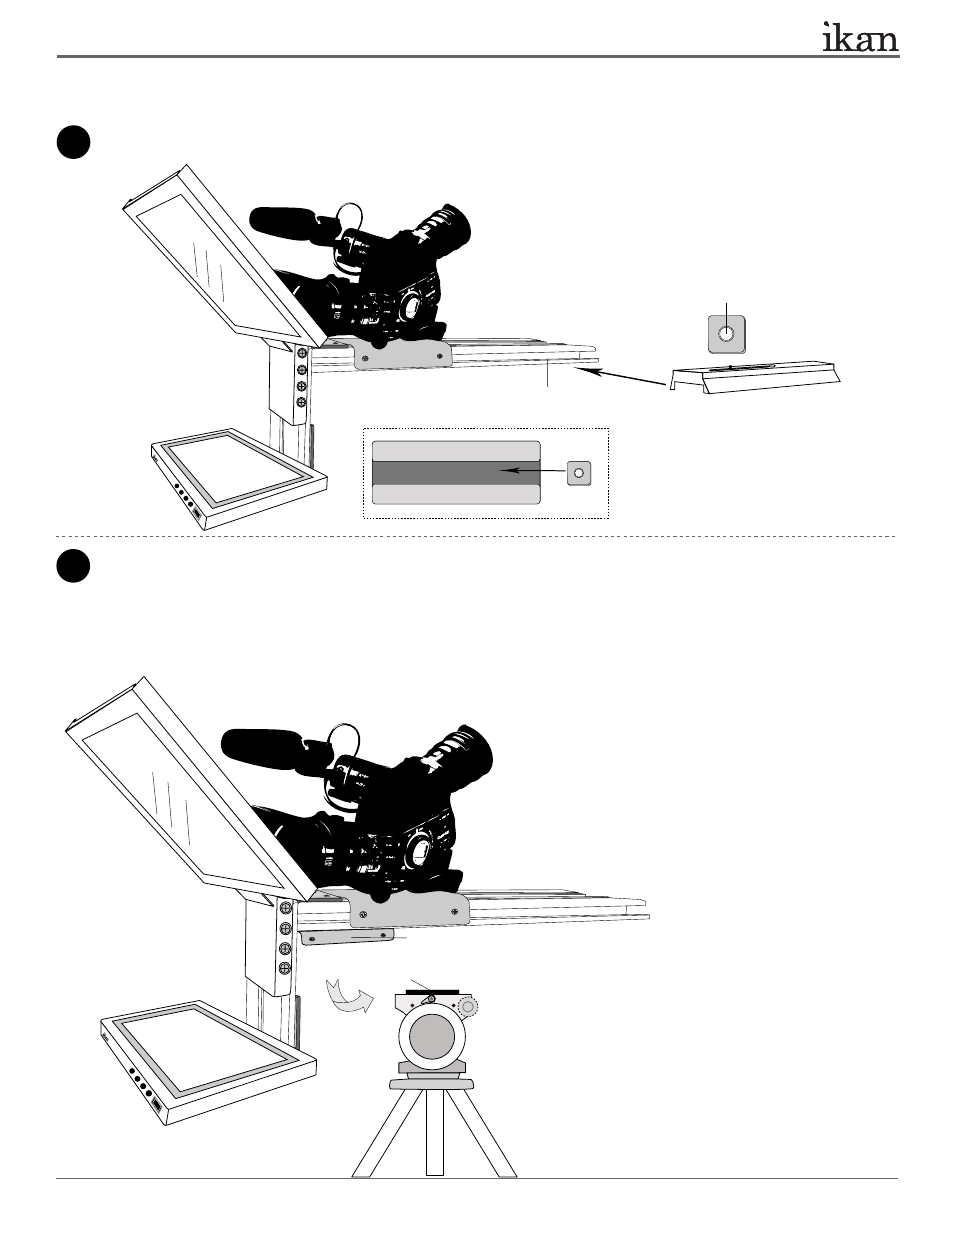
Attach your tripod skid plate to Part-N.
For those who use a tripod that is rear loading (ie: your tripod skid plate slides into the tripod head from the rear), we have provided an
optional piece , Part-N, will allow for more convenient attaching and detaching of the PT3000 Teleprompter on your tripod.
Attach your tripod skid plate directly to the teleprompter.
Part-P
Part-A or Part-B
(depends on your tripod skid plate)
> Loosen the screws and slide out the Metal Bracket
through the channels
> Install 2 x Part-A & Part-E or 2 x Part-B &Part-F
> Slide in the Metal Bracket through the single channel
of the bottom of the Part-P
> Attach your tripod skid plate to the remaining Part-N (8” T-Slot)
and secure them on your tripod head
> Attach the assembled teleprompter to your tripod
PT3000
15” TELEPROMPTER
> Slide in the Part-A or Part-B through the single channel
of the bottom of the Part-P, and secure it with the screw
on your tripod skid plate. See Figure 1.
> Attach the assembled teleprompter to your tripod
your
tripod
Part-P (bottom view)
Figure 1.
Part-N (Metal Bracket)
Part-N (8” T-Slot)
ikancorp.com
ikancorp.com
5 of 10