Quick setup – IHSE USA 434 Series SD- VUE/5x User Manual
Page 7
Quick Setup
5
1. Quick
Setup
This section briefly describes how to install your SD-VUE USB Mini Extender
system. Unless you are an experienced user, we recommend that you follow the
full procedures described in the rest of this manual.
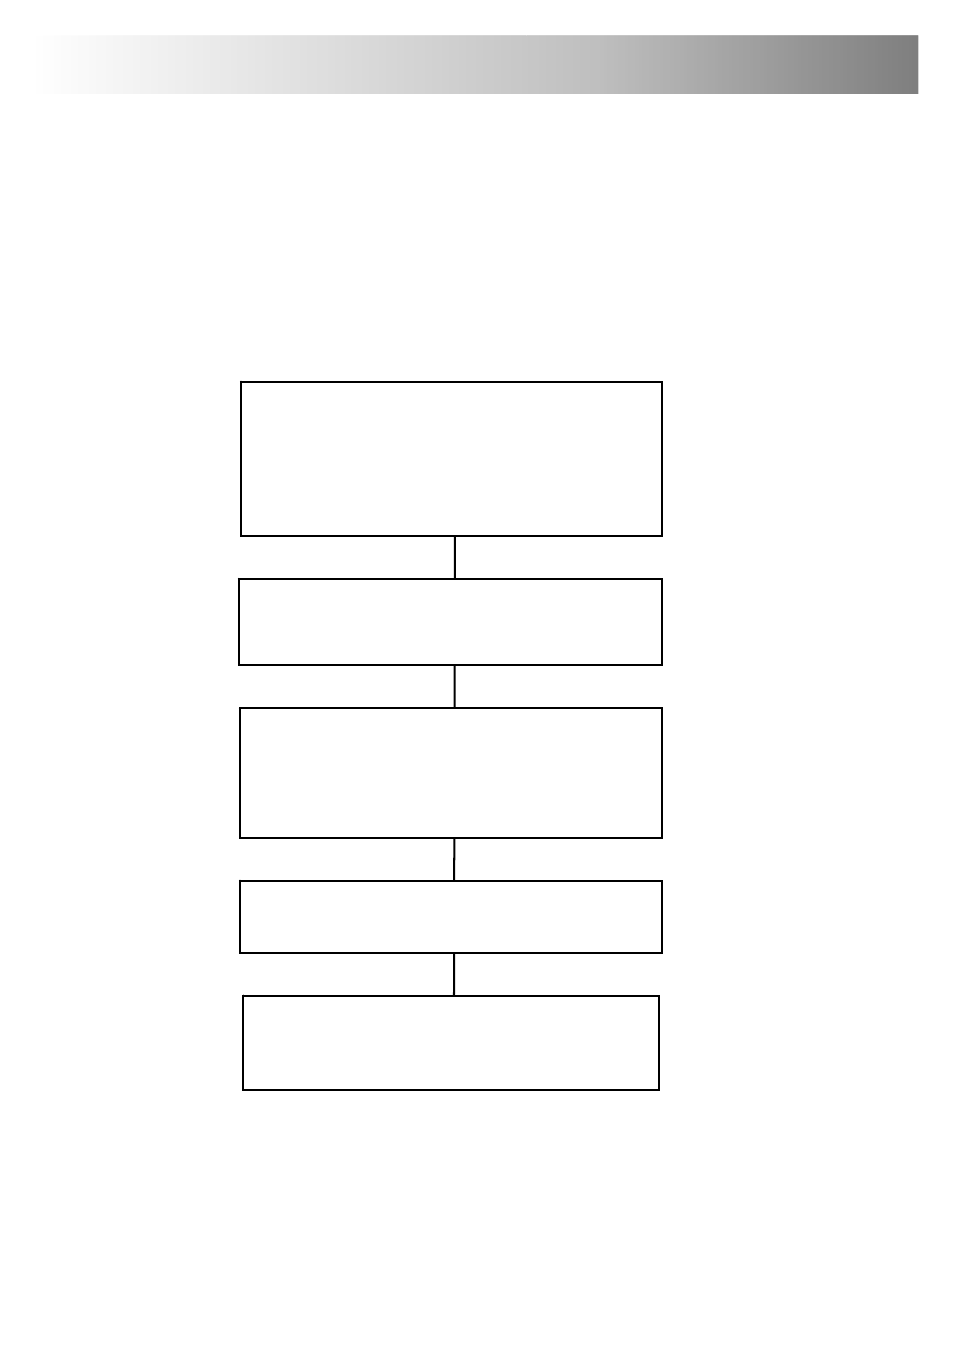
Set Video Distance DIP Switches
Set DIP switches on base of Remote Unit to position for
Interconnect cable length:
5-25m
OFF
(default)
25-50m
ON
DIP Switch 1: Primary Interconnect (channel 1)
DIP Switch 2: Interconnect 2
(SD-VUE/52 & SD-VUE/52A only)
See Setting the Cable
Length DIP Switches on
page 13.
Connect Remote Unit and devices
Connect Remote Unit to monitor, USB and audio/serial
devices (if present). Connect 5V power supply.
Connect Local Unit to CPU
Connect Local Unit to CPU video, USB and Audio/Serial ports
(if used).
Connect Local monitor(s) to video output(s) on Local Unit.
Note. If you intend to connect the Local Unit to an external
USB hub, ensure that it is self-powered. If not, you will need
an additional 5V PSU for the Local Unit (not supplied).
Connect Local and Remote Units
Connect extender Units with up to 50m of compatible CATx
interconnect cable.
Power Up
Power up the CPU.
Switch on the Remote Unit power supply.
Auto-adjust flat panel monitors.
See Connecting the
Remote Unit on page 14.
See Interconnection
Cable Requirements on
page 12.
See Local Unit
Installation on page 16.
Use LEDs on Interconnect
ports to check operation
(see pages 15 and 17).