Operation – Gullco GK-203-400-12 User Manual
Page 11
9
Operation
The Power On/Off switch (located on the back of the main control box) is used to disconnect the
power to the rest of the control circuitry.
I = On, O = Off.
WARNING! Always turn the main power off before connecting/disconnecting the linear slide head
cable to/from the remote pendant and the remote pendant from the control box.
Failure to comply may result in control damage.
WARNING! The E.A.H.S. controls must not be continually started and stopped by the removal and
reapplying of power to the controls. Allow ten (10) seconds after the removal of
power before reapplying the power to the equipment.
The fuse holder (located on the back of the sensor control box) allows accessibility to the main fuse
by pushing the cap in towards the main body and twisting in a counter-clockwise direction.
The remote pendant connector (located on the front of main control box) is used to interface
between the main control box and the remote pendant.
The 4” linear slide connector (located on the bottom end of the remote control pendant) can be
connected to the linear slide (located on the top of the linear slide).
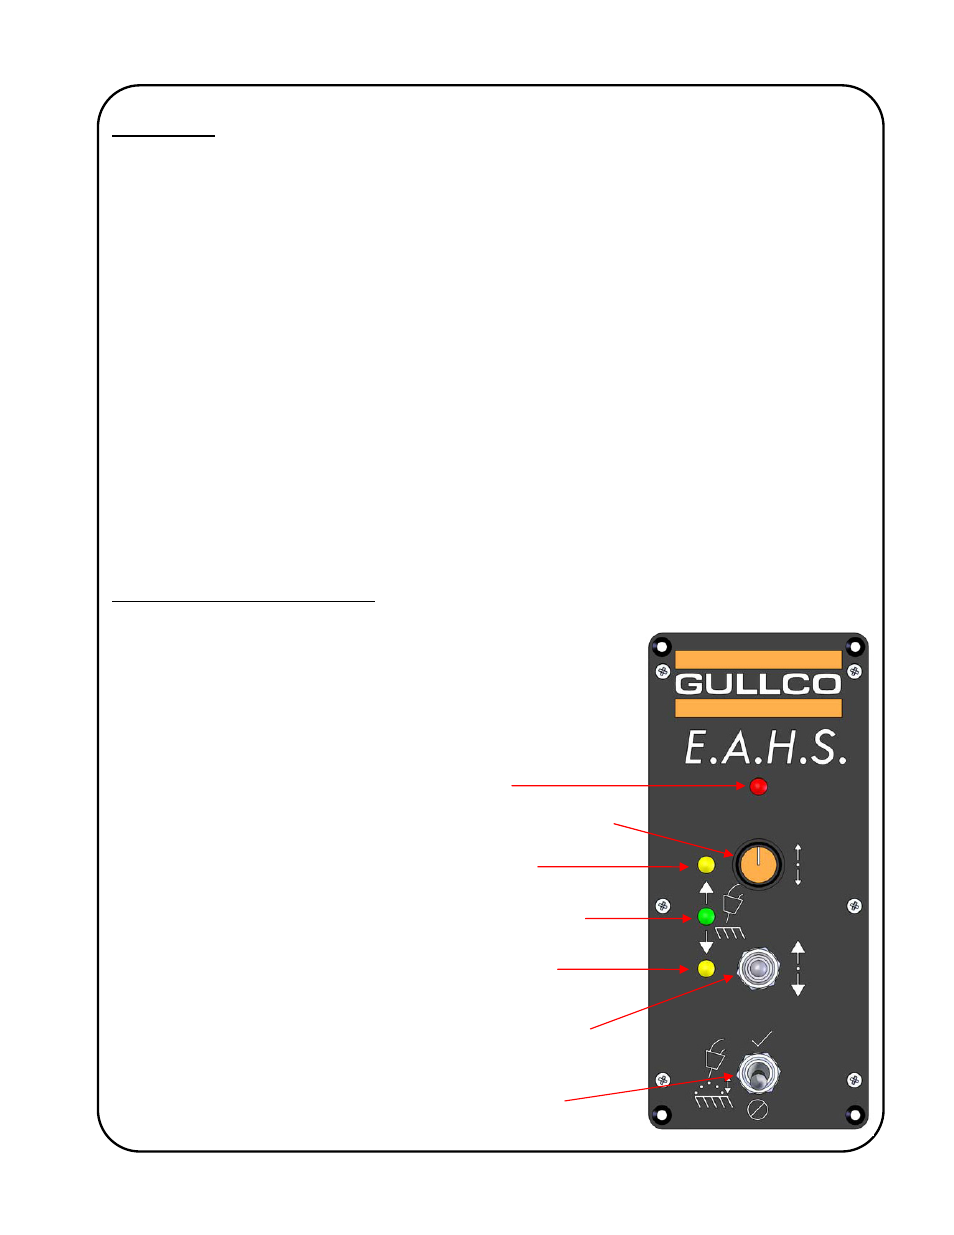
E.A.H.S. remote pendant control
A highly sophisticated, yet easy to use, micro-processor based
control drives a high torque, high resolution, low vibration stepper
motor located in the linear slide, allowing the height of the welding
gun to be precisely controlled. The control interfaces with the linear
slide through a removable head cable assembly and with the main
control box through a fixed pendant control cable. By controlling the
height of the welding torch, the quality and appearance of the weld
can be tuned to perfection.
Power L.E.D.
Up slide indicator
Control status indicator
Down slide indicator
Manual (Teach) / Auto
(Tracking) switch
Fine adjustment slide knob
Coarse adjustment slide
toggle switch