Mounting – Greenheck Vari-Green Control - Indoor Air Quality - Temp/Humidity (475573) User Manual
Page 3
3
Mounting
Mount the controller in the space to be controlled.
Keep wire lengths between the controller and the fan
to 200 feet or less.
1. Separate the unit from the back plate by driving
in the Allen screw until the two pieces come free.
2. Pull the wire through the wall and out of the
junction box, leaving about six inches free.
3. Pull the wire through the hole in the base plate.
4. Secure the plate to the box using the #6-32 x 5/8
inch mounting screws provided.
5. Terminate the unit wiring.
6. Mold the foam on the unit’s base to the wire
bundle to prevent drafts. (see note below)
7. Attach Cover by latching it to the top of the base,
rotating the cover down and snapping it into place.
8. Secure the cover by backing out the lock-down
screw using a 1/16 inch Allen wrench until it is
flush with the bottom of the cover.
1. Separate the unit from the back plate by driving
in the Allen screw until the two pieces come free.
2. Place the base plate against the wall where you
want to mount the sensor.
3. Using a pencil mark out the two mounting holes
and the area where the wires will come through
the wall.
4. Drill two 3/16 inch holes in the center of each
marked mounting hole, DO NOT punch the
holes or the drywall anchors will not hold. Insert
a drywall anchor into each hole.
5. Drill one 1/2 inch hole in the middle of the
marked wiring area.
6. Pull the wire through the wall and out of the 1/2
Inch hole, leaving about six inches free.
7. Pull the wire through the hole in the base plate.
8. Secure the base to the drywall anchors using the
#6 x 1 inch mounting screws provided.
9. Terminate the unit wiring.
10. Mold the foam on the unit’s base to the wire
bundle to prevent drafts. (see note below)
11. Attach cover by latching it to the top of the base,
rotating the cover down and snapping it into place.
12. Secure the cover by backing out the lock-down
screw using a 1/16 inch Allen wrench until it is
flush with the bottom of the cover.
NOTE: In any wall-mount application, the air
within the wall cavity can cause erroneous
readings. The mixing of room air and air from
within the wall cavity can lead to condensation,
erroneous readings and sensor failure.
To prevent these conditions, Greenheck
recommends sealing the conduit leading to
the junction box, filling the junction box with
fiberglass insulation or sealing the wall cavity.
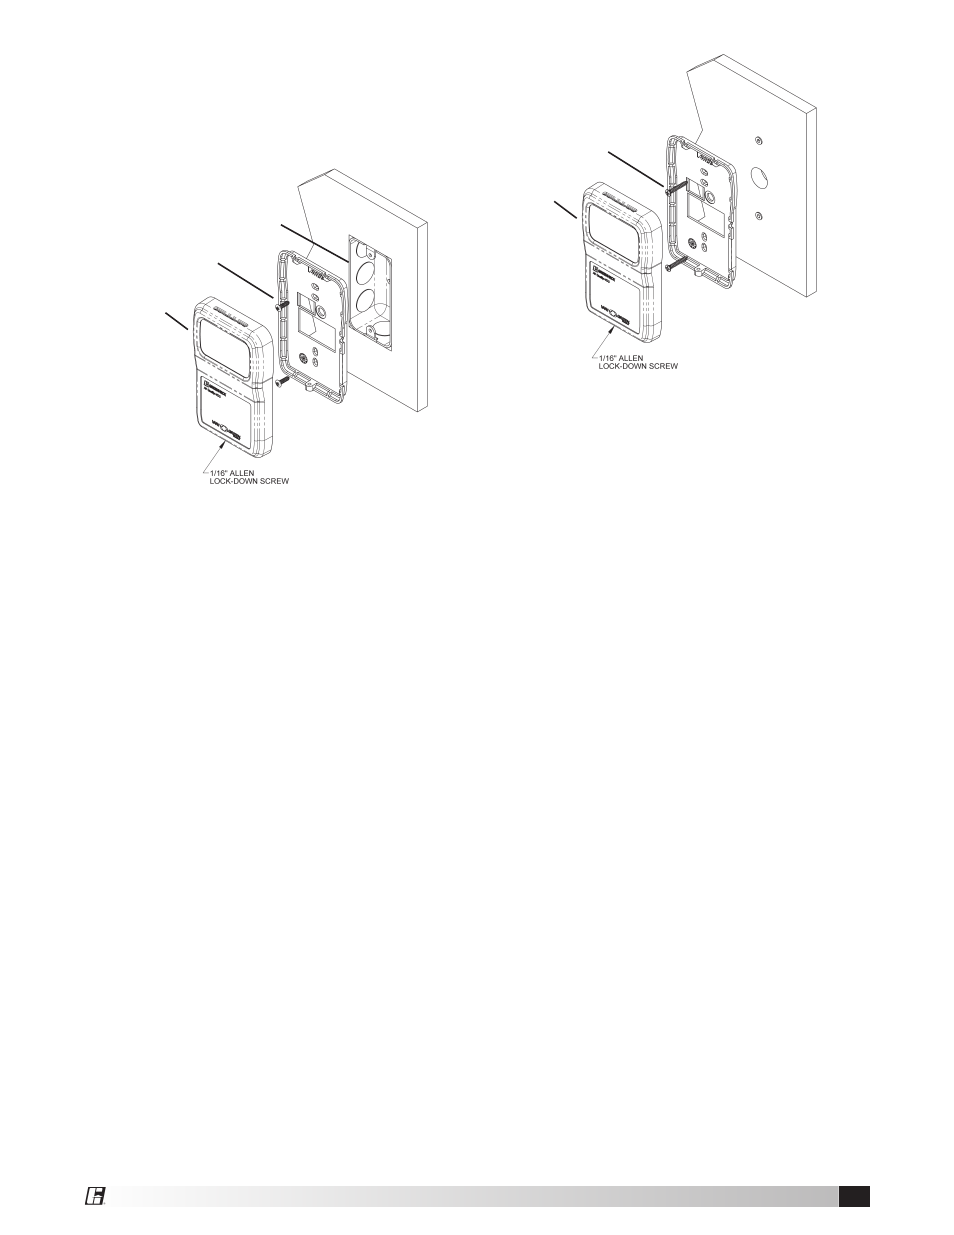
Electrical Box
Mounting Plate
Cover
Junction Box Mounting
Mounting Plate
Cover
Drywall Mounting