Troubleshooting, Our commitment, Bearing replacement – Greenheck EQB (479049) User Manual
Page 8
WARNING
Before taking any corrective action, make certain
unit is not capable of operation during repairs.
AVERTISSEMENT
Avant d’entreprendre toute action corrective,
s’assurer que l’appareil ne pourra pas fonctionner
durant les réparations.
Troubleshooting
479049 • EQB, Rev. 2, August 2014
Copyright 2014 © Greenheck Fan Corporation
8
As a result of our commitment to continuous improvement, Greenheck reserves the right to change specifications
without notice.
Specific Greenheck product warranties are located on greenheck.com within the product area tabs and in the
Library under Warranties.
Greenheck’s Mixed Flow Inline Fan catalog provides
additional information describing the equipment, fan
performance, available accessories, and specification data.
®
Phone: 715.359.6171 • Fax: 715.355.2399 • Parts: 800.355.5354 • E-mail: [email protected] • Website: www.greenheck.com
Our Commitment
AMCA Publication 410-96, Safety Practices for Users and
Installers of Industrial and Commercial Fans, provides
additional safety information. This publication can be
obtained from AMCA International, Inc. at www.amca.org.
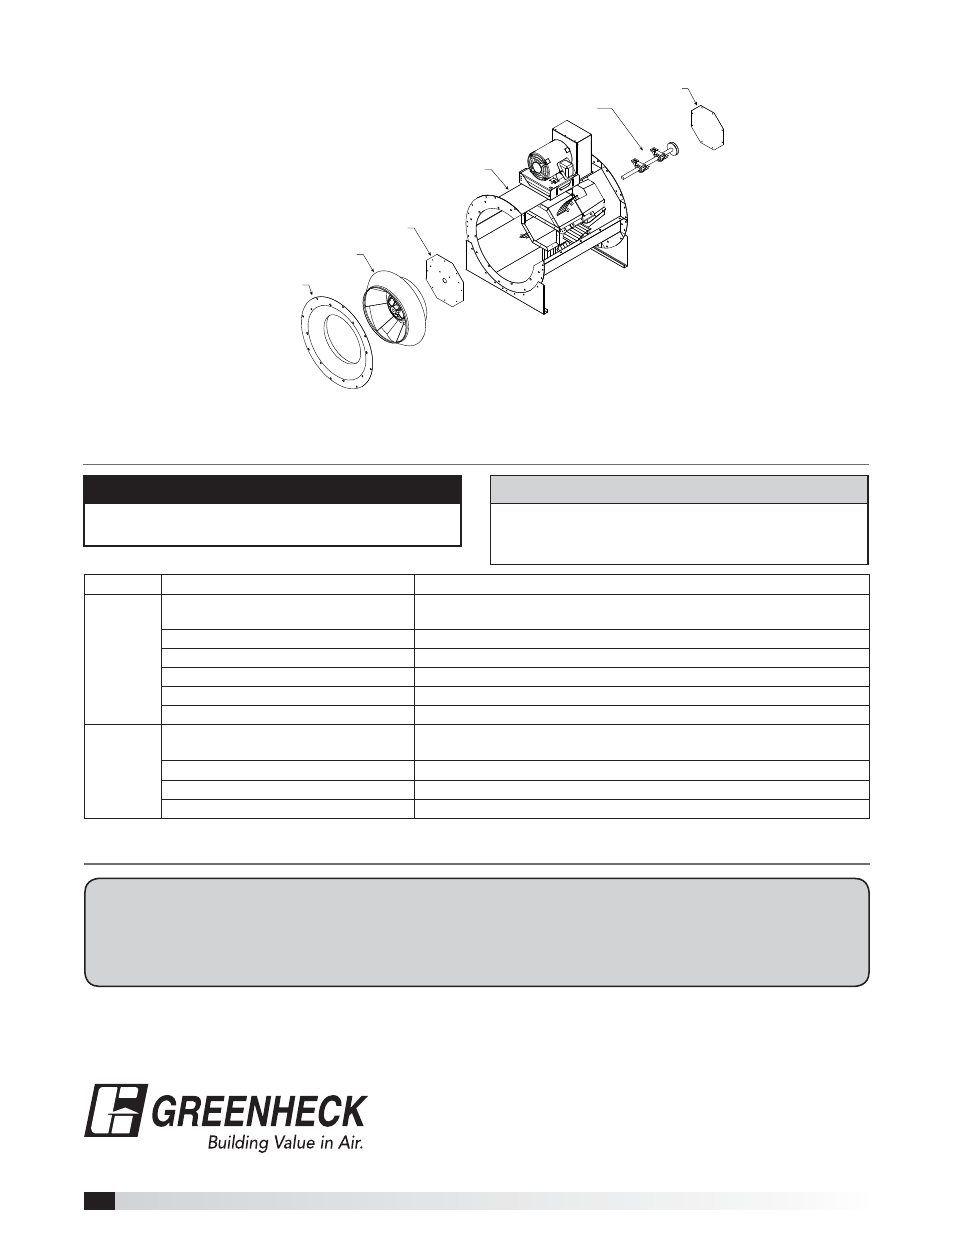
Bearing Replacement
Replacement of bearings requires disassembly of
internal components. For this procedure access must
be available to both the inlet and outlet ends. The
following procedure assumes belts have already
been loosened and removed. (Belts are
removed by adjusting the motor plate).
Reinstall components in reverse
order of removal. Reference the
Radial Gap and Alignment
sections on page 4 to
ensure proper
wheel installation.
If the bearings cannot
be removed from the
shaft due to corrosion or
damage, the bearings and
shaft can be removed as a
complete assembly from the fan outlet.
Problem Cause
Corrective Action
Excessive
noise or
vibration
Wheel imbalance
Clean all dirt off wheel. Check wheel balance, rebalance in place if
necessary.
Bad bearings
Replace.
Belts too tight or too loose
Adjust tension, see Fig. 13 on page 5.
Wheel improperly aligned and rubbing
Center wheel on inlet, see Fig. 10 on page 4.
Loose drive or motor sheaves
Align and tighten. See “Prestart-up Checks”, page 4-5.
Foreign objects in wheel or housing
Remove objects, check for damage or imbalance.
Reduced
airflow
System resistance too high
Check system: proper operation of backdraft or control dampers,
obstruction in ductwork, clean dirty filters.
Unit running backwards
Correct as described in
NOTE
on page 5.
Excessive dirt buildup on wheel
Clean wheel.
Improper wheel alignment
Center wheel on inlet, see “Prestart-up Checks” and Fig. 10 on page 4.
1. Unbolt and remove
inlet cone (inlet side).
2. Loosen set screws
at the wheel hub
and remove wheel
(inlet side).
Inlet
Cone
Wheel
End Cap
Shaft/Bearing
Assembly
Housing
Tail Cone
Cover Plate
3. Remove end cap from
the end of the inner
chamber (inlet side).
Remove tail cone cover
plate from the opposite
end of the inner
chamber (outlet side).
4. Remove bearing bolts
from mounting plate.
5. Pull shaft/bearing
assembly out of the fan
housing (outlet side).
6. Replace bearings on
shaft/bearing assembly.