Extension assignment – Grandstream UCM6100 series Initial Setup Guide User Manual
Page 11
11
E
XTENSION
A
SSIGNMENT
In the Auto Provision settings, users have the option to enable “Automatically Assign Extension”. If
enabled, an extension will be created and assigned to the new device detected. This is a great feature if
specific extension assignment isn’t required, but for our setup we’ll work on manually assigning an
extension to a discovered device.
Navigate to PBX
Basic/Call RoutesZero Config and click on the
for the discovered device.
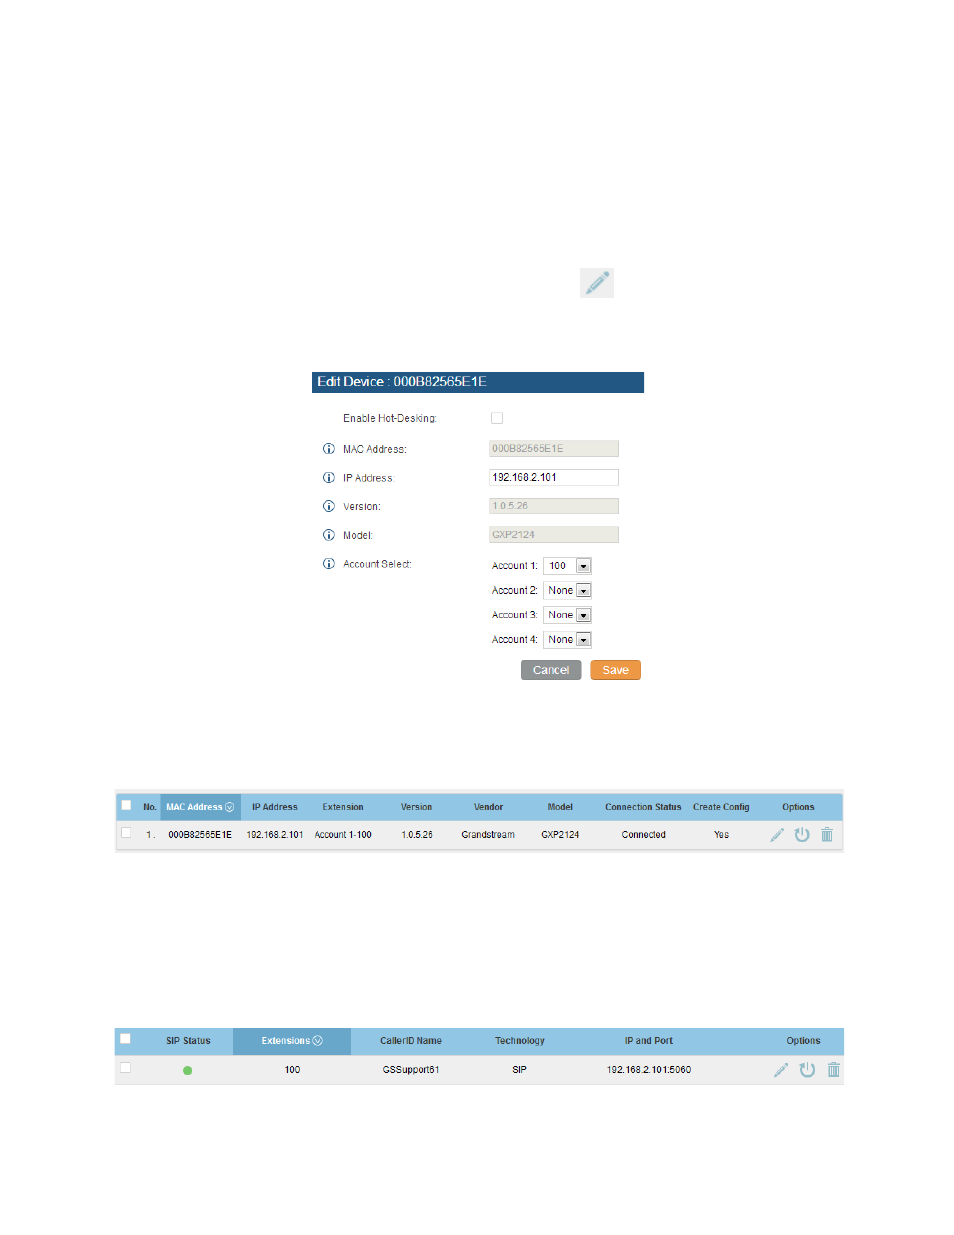
The next screen provides details of the device and also allows a user to assign an extension. Since our
GXP2124 is a 4 line phone, the UCM6100 series gives us the option to assign 4 extensions to the phone.
Figure 12: Provisioning with Zero Config – Extension Assignment
Click on the Account 1 and select the desired extension, then click “Save”. Now the Zero Config page
displays the device with an extension assigned to it on Account 1.
Figure 13: Provisioning with Zero Config – Manually Assigned Extension
After assigning an extension, the phone must be rebooted in order to pick up the configuration file from
the UCM6100 series. During this process, the phone will bootup, request for config file,download the
config file, then reboot once more in order to apply the changes.
After the phone is completely booted, Navigate to PBX
Basic/Call RoutesExtensions page to see the
extension status. The SIP status will show a green circle for a successful registration.
Figure 14: Provisioning with Zero Config – Extension Status