8 mounting and installation – Flowserve StarPac 3 User Manual
Page 14
StarPac Intelligent Control System FCD VLENIM0066-05 04/14
14
®
causes the actuator piston to move upward.
This upward motion of the piston is transmitted back to the positioner through the feedback linkage and position feed-
back potentiometer signal changing proportionally to the valve position. The piston continues to stroke upward until the
signal of the feedback sensor increases sufficiently to counter the signal being sent to the modulator. At this point, the
spool is at its equilibrium position as the pressures in the cylinder stabilize and the air flow to the actuator decreases.
After the piston has reached the required position, the feedback signal will equal the spool position generated in the mo-
dulator capsule. The computer will then make small null adjustments to fine-tune the desired position and compensate
for changes in dynamic loading.
A decrease in the command signal reverses the described actions causing a proportional downward movement of the
actuator piston and stem.
8 Mounting and Installation
8.1 Mounting to Flowserve Valtek Linear Mark One Valves
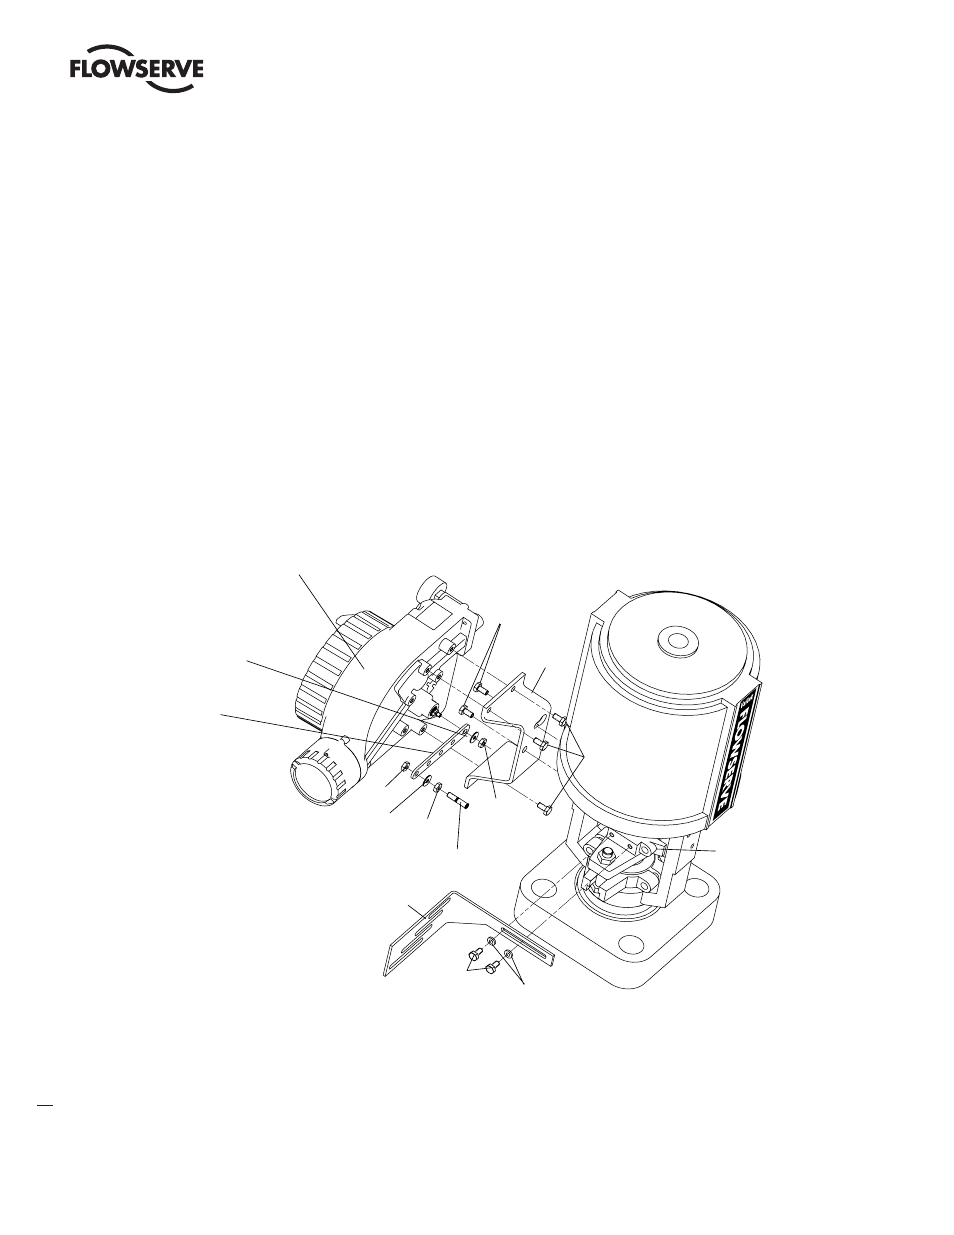
Figure 2: Linear Mark One Control Valve Mounting (Sensor Mounting not shown)
To mount the StarPac 3 positioner to a Flowserve Valtek linear Mark One valve, refer to Figure 2 and proceed as out-
lined below. The following tools are required:
• 9/16” open-end wrench (or 1/2” for spud sizes 2.88 and smaller)
• 7/16” box wrench
• 3/8” open-end wrench
1. Remove washer and nut from follower pin assembly. Insert pin into the appropriate hole in follower arm,
StarPac 3
Locknut
Washer
Follower
Arm
Bracket
Bolts
Bracket
Positioner
Bolts
Stem Clamp
Metal Washers
Bolts
Take-off Arm
Follower Pin
Nut
Lock Washer
Nut
Nut