Installation, Install vpn tracker, Activate vpn tracker – equinux VPN Tracker 5.4.4 User Manual
Page 7
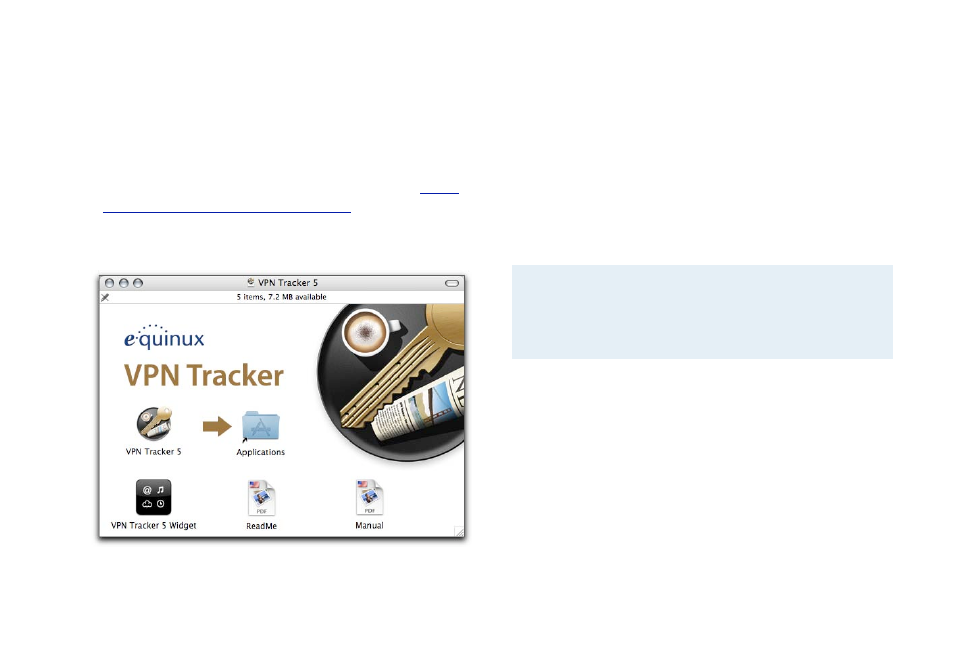
Installation
Install VPN Tracker
The first step is to install VPN Tracker on your Mac.
To install VPN Tracker on your Mac:
‣ Download VPN Tracker from the equinux web site a
‣ If the downloaded disk image is not mounted automatically,
double-click the file
‣ Drag the VPN Tracker application symbol into your
”Applications” folder
‣ Eject the disk image by dragging it to the trash
You can now use VPN Tracker in demo mode – all connections
will be terminated after three minutes. If you already tested the
software, you should activate the application right away.
Activate VPN Tracker
Activating VPN Tracker is a simple and straightforward process.
Described below are three different scenarios: Buy a new
license online, activate a retail version and transfer a license.
Note
Your equinux ID will be used to store and manage all
your licenses. Whenever you purchase additional
licenses or other products, please specify your
equinux ID.
Buy a License
Obtaining a license for VPN Tracker and activating it on your
Mac is a simple process.
To buy a license, please complete the following steps:
‣ Choose “VPN Tracker“ > “Buy VPN Tracker...“
‣ Click “Buy VPN Tracker”
‣ If you are a new customer, choose your country and click
“Next“.
or
7