Removing and replacing the belts – DR Power Powerwolf Power Wagon User Manual
Page 27
DR
Powerwolf
Safety & Operating Instructions
21
Removing and Replacing the Belts
If your DR Powerwolf is starting to lose speed and power, and the engine is operating
normally (with a clean air filter and spark plug), you may need to check and/or replace the
drive belts. The unit has an intermediate shaft to transfer power from the drive pulley
located at the bottom of the engine to the pulley located above the hydrostatic
transmission.
WARNING!
Before performing any maintenance procedure, set the
parking brake, stop the engine, and disconnect the spark plug wire.
Important!
Use only DR
belts on your machine. They have been thoroughly
tested and proven for many hours of use.
1. Position the machine on a level
surface and set the parking brake.
2. Tip the bed forward.
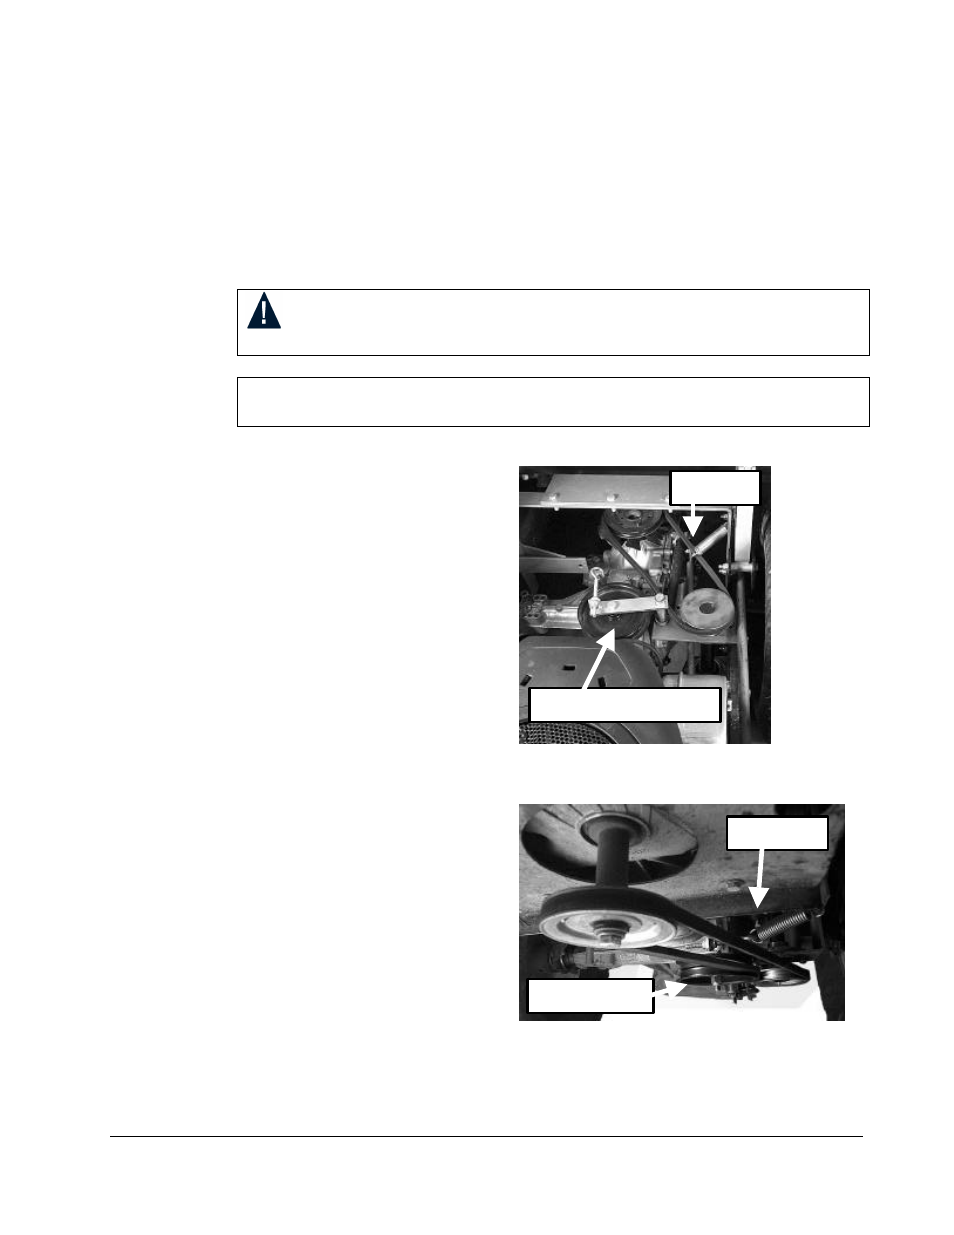
3. Push the idler arm on the top belt
toward the spring to reduce
tension, unhook the arm from the
spring, and swing the idler pulley
away from the belt.(Figure 12)
4. Remove the belt first from the
transmission pulley at the front of
the machine. Then remove the
belt from the intermediate shaft
pulley.
5. Remove lower belt the same way.
Disconnect idler arm from spring,
remove belt first from drive pulley
at engine, then from intermediate
shaft pulley. (Figure 13)
6. Install new lower belt on drive
pulley first, then on intermediate
shaft pulley, and then the idler
pulley.
7. Reconnect the idler spring.
Figure 12: Top Drive Belt –
-
Idler Arm Disconnected
Figure 13: Lower Drive Belt
Idler Arm & Pulley
Spring
Idler Pulley
Spring