Assembly, Warning – DR Power Walk-Behind Pro (1985 - 2000) User Manual
Page 11
DR
®
TRIMMER/MOWER
™
Assembly & Operating Instructions
9
Assembly
WARNING: Do not attempt to start the engine until all assembly steps are complete, and you
have ADDED GAS AND OIL to the engine.
Tools & Supplies Needed:
• flat head screwdriver
• 1/2" and 3/8" wrenches, adjustable
wrench, or socket set
• pliers
• SAE30 HD (High Detergent) motor oil
• funnel (preferably with filter)
• unleaded gasoline
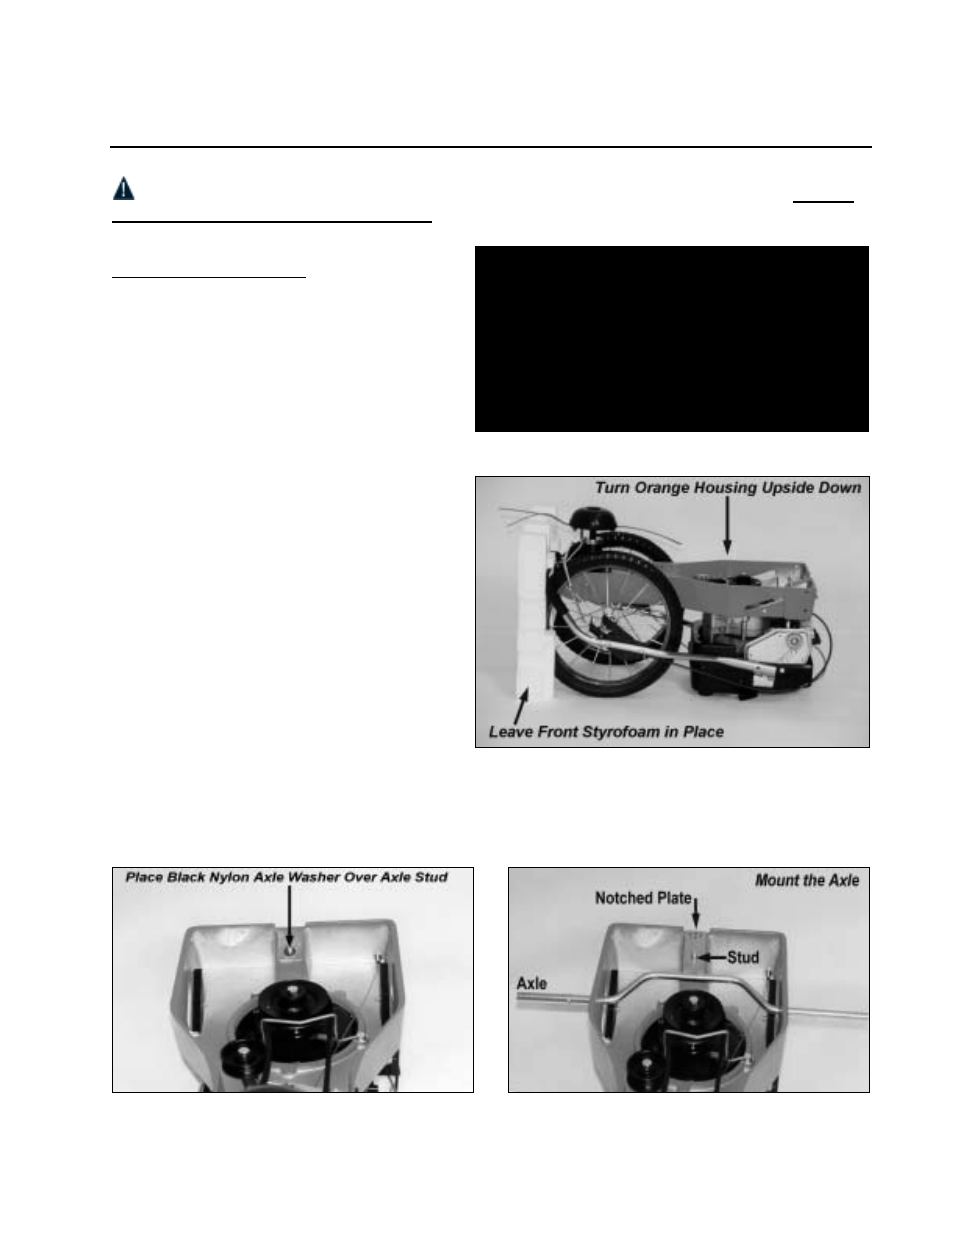
Step 1: Install the Axle
1. Turn the orange housing upside down to
access the underside. Leave the front
piece of Styrofoam in place (Figure 2).
2. Place the black nylon axle washer over
the axle stud at the center back of the
housing (Figure 3).
3. Insert the axle through the slot in the side
of the housing so the plate faces the axle
stud (Figure 4).
4. Center the axle and slide the hole in the
notched plate over the stud so that it rests
flush against the nylon washer (Figures 3
& 4). Be sure the axle is seated on the
axle stud solidly.
5. Screw a 5/16" lock nut onto the axle stud
using a 1/2" wrench or socket. Tighten until there is resistance, then back off 1/2 turn. [If the
bolt is too tight, it will be hard to operate the Parallel Trimming Action (PTA
™
)
Feature.]
Figure 2
Figure 3
Figure 4
WARNING!
THIS MACHINE IS SHIPPED WITHOUT
OIL! TRACES OF OIL MAY BE IN
RESERVOIR FROM FACTORY TESTING,
BUT YOU MUST ADD THE
RECOMMENDED AMOUNT OF OIL
BEFORE STARTING ENGINE.