DR Power 3-Point Hitch (April 2015 - Present) User Manual
Page 20
20
DR
®
3-POINT HITCH TRIMMER/MOWER
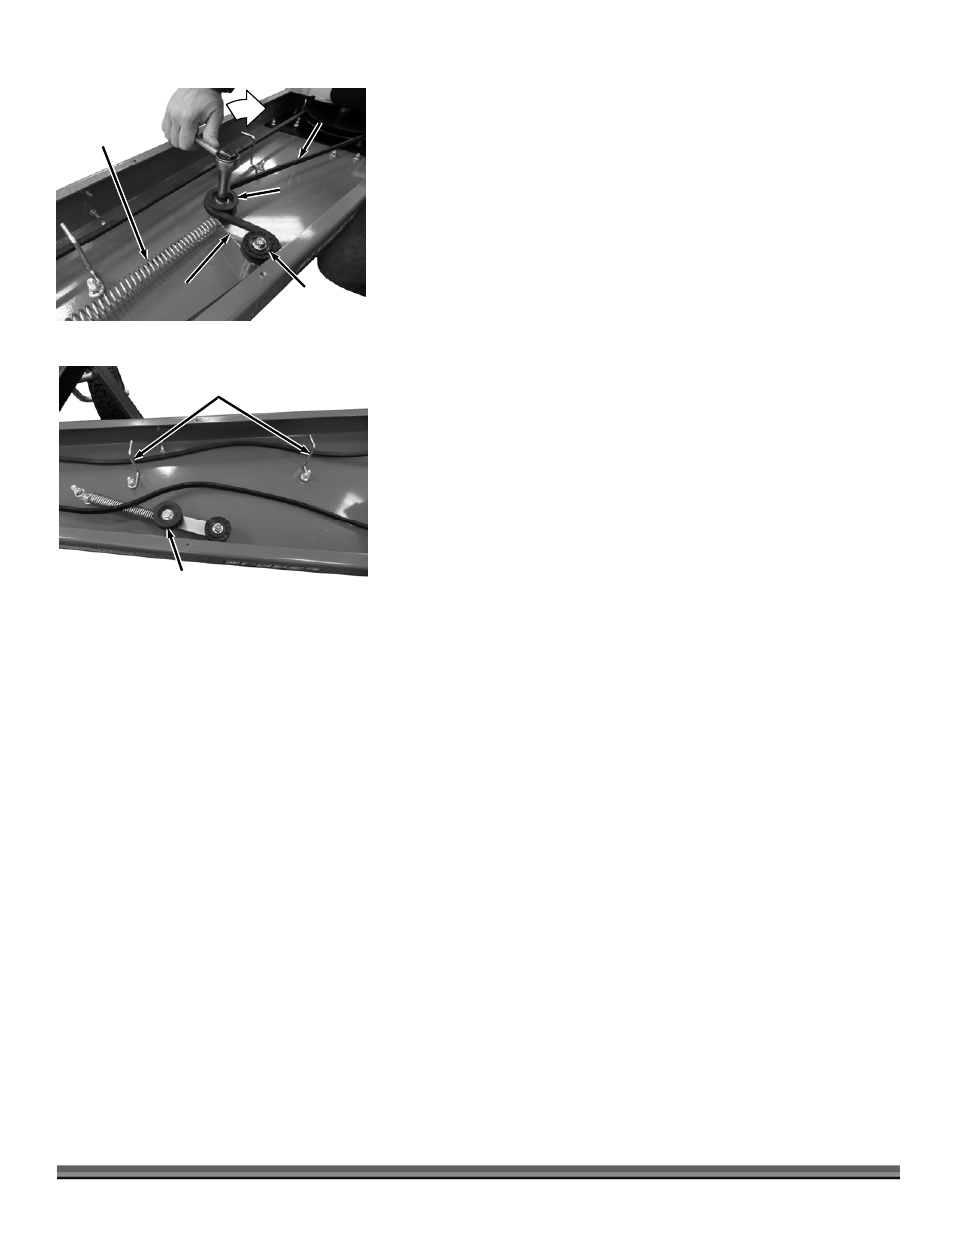
5. Position the 9/16˝ Deep Socket and Ratchet onto the Bolt of the Flat Groove
Idler Pulley. The Ratchet Handle and Idler Arm must be aligned for the pivoting
of the Arm to work properly (Figure 38).
6. Pull on the Ratchet to rotate the Idler Arm towards the Gearbox Pulley and
slide the Belt off the V-Groove Idler Pulley.
7. Allow the Ratchet to return back towards the Spring until the Idler Arm is in
line with the Tension Spring.
8. Remove the Belt from the Trimmer Head Pulley and the main Drive Pulley.
9. Install the new DR Drive Belt around the main Drive Pulley and the Trimmer
Head Pulley. Ensure that the “V” of the Belt is in the “V” of the Pulleys and
there are no twists in the Belt.
Note: Make sure the Belt is on the outside of the Frame Mounted Belt Guides and
on the inner side of the Flat Groove Idler Pulley (Figure 39).
10. Rotate the Idler Arm towards the Gearbox Pulley with the Ratchet and 9/16˝
Deep Socket (Ratchet Handle in line with the Idler Arm) and position the Belt
around the Flat Groove Pulley and then around the V-Groove Pulley (Figure 38).
11. Adjust and tighten the two Belt Guides at the Gearbox Pulley.
12. Install the Belt Guide Pins at the Head of the machine using two 9/16˝
Wrenches.
13. Position the Belt Guard and secure with the eight Flange Bolts using a 3/8"
Wrench.
Belt
Figure 38
Flat Groove
Idler Pulley
Idler Arm
Tension Spring
V-Groove
Idler Pulley
Belt
Guides
Figure 39
Flat Groove
Idler