To install the brush deck – DR Power Walk-behind Pro User Manual
Page 9
CONTACT US AT
www.DRpower.com 9
6. Attach the Deck to the Power Unit following the directions in the next
section. The Belt is stored below the black Pulley Cover.
7. If assembling the Lawn Deck, mount the front Caster Wheels before
attaching the Deck to the Power Unit.
NOTE: Find the Safety and Operating Instructions and the Caster Wheels for the
Lawn Deck (if ordered) tucked in one of the cardboard corner supports.
To Install the Brush Deck
1. Remove the black Belt Guard by unscrewing the black Knob, lifting the Cover
and pulling up and back to remove it. The Belt is shipped wrapped around
the Pulley.
2. Slide the Power Unit shaft into the Brush Deck and install the Collar and Pin
(Figure 2).
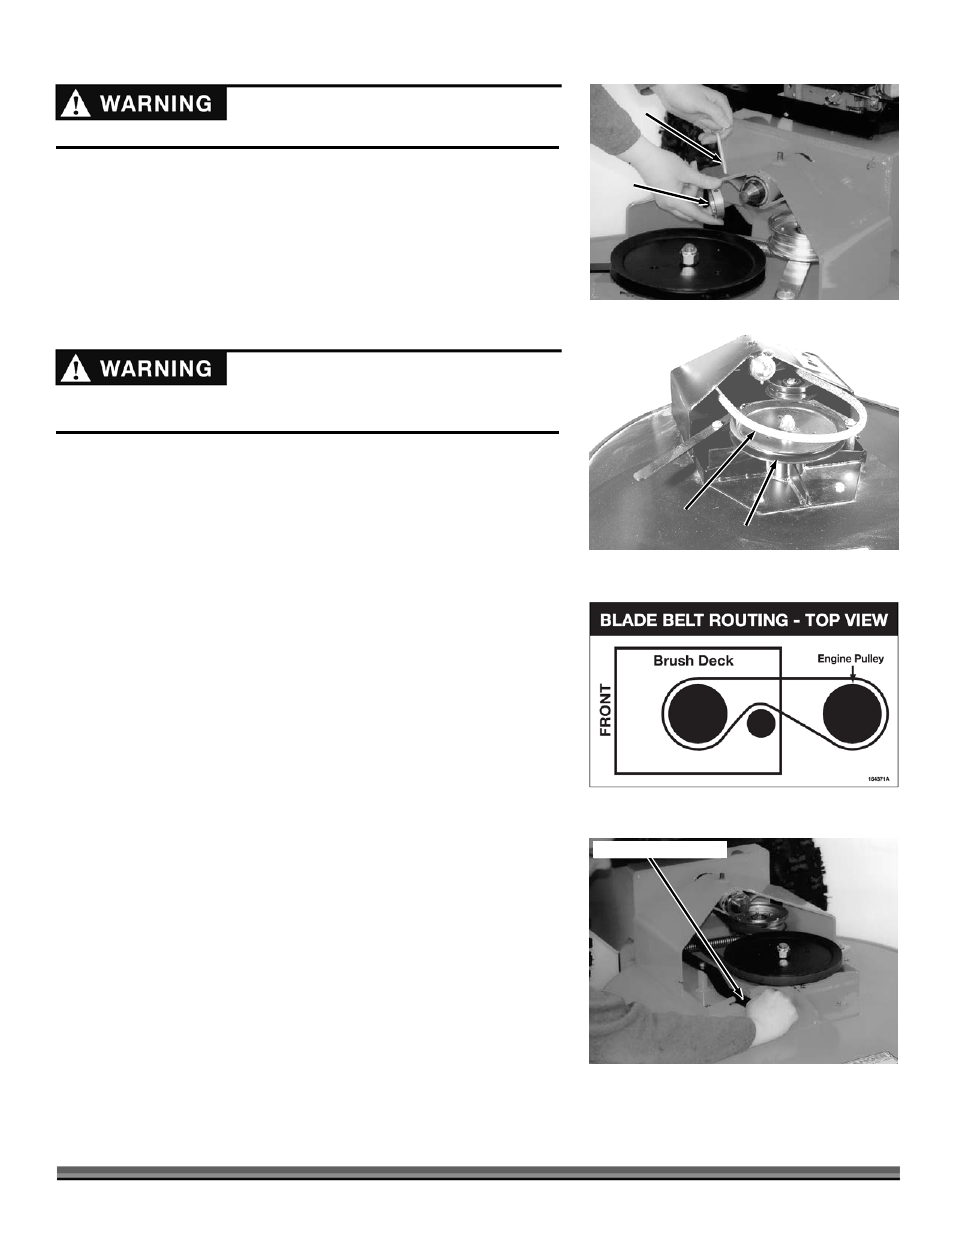
3. Install the Belt on the Pulley and Clutch (Figure 3) and route the Belt per the
label on the Spindle Housing (Figure 4). The Tension Lever may have to be
released where the Lever is secured into the slot. (Figure 5).
4. Tighten the Belt Tensioner (Figure 5) onto the Belt with the Lever secured in
the slot.
5. Replace the Belt Guard and secure in place with the black Knob.
Before performing any maintenance procedure, stop the engine and
disconnect the spark plug wire(s).
Before attaching the deck, be sure the spark plug wire(s) is disconnected.
Collar
Figure 2
Pin
Belt
Figure 3
Pulley
Figure 4
Belt Tension Lever
Figure 5