Replacing the push tube skid, Replacing the carbon canister – DR Power Walk-behind Pro User Manual
Page 23
CONTACT US AT
www.DRpower.com 23
Replacing the Push Tube Skid
Tools and Supplies Needed:
•
Two 1/2" Wrenches
•
Blocks
1. Lift the Push Tube Skid off the ground by tipping back on the Field and
Brush Mower and support the back of the Deck with Blocks.
2. Remove the five Bolts, Curved Washers and Locknuts that secure the Skid
using two 1/2" Wrenches (Figure 35).
3. Position the new Push Tube Skid and secure with the five Bolts (bolt head
facing out), Curved Washers (under Bolts) and Locknuts.
Replacing the Shear Pulley (extra Pulley comes in Product Pack of
Machine with 30" Deck only)
Tools and Supplies Needed:
•
1" Wrench
1. Unscrew the Hand Knob and remove the Belt Guard (Figure 36).
2. Release the Belt Tensioner Lever and remove the Belt from the Pulley (Figure
37).
3. Support the Blade with a block as you remove the Locknut using a 1"
Wrench.
4. Remove the damaged Pulley and replace with new Pulley.
5. Secure the Pulley with the Locknut.
6. Install the Belt and reset the tension by engaging the Belt Tensioning Lever.
7. Replace the Belt Guard and Hand Knob.
Replacing the Carbon Canister
NOTE: You should change out the components that make up the Evaporative
Emission Controlled every five years or when damaged.
Tools and Supplies Needed:
•
Pliers
•
Wire Cutters
•
7/16" Wrench
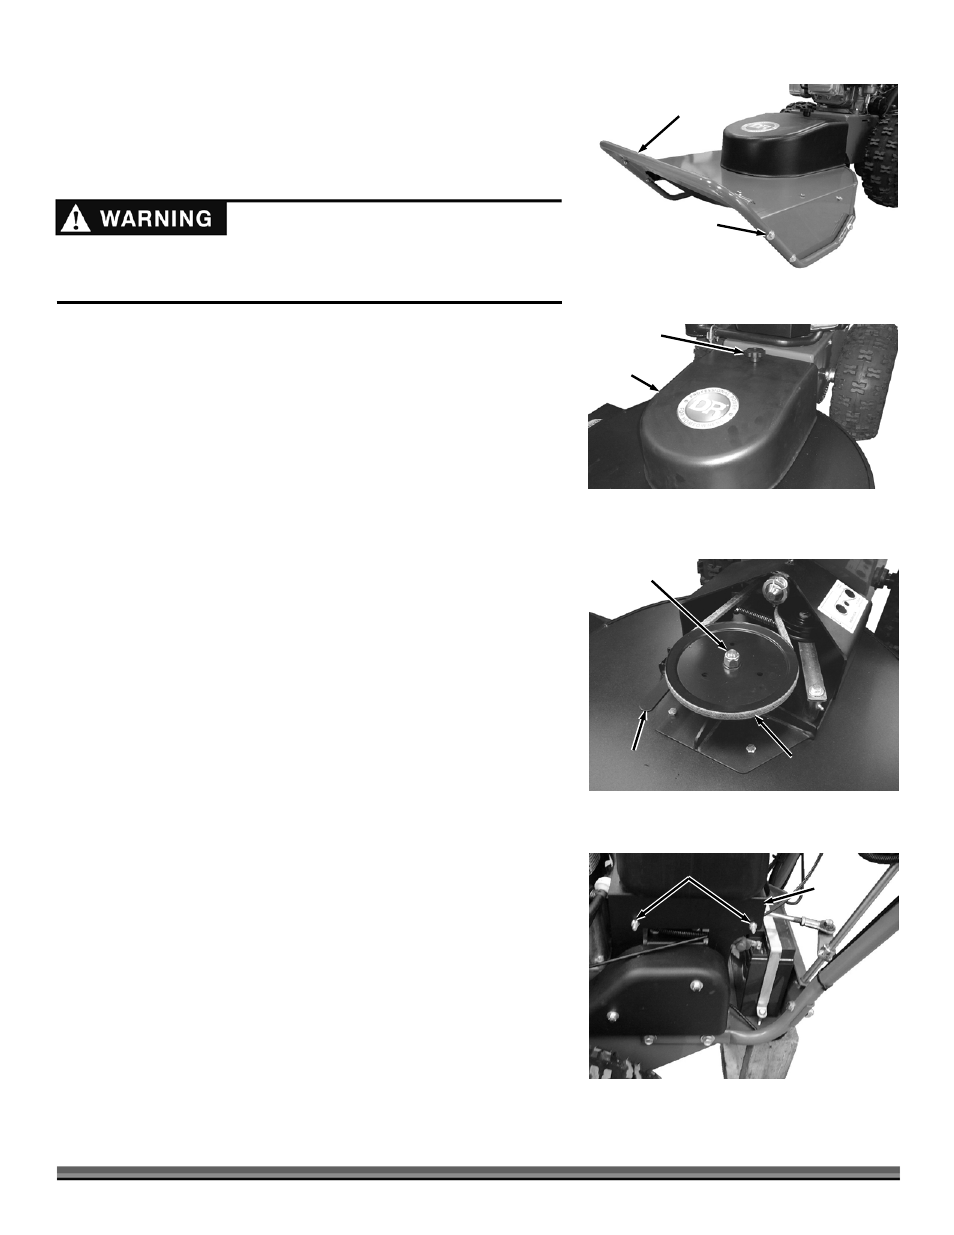
1. Drain as much of the Fuel as you can from the Fuel Tank.
2. Remove the Locknuts on the left hand side of the Fuel Tank Mount with a
7/16" Wrench (Figure 38).
Hand Knob
Figure 36
Belt Guard
Shear Pulley
Figure 37
Locknut
Belt Tensioning
Lever
Belt
Bolt, Curved Washer
and Locknut (5 Places)
Figure 35
Push Tube
Skid
Before performing any maintenance procedure or inspection, stop the
engine, wait five (5) minutes to allow all parts to cool. Disconnect the spark
plug wire(s), keeping it away from the spark plug(s).
Locknuts
Figure 38
Fuel Tank
Mount